Materials
Materials are embedded into a .gltf or .glb file.
This document refers to materials that are imported in a 3D model. For materials defined via code to apply onto primitive shapes, see materials .
📔 Note: You can’t currently dynamically change the materials of a 3D model from your scene’s code, unless this is a primitive shape.
Shader Support #
Not all shaders can be used in models that are imported into Decentraland. Make sure you use one of the following:
- Standard materials: any shaders are supported, for example diffuse, specular, transparency, etc.
- PBR (Physically Based Rendering) materials: This shader is more flexible, as it includes properties like diffuse, roughness, metalness and emission that allow you to configure how a material interacts with light.
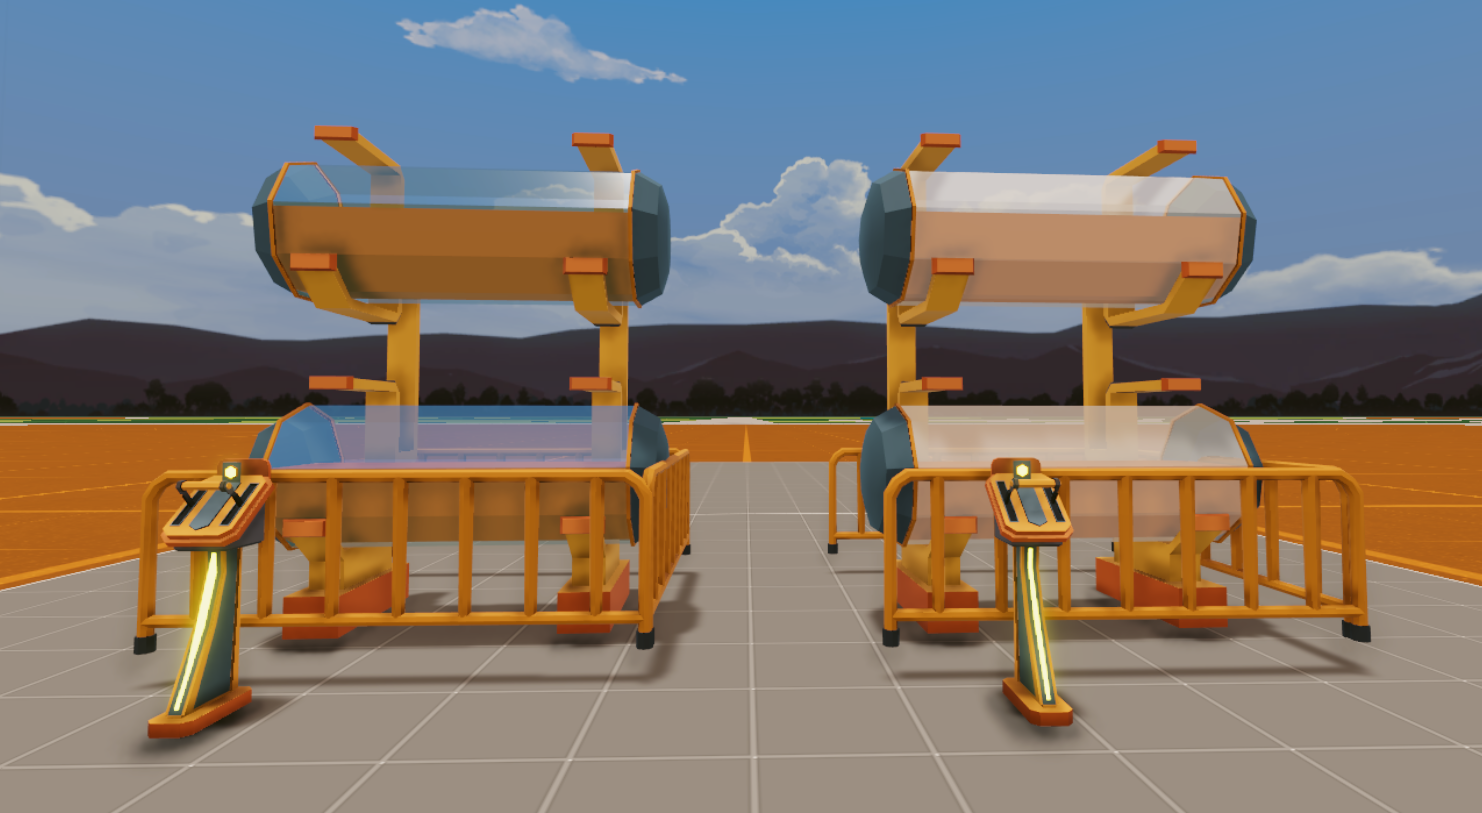
The image below shows two identical models, created with the same colors and textures. The model on the left uses all PBR materials, some of them include metalness, transparency, and emissiveness. The model on the right uses all standard materials, some including transparency and emissiveness.
PBR Properties that currently works with Decentraland Engine #
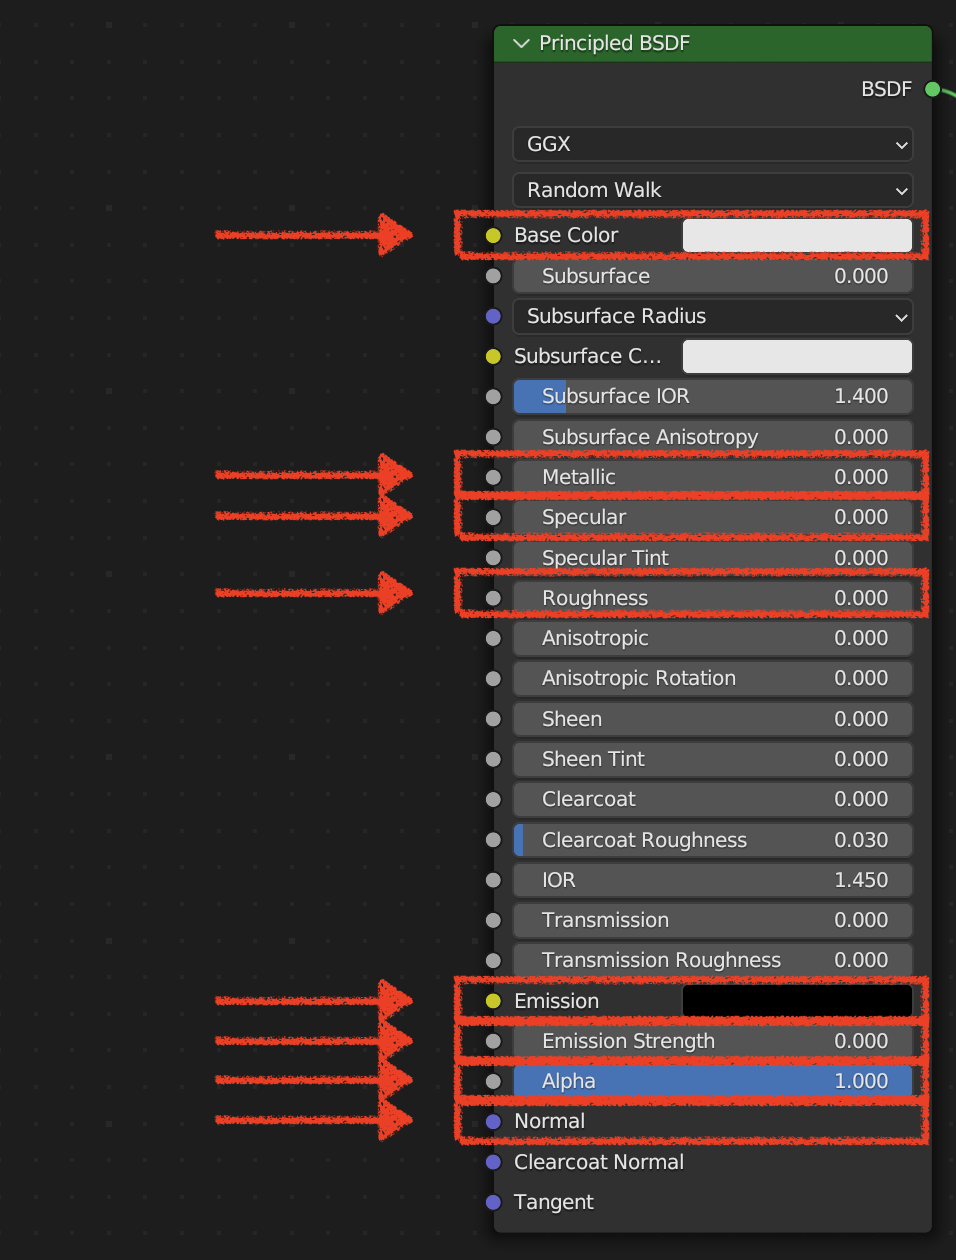
- Base Color
- Metallic
- Roughness
- Specular
- Emissive
- Emission Strength
- Alpha
- Normal
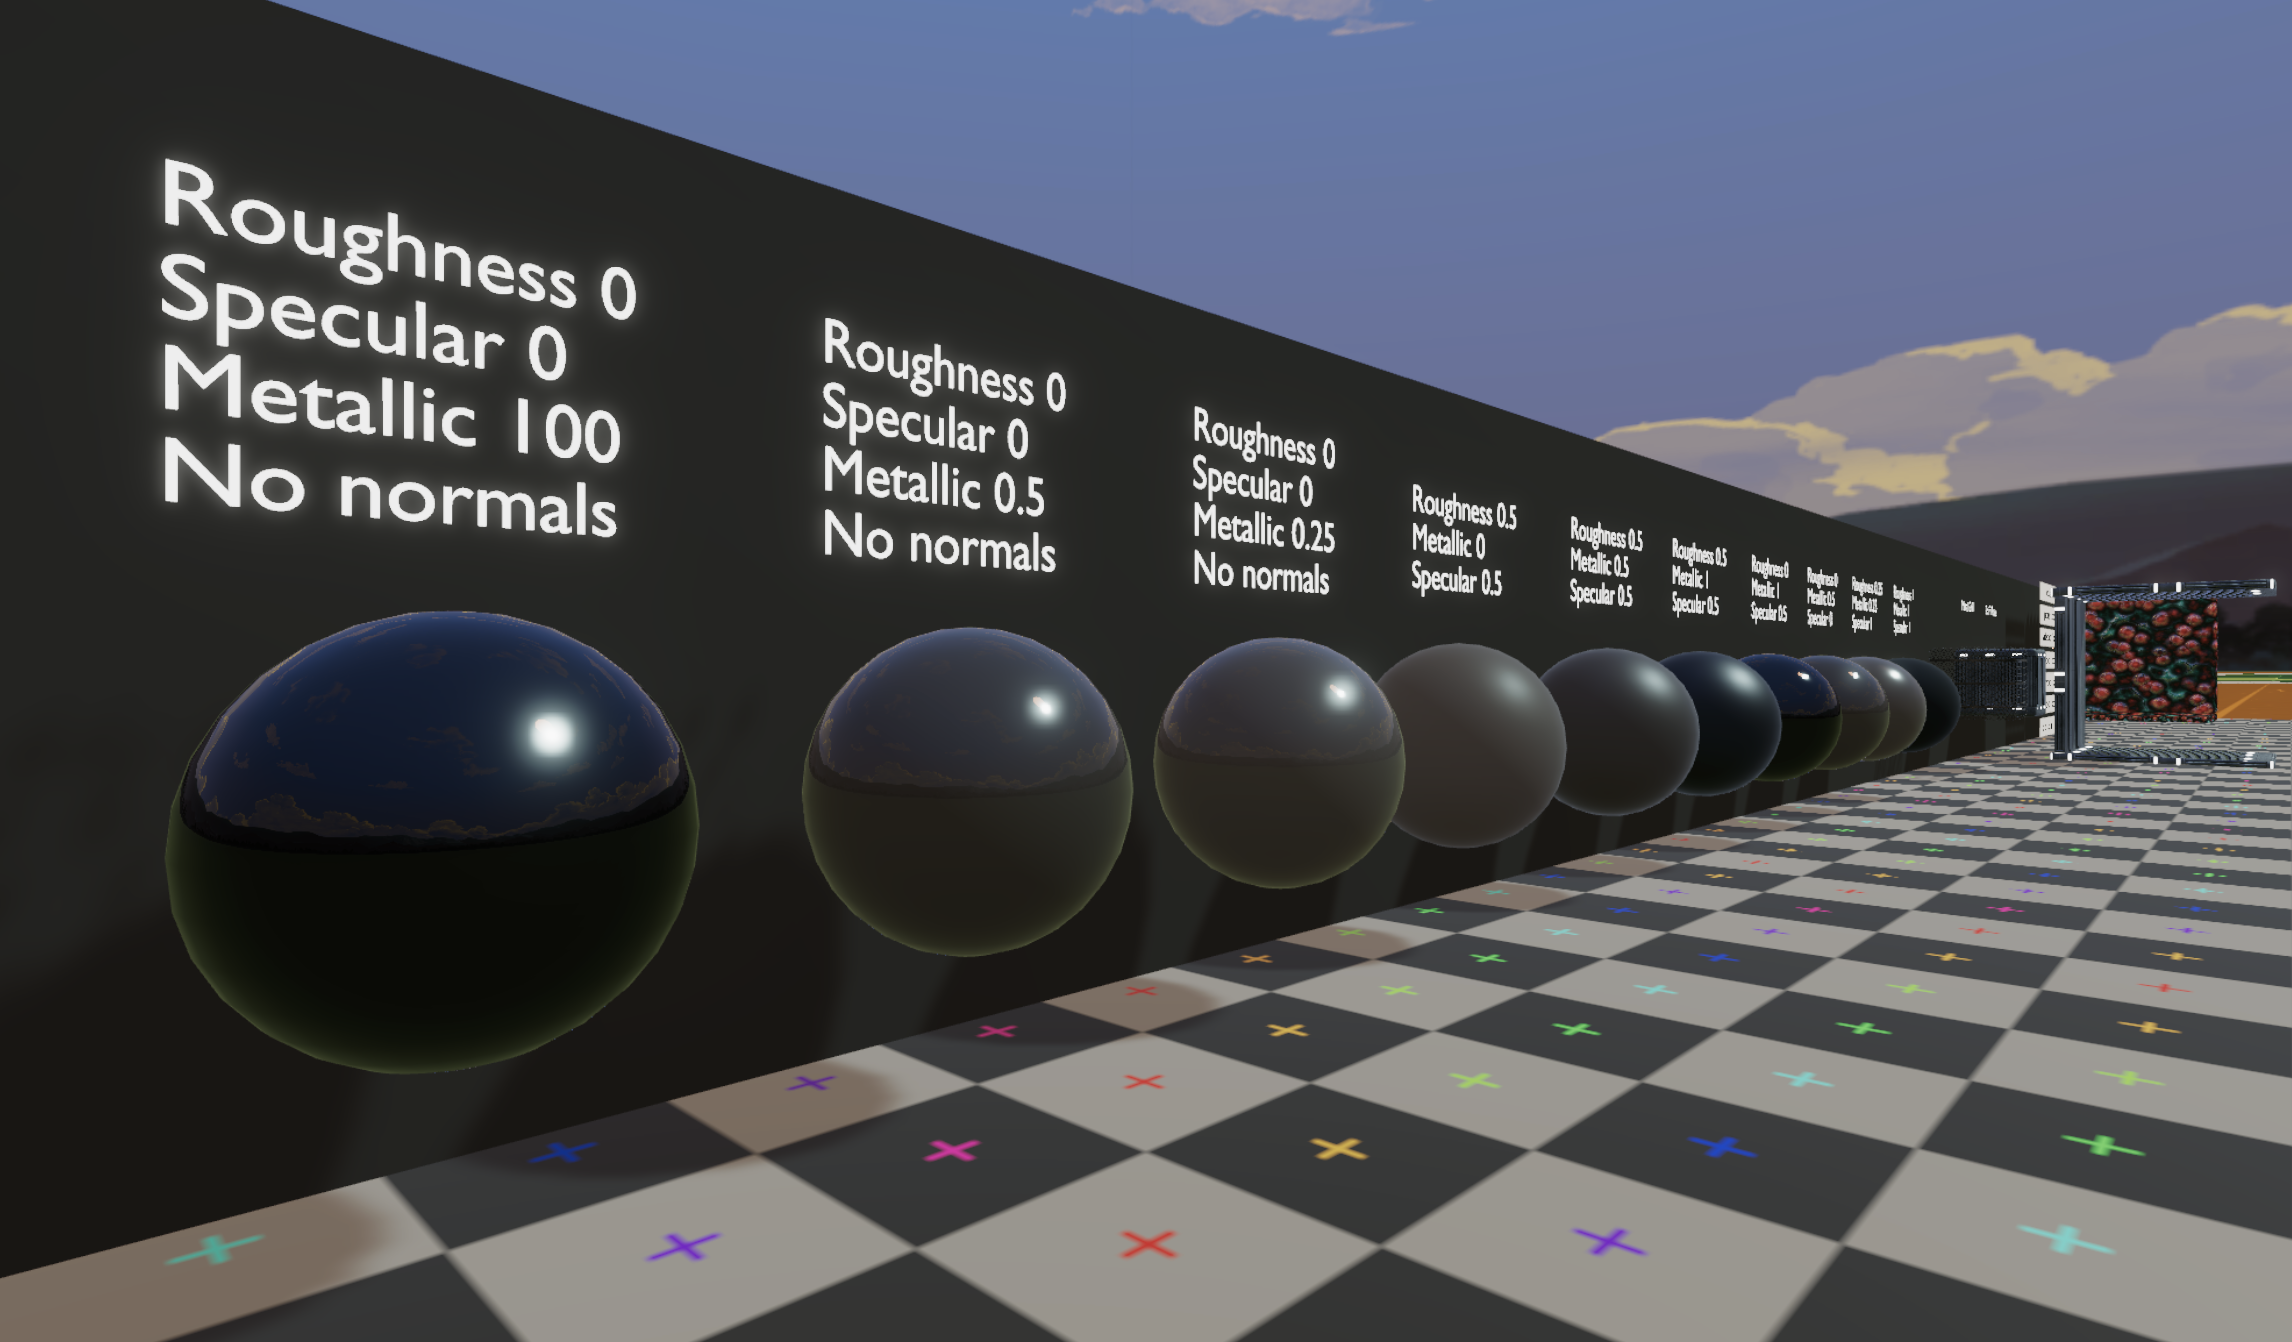
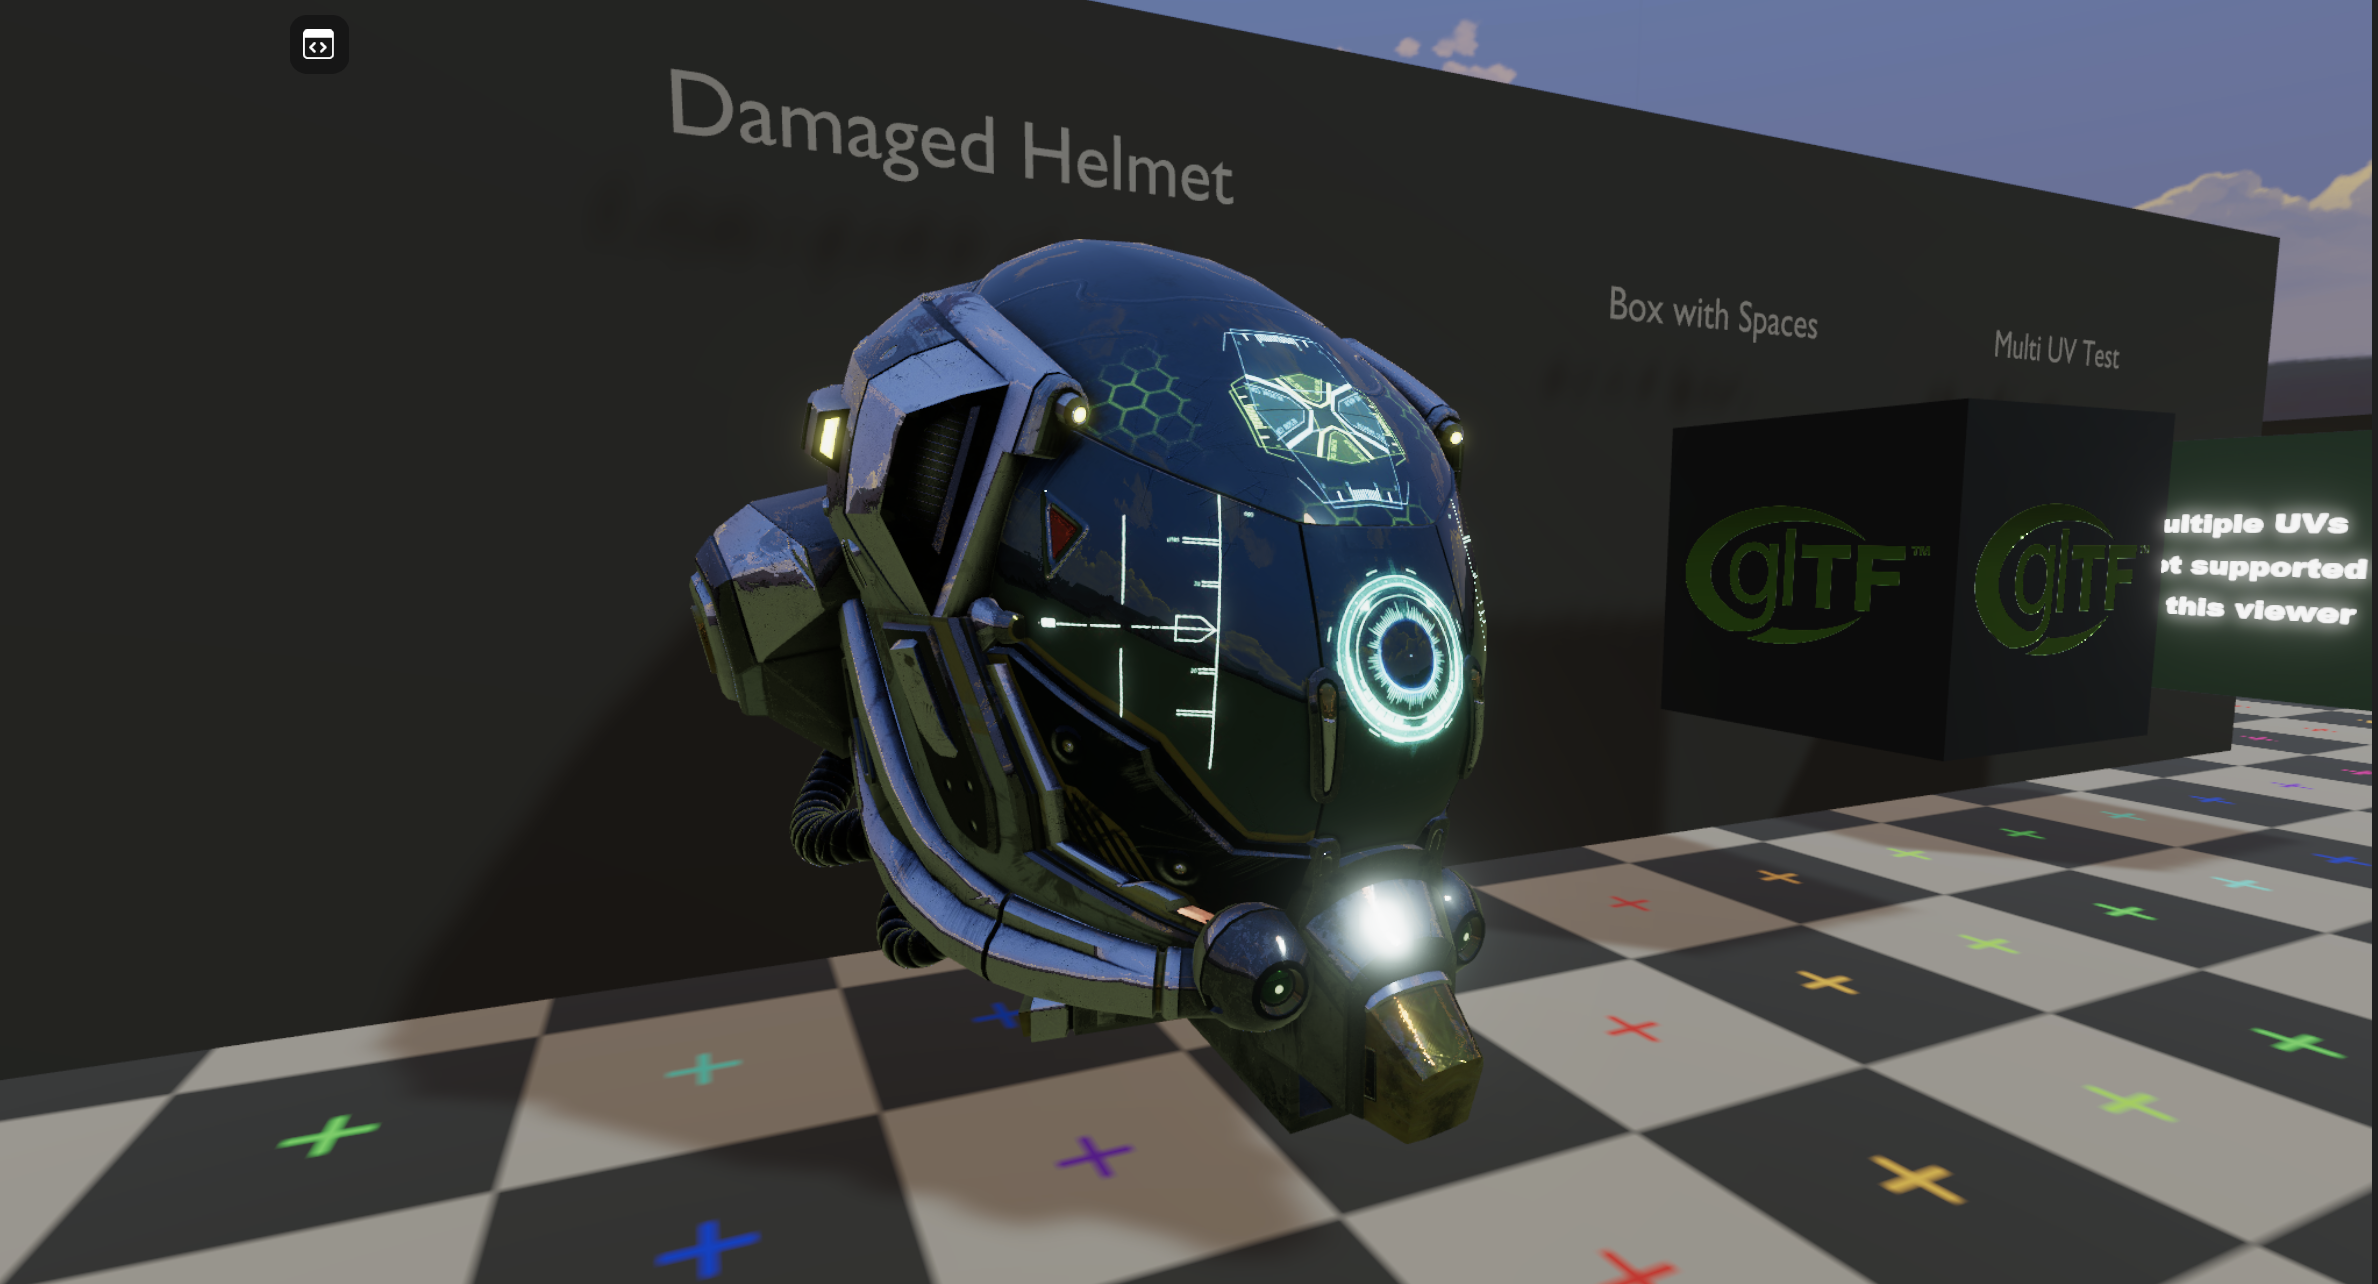
In order to visualize how these properties behavies in world you can go to this testing world to find different objects and materials and how they interact with lights and world environment.
Base/Diffuse Color #
Defines the the base color of the object surface. By itself it doesn’t have any affectance by the lightning, that’s why it is combined to other nodes such as roughness, metallic, specular, etc.
Metallic #
A metallic shader refers to a type of rendering technique used to simulate the appearance of metallic surfaces. A metallic shader takes into account the physical properties of metals and how they interact with light to produce the characteristic shiny and reflective qualities of metal.
Roughness #
Roughness materials are related to realistic simulation of how light interacts with the material’s surface. Normally the roughness maps are used to give to the models a range of “smoothness” or “roughness” in their surfaces. A grayscale value texture map is normally used to provide information of this type.
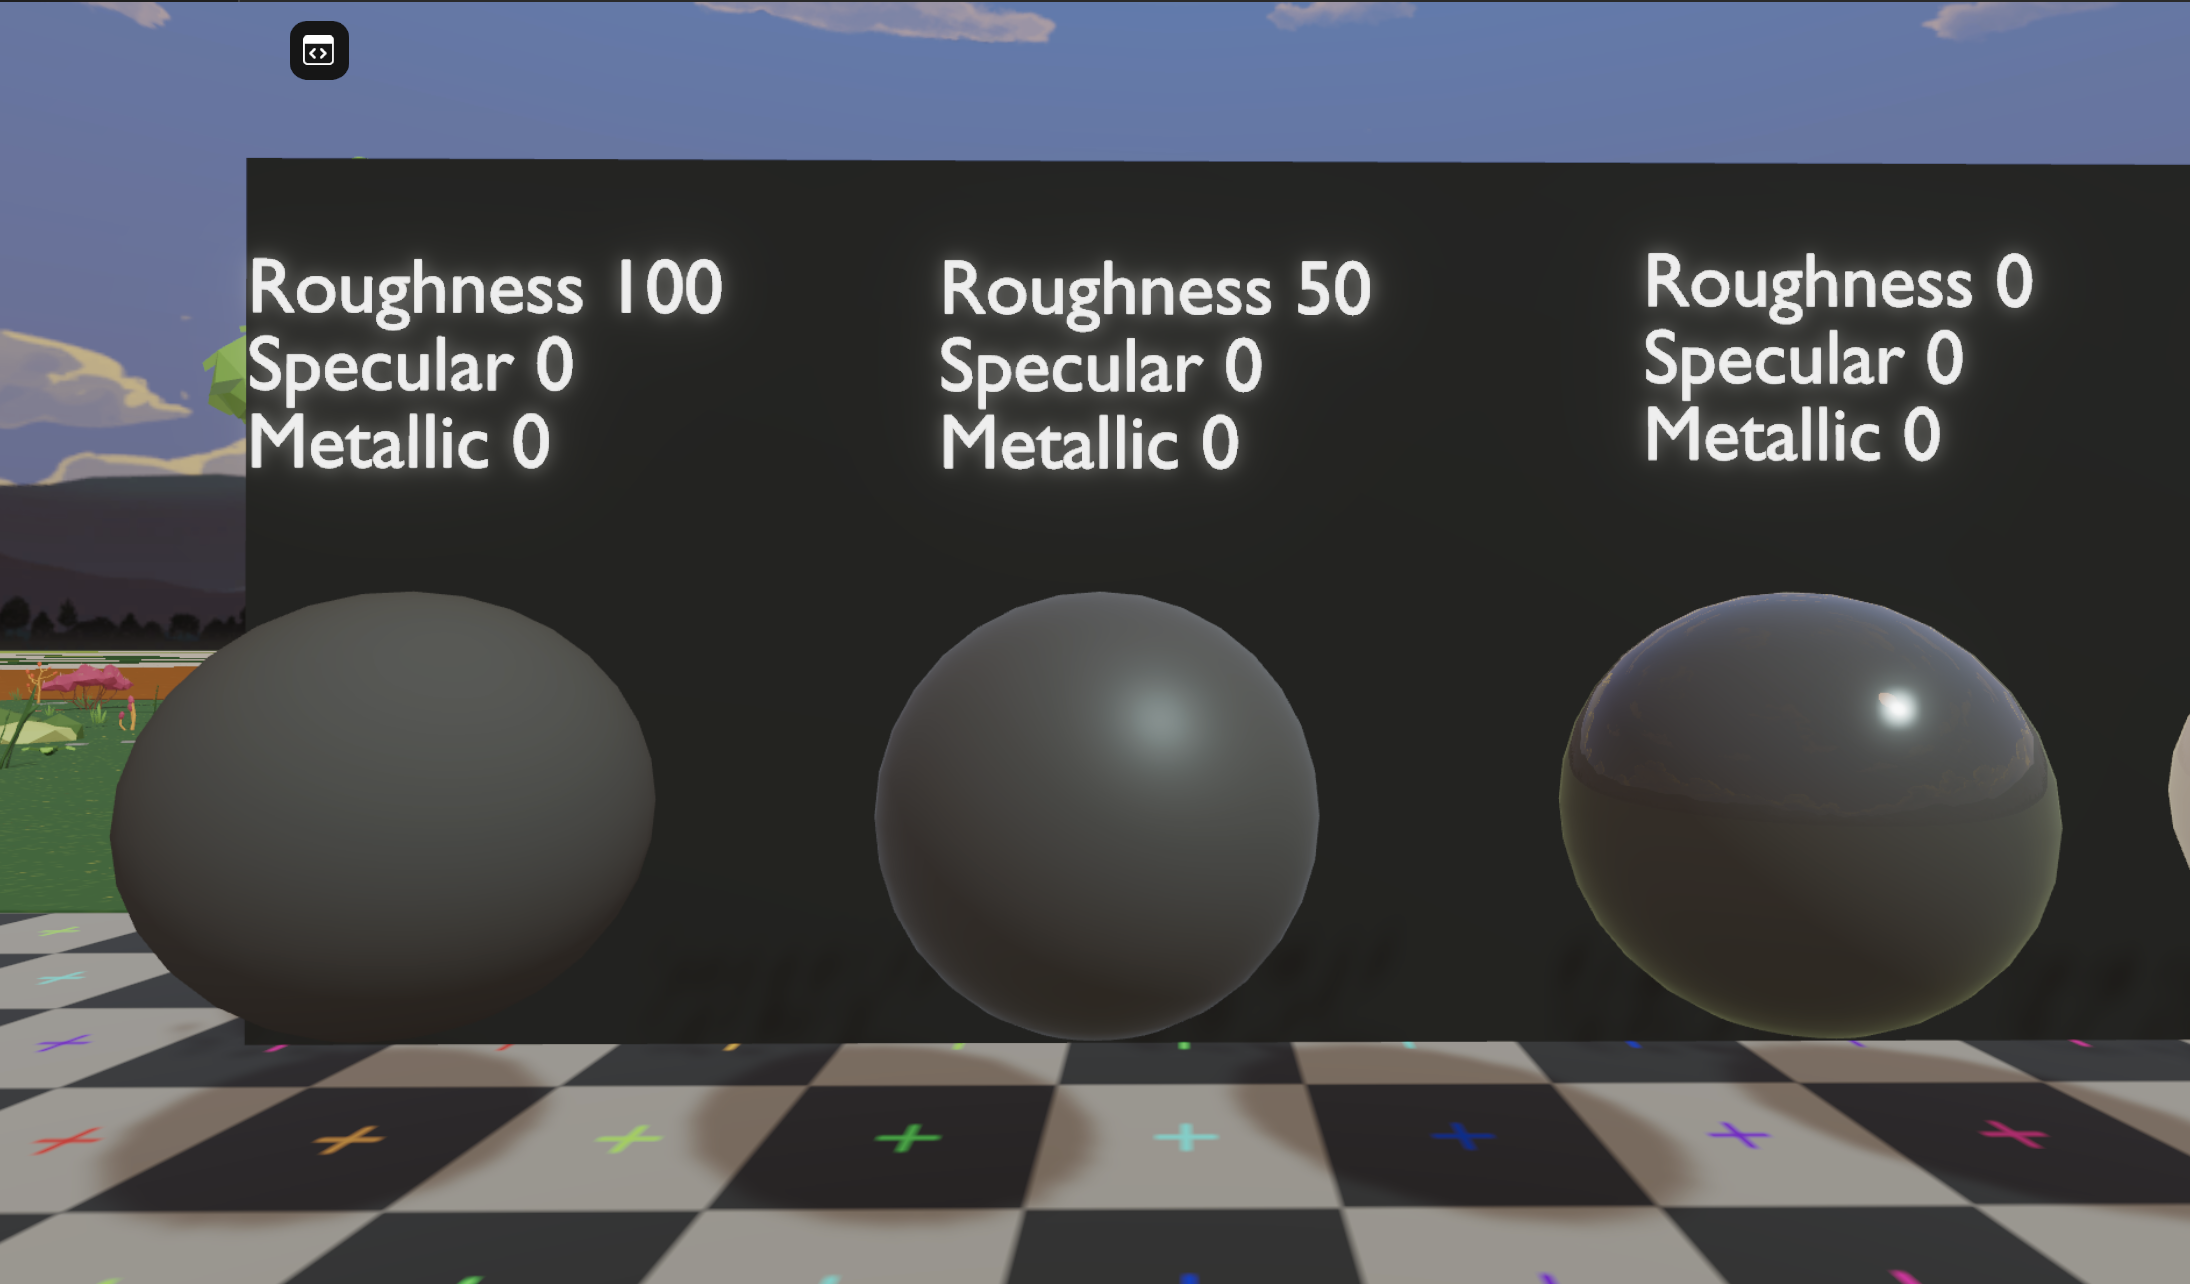
This property blends between a non-metallic and metallic material model. A value of 1.0 gives a fully specular reflection tinted with the base color, without diffuse reflection or transmission. At 0.0 the material consists of a diffuse or transmissive base layer, with a specular reflection layer on top.
Specular #
In a Physically-Based Rendering (PBR) shader, the specular properties refer to how light interacts with a surface in terms of its reflectivity and shininess. Specular reflection is the mirror-like reflection of light off a surface. In PBR, this property is used to control how much light a surface reflects in a mirror-like manner. Materials like metals typically have high specular reflection, creating sharp, bright highlights, while non-metallic materials like plastics have lower specular reflection, resulting in broader and softer highlights.
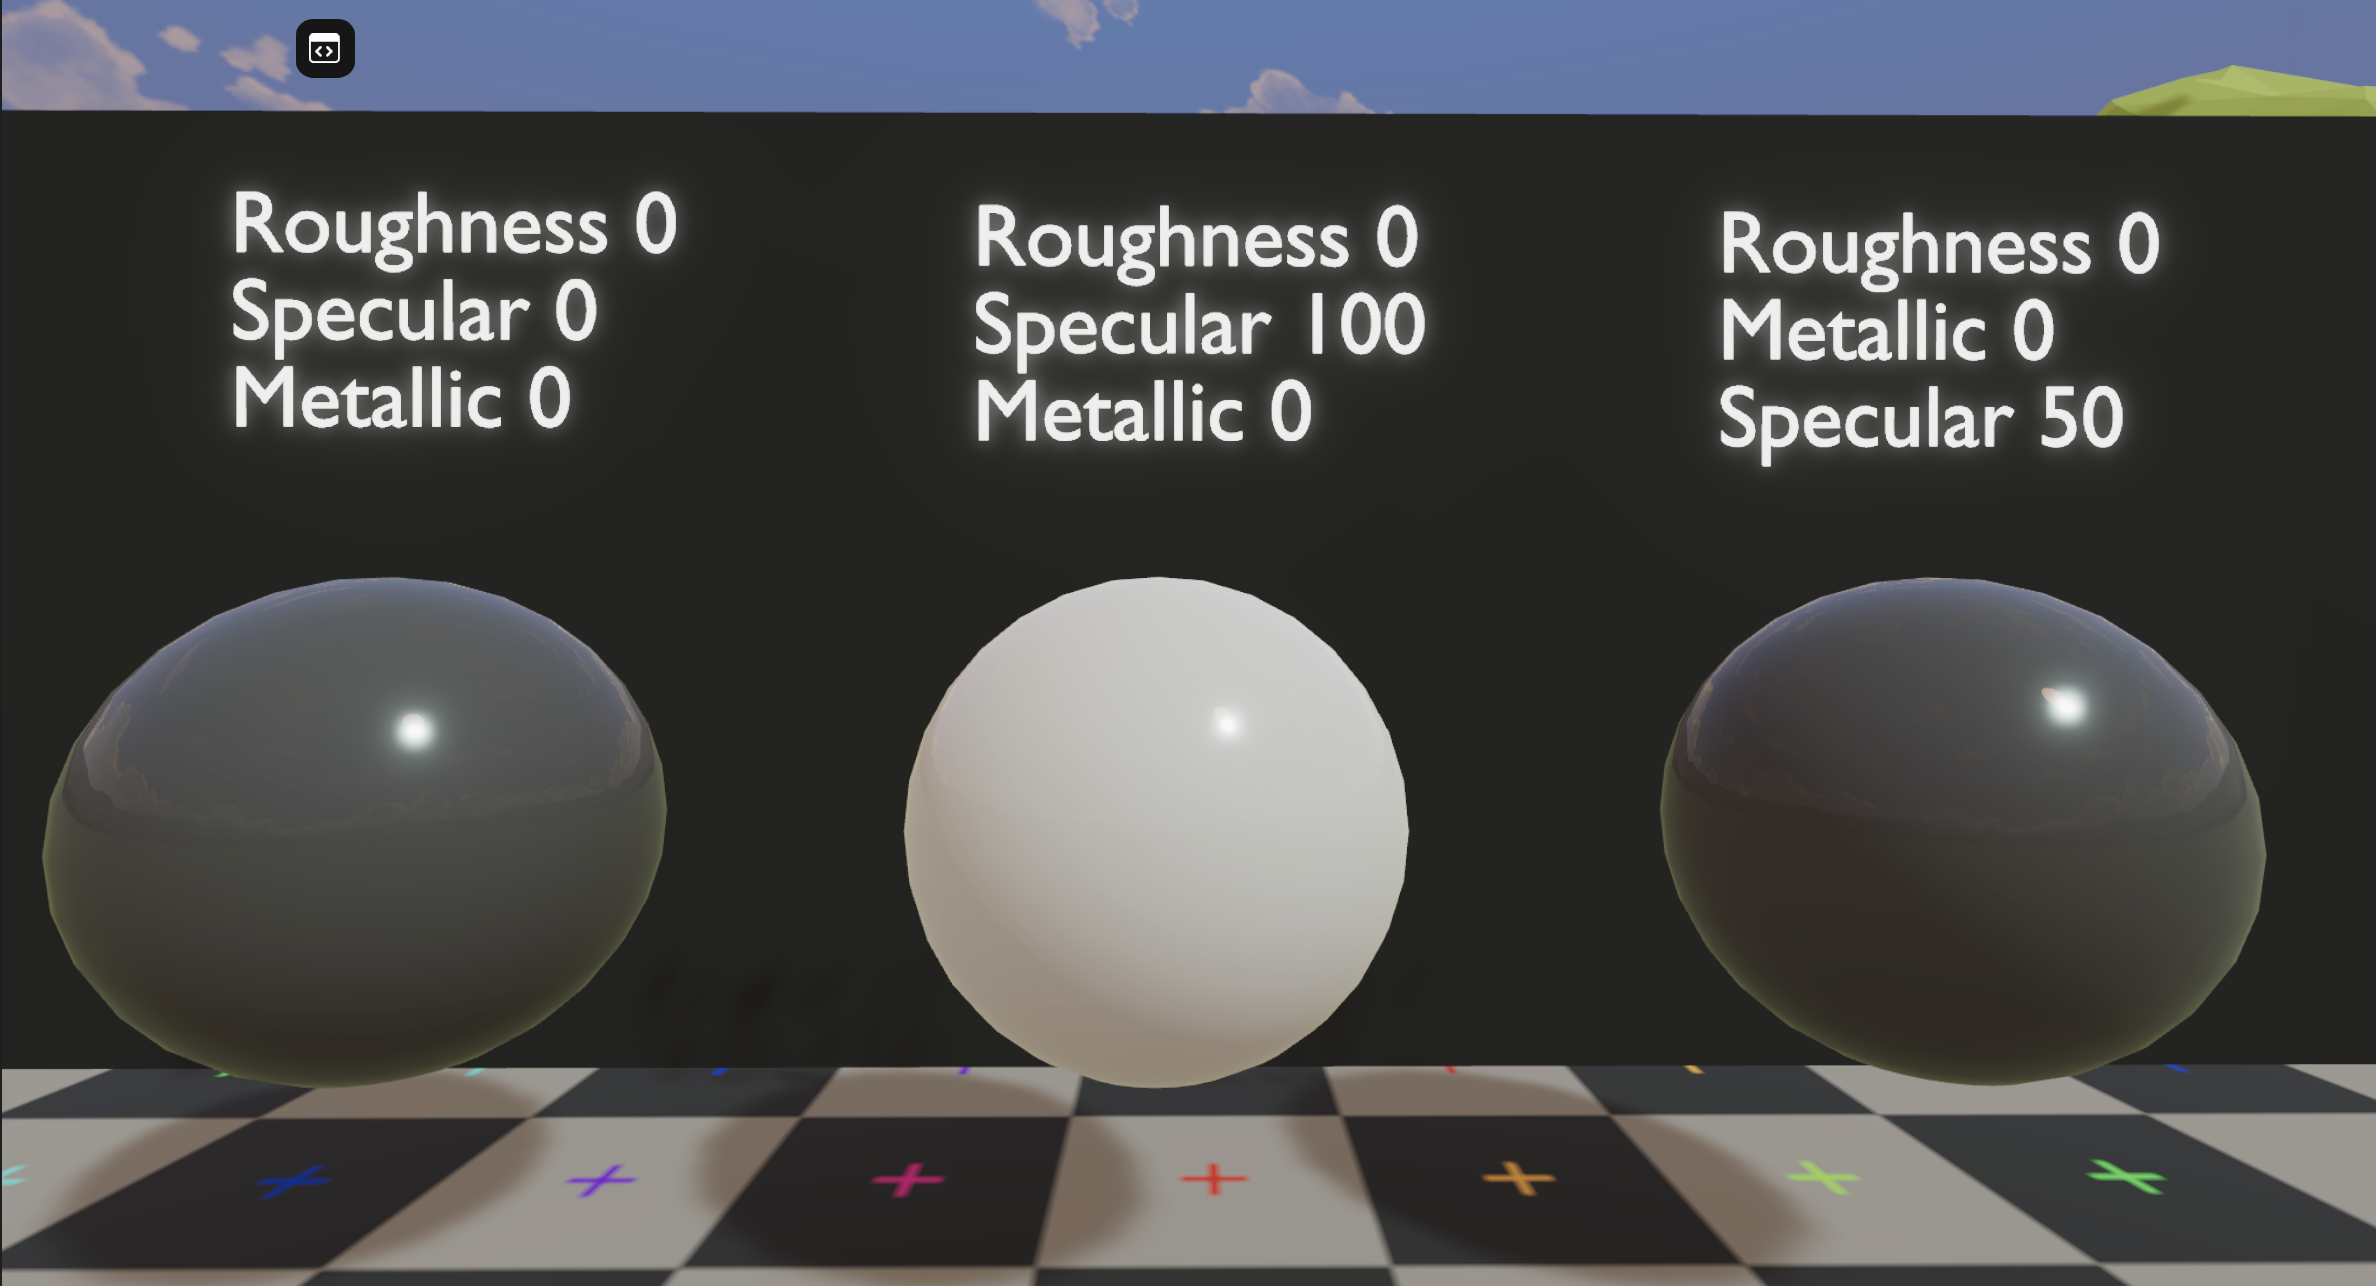
Alpha #
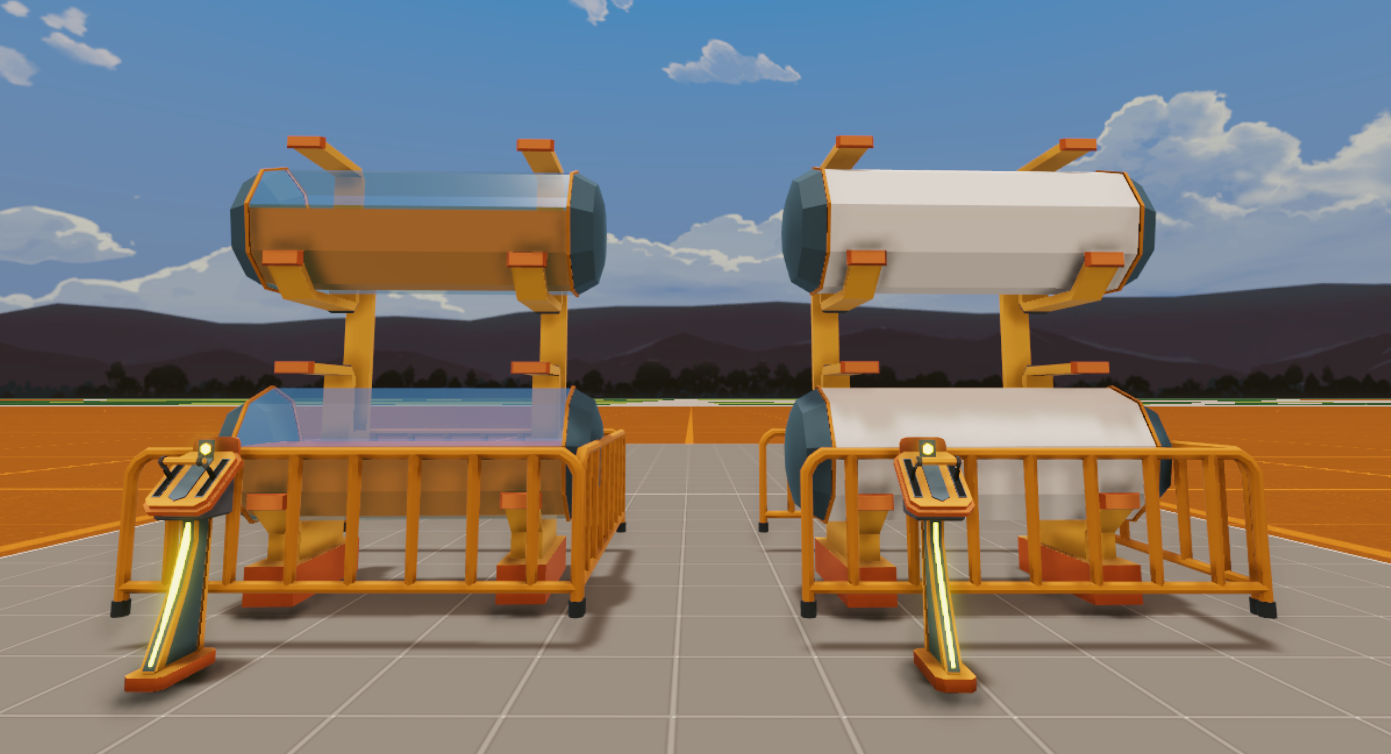
You can set a material to be transparent. Transparent materials can be seen through to varying degrees, depending on their alpha. To do this, activate the transparency property of the material and then set its alpha to the desired amount. An alpha of 1 will make the material completely opaque, an alpha of 0 will make it invisible.
The image below shows two identical models created with standard materials. The one on the left uses only opaque materials, the one on the right uses both transparent and opaque materials in some of its parts.
💡 Remember that using transparent materials is always more expensive in terms of performance than diffuse materials. Always try to keep the transparent materials as low as you can.
There are two main different transparency modes: Alpha Clip and Alpha Blend. The main differences are:
- Alpha Clip: Alpha Clip render absolut values being 0 or 1 given a clip threshold of a grayscale value. The previous color will be overwritten by the surface color, but only if the alpha value is above the Clip Threshold value.
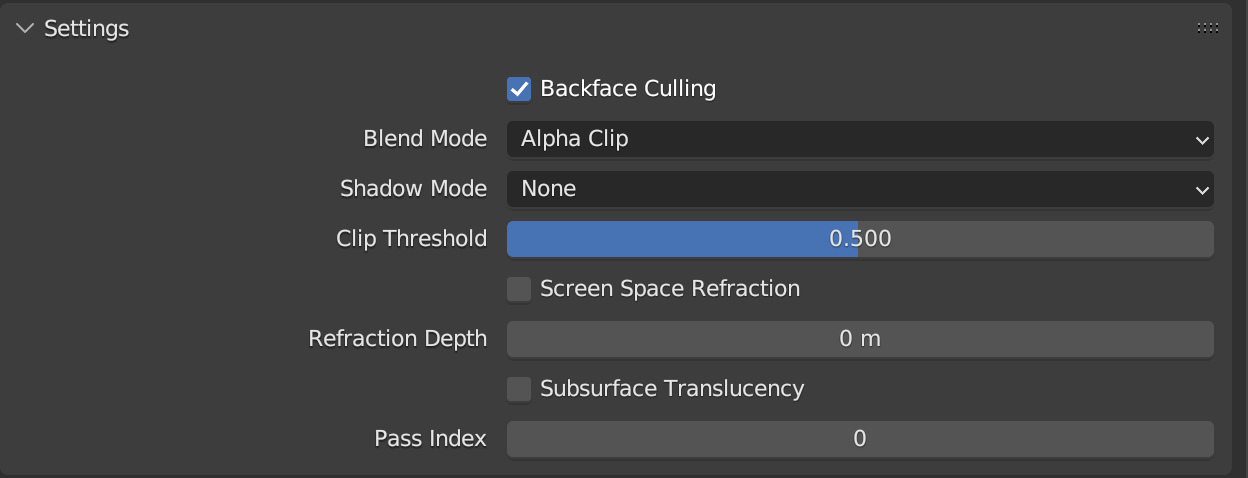
- Alpha Blend: Alpha Blend interpolates the values between 0 and 1. You can use alpha blending to overlay the surface color on top of the previous color.
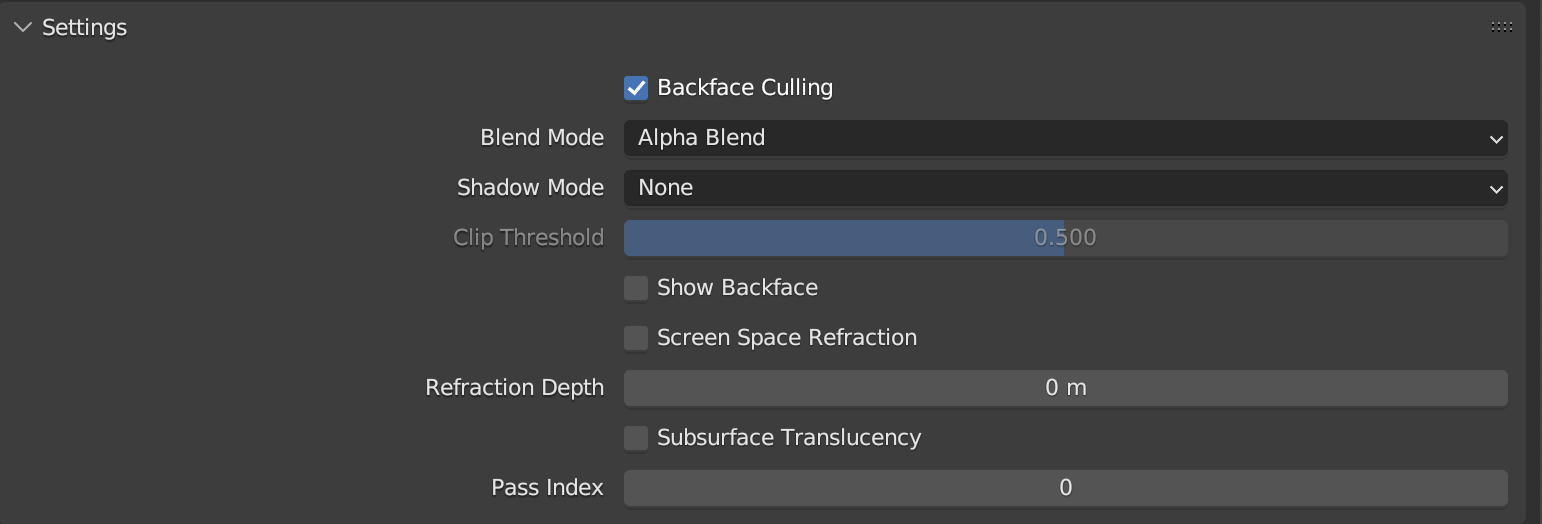
🔥Optimization Tip🔥 Unless you specifically want to be able to have an intermediate level of transparency, it’s always more performant for rendering to use Alpha Clip instead of Alpha Blend.
⚠️ Sorting Issues
When you use transparent blend modes in your game, it’s crucial to consider the order in which the color blending takes place. This is because the final output color can be significantly impacted by the blending order. Currently, the engine only supports per-object sorting, which means that it automatically sorts all transparent surfaces based on object origin. However, per-fragment (pixel) sorting and per-triangle sorting are not currently supported.
To avoid issues related to sorting, it’s best to avoid using objects with both alpha clip and alpha blend on the same mesh. This can help prevent unexpected blending artifacts and ensure that your game looks its best.
Emissive #
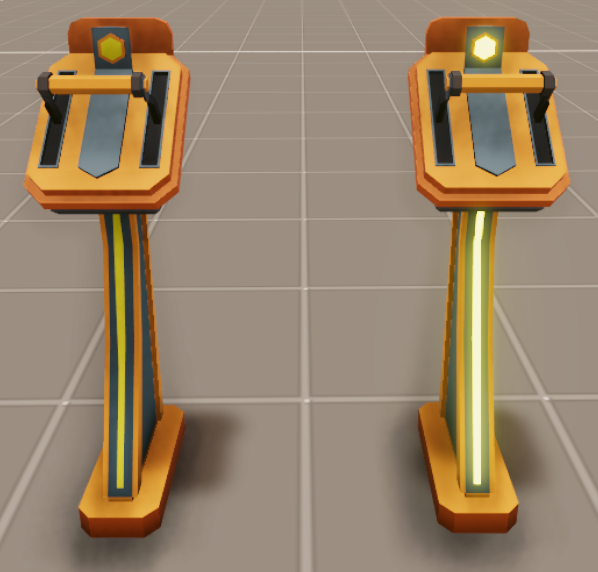
You can also make a material emissive. Emissive materials cast their own light. Note that when rendered, they don’t actually illuminate nearby objects in the scene, they just seem to have a blurred glow around them.
The image below shows two identical models created with standard materials. The one on the right has glowing emissive materials on some of its surfaces.
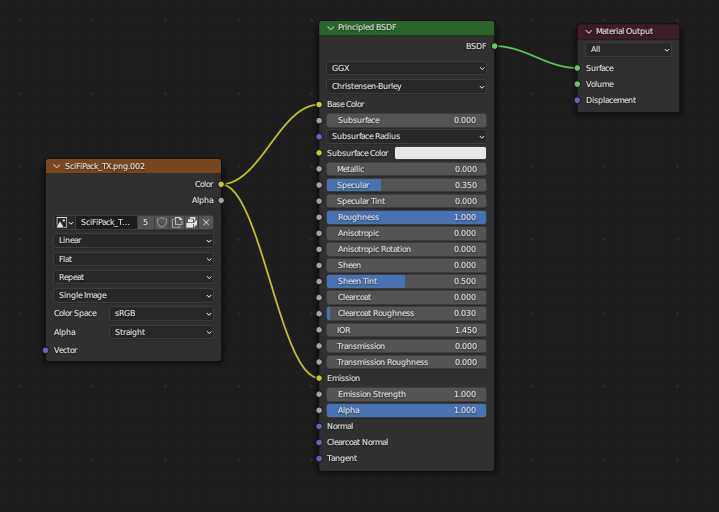
To make a material emissive in Blender, simply add an emission shader to the material.
Emissive Strenght #
Strength of the emitted light. A value of 1.0 will ensure that the object in the image has the exact same color as the Emission Color, i.e. make it ‘shadeless’.
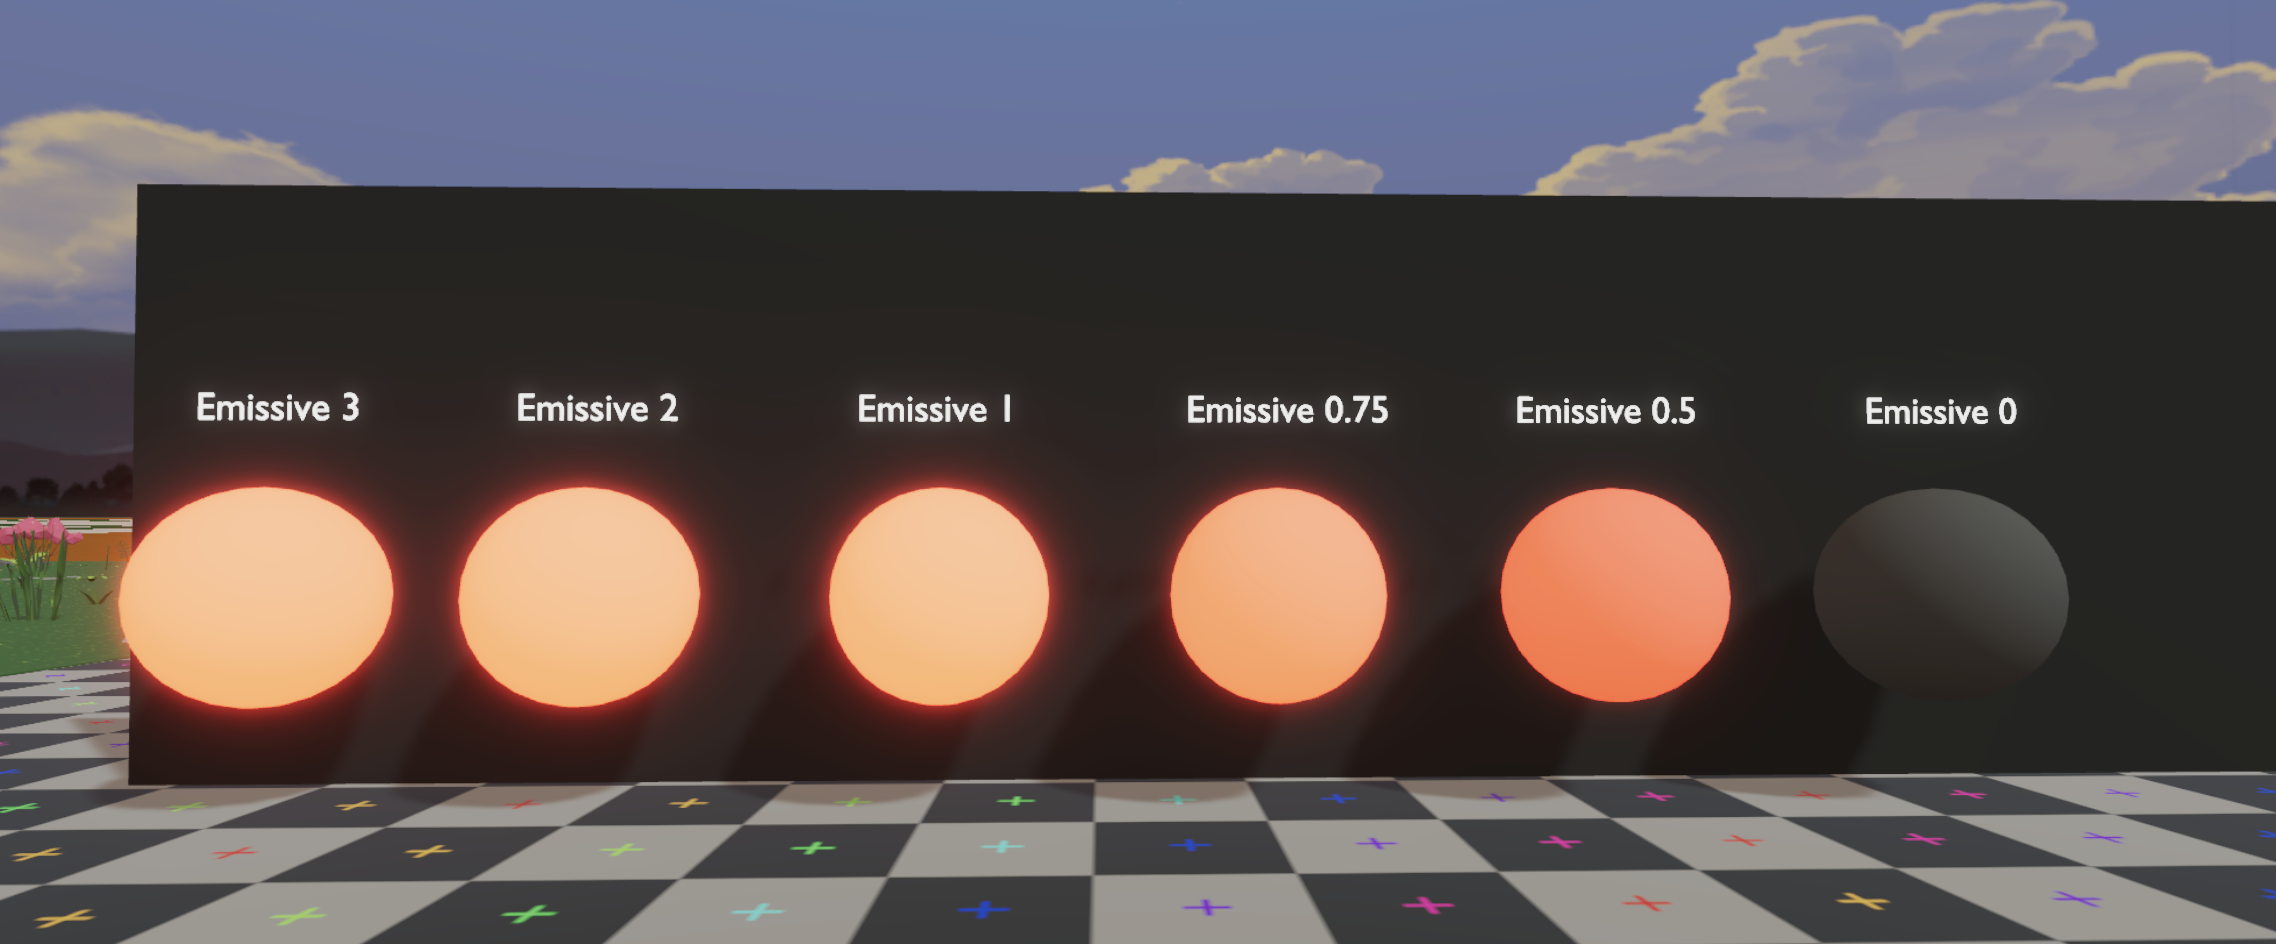
You can check in the testing world how the emission strenght behavies in world
Normal #
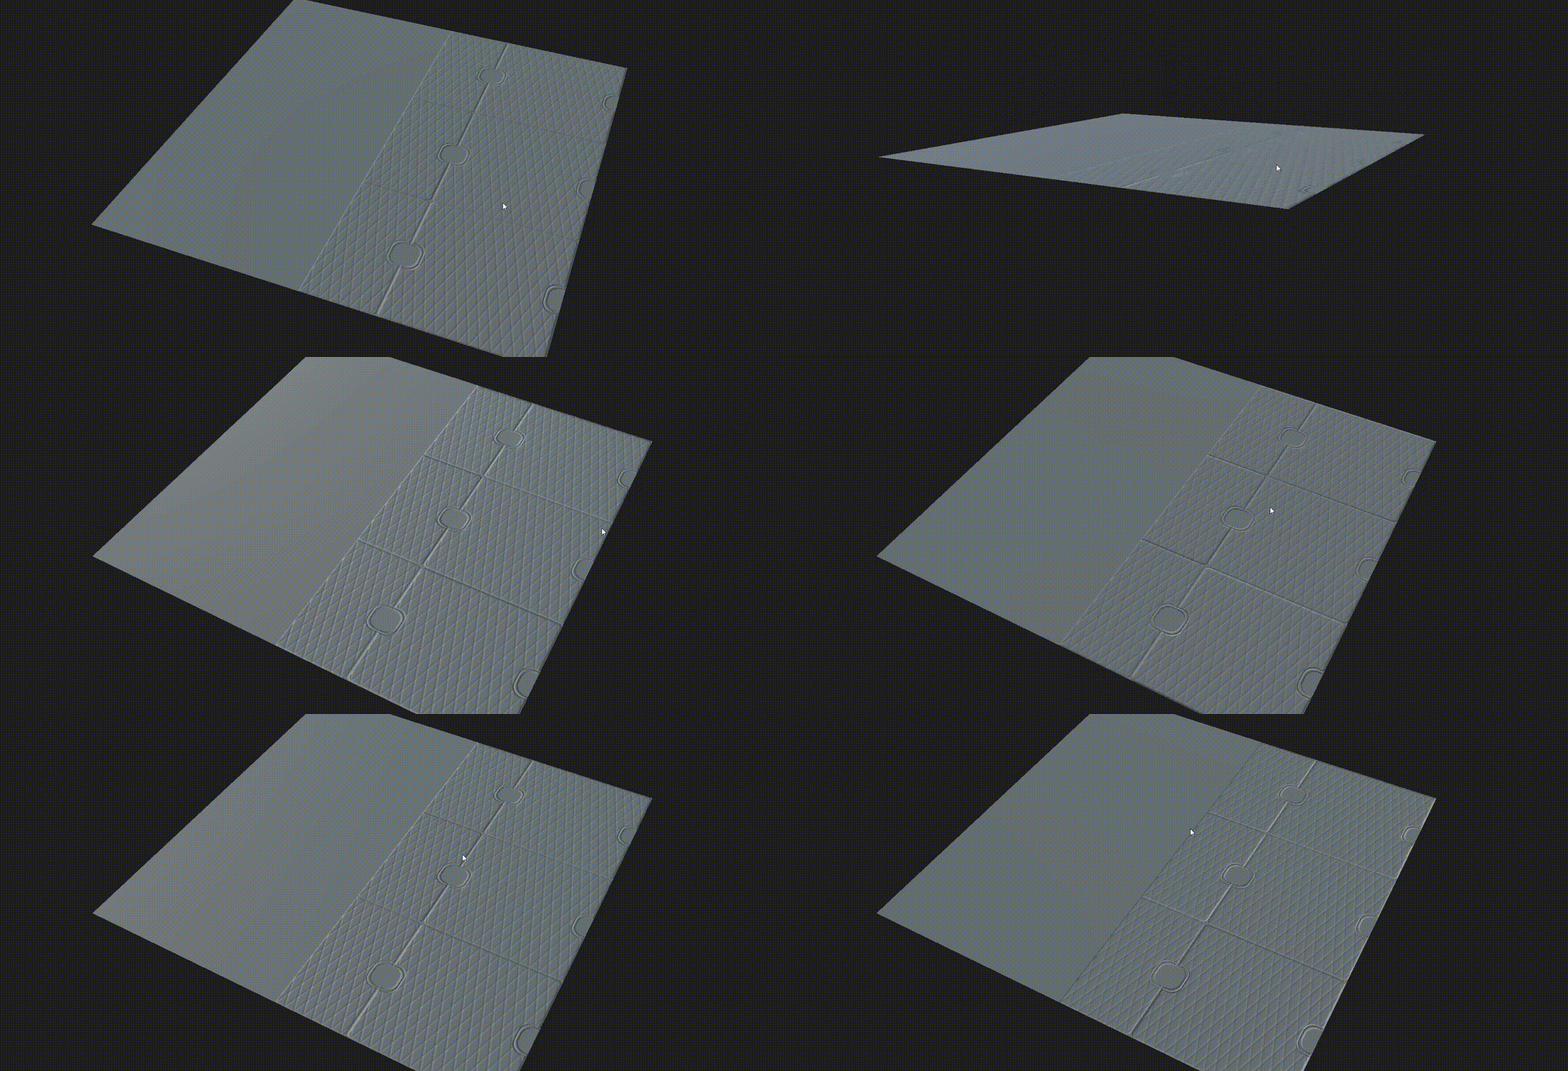
The “normal” node in a PBR shader is a fundamental component used to control the surface normals of a material. Normals are vectors that define the direction perpendicular to a surface at a specific point, and they play a crucial role in determining how light interacts with the surface.
Vertex Painting #
Vertex painting of 3D models isn’t currently supported by Decentraland’s engine.
Material Limitations #
Take into account that material limits per parcel are:
log2(n+1) x 20 Amount of materials in the scene. It includes materials imported as part of models.
It’s important to take into account that each material represent one draw call per objetc so it’s crucial to keep the materials as minimun as possible and try to reutilize materials as much as possible doing techniques like Texture Atlases, this also is going to benefit the scene having a cohesive style between the assets of your scene.
Material Naming #
In order to have an organized and healthy art pipeline we recommend to name your materials properly. One way to do it is using this convention method.
<Object>_<Classification>_<Sub-Classification(optional)>_<_MAT>
So for example, let’s say we did 2 different trees, one that is emissive and glowy for spring and another cold and metallic for winter. We could name the materials: “TreeSpring_Emissive_MAT” and another one “TreeWinter_Metallic_MAT”
In conclusion,
- 🟢 Prefer using names starting with the object and clasification: “Wood_Oak_MAT”, “SciFiFence_Metallic_MAT”, etc.
- 🔴 Avoid using names like “Material009”, “material1”, which makes the scene and models really difficult to track and analize.
Override glTF materials #
You can override the materials of a glTF model by using the GltfNodeModifiers component in your scene’s code. See Modify glTF materials for more details.
Best Practices For Materials #
- If your scene includes multiple models that use the same texture, reference the texture as an external file instead of having it embedded in the 3D model.
Embedded textures get duplicated for each model and add to the scene’s size. .glb files have their textures embedded by default, but you can use glTF pipeline to extract it outside.
Note: After referencing a file for a texture that won’t be embedded, make sure that file won’t be moved or renamed, as otherwise the reference to the file will be lost. The file must also be inside the scene folder so that it’s uploaded together with the scene.
- When setting transparency of a material, try to always use Alpha clip rather than Alpha blend, unless you specifically need to have a material that’s partially transparent (like glass). This will avoid problems where the engine renders the wrong model in front of the other.
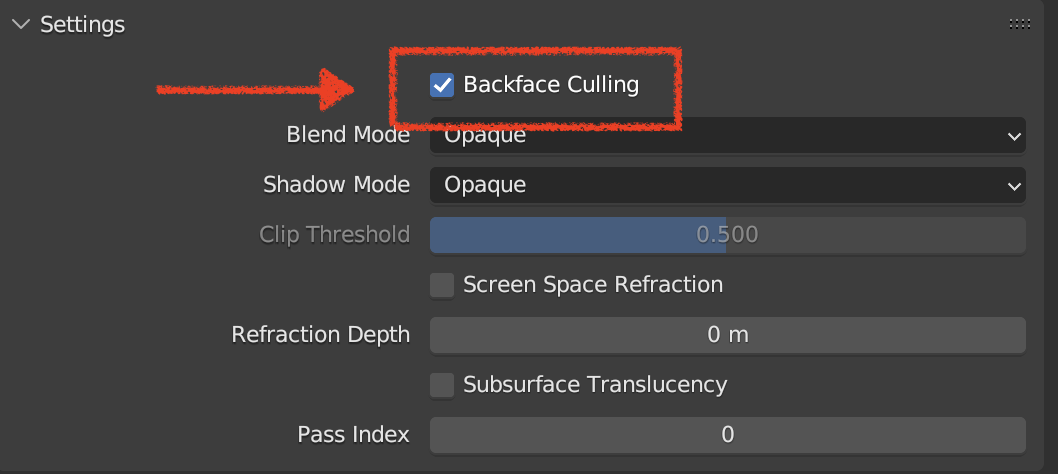
- As a rule of thumbs remember to always set backface culling in your materials. This will make your scene more perfermant giving that the engine is going to render only the visible face of your models. Only untoggle backface culling in case you need a model to be renderer in both sides (for example, a group of leafs of a tree made by 3D planes).
- Use the Decentraland default textures , which are pre-loaded by players, making your assets render a lot faster.
- Read this article for a detailed overview of a full art pipeline that uses PBR textures in glTF models.
- You can find a detailed reference about how to create glTF compatible materials with Blender in Blender’s documentation .
- Find free, high quality PBR textures in cgbookcase .