Uploading Emotes
Once you export your emote, you’ll have to upload it to the builder. This document will cover the process of uploading emotes.
Uploading Your File #
Remember that you need to create a collection before you can upload your file. If you don’t know how to do that, check Creating a Collection . To upload your emote, just drag and drop the file on the New Item window or browse your computer. It will automatically detect if the file has any animation, identifying it as an emote.
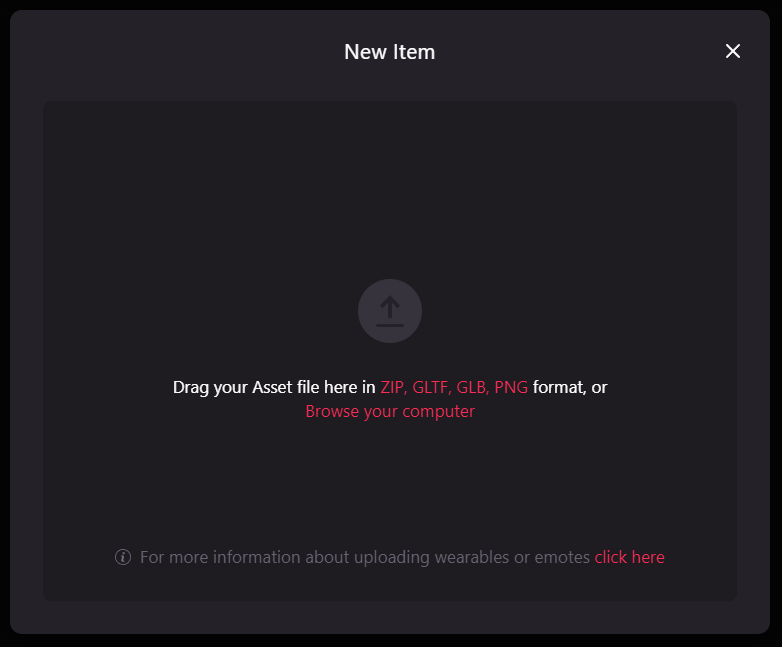
Drag and drop your animation file to upload it.
You will be asked to enter a name for your emote, define its rarity, the category and the play mode. Below the thumbnail is shown the number of animation clips in your file, the length of the animation in seconds, the length in frames and the frame rate.
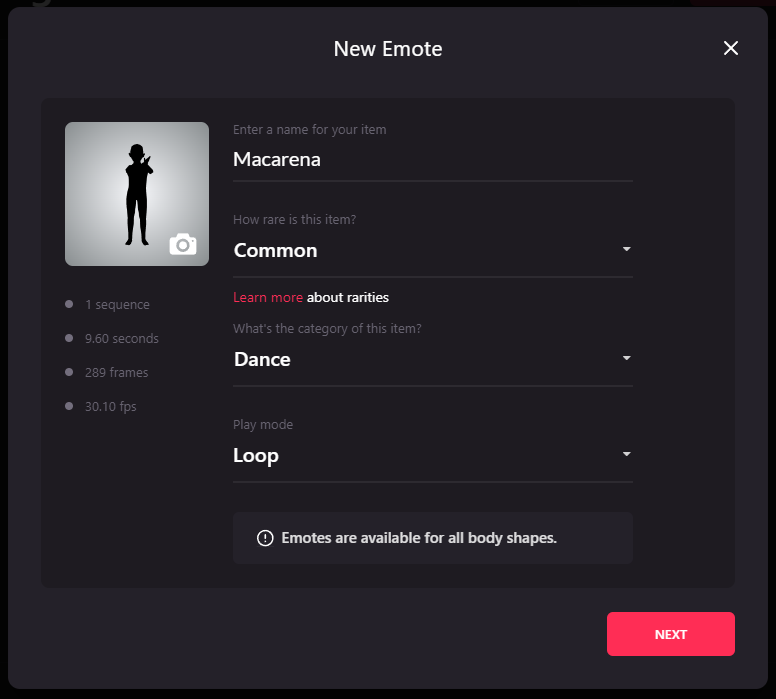
Uploading Emotes Using a .zip File #
If the emote has sound (mp3 or ogg) it must be zipped with the .glb. After that, just drag and drop the .zip to the builder. Also, it is possible to add a .json file along with the other assets in the same .zip to add name, description, rarity, category, play mode and/or tags. These are the definitions for each:
name: Name of the Emotedescription: Description of your Emote (no more than 64 characters in total, counting spaces)category: Category of the Emote (“dance”, “stunt”, “greetings”, “fun”, “poses”, “reactions”, “horror”, “miscellaneous”)rarity: Rarity of the Item (“unique”, “mythic”, “legendary”, “epic”, “rare”, “exotic”, “uncommon”, “common”)play_mode: Simple or Loop Animation (“simple”, “loop”)tags: Tags for easy finding in the marketplace.
To add those definitions to the emote just create a text file, naming it emote.json and add the following lines as the example:
{
  "name": "Tennis Shot",
  "description": "Show me you can do tennis",
  "category": "fun",
  "rarity":"epic",
  "play_mode": "simple",
  "tags":["tennis", "emote", "shot"]

}
This way the builder is going to take all the .json information and it automatically to the emote.
Rarity #
Add rarity of the emote:
| Rarity | Number of Items |
|---|---|
| Unique | 1 |
| Mythic | 10 |
| Exotic | 50 |
| Legendary | 100 |
| Epic | 1,000 |
| Rare | 5,000 |
| Uncommon | 10,000 |
| Common | 100,000 |
Category #
Choose the category that best describe your emote.
- Dance
- Stunt
- Greetings
- Fun
- Poses
- Reactions
- Horror
- Miscellaneous
Play Mode #
There are currently two play modes:
- Play Once: means that your emote will only play once. After that the avatar will return to Idle position.
- Loop: the emote will keep playing in loop until the user input another action.
Custom Thumbnails #
For emotes, you don’t have to upload any images since the editor already has a built in tool to create a thumbnail. Just select the frame that best represents the action.
People should be able to identify what the animation is about through the thumbnail. If a front shot isn’t good enough, try rotating the model, zoom in or out, pan up or down, pick any frame from your clip. It’s really important that you select the best shot!
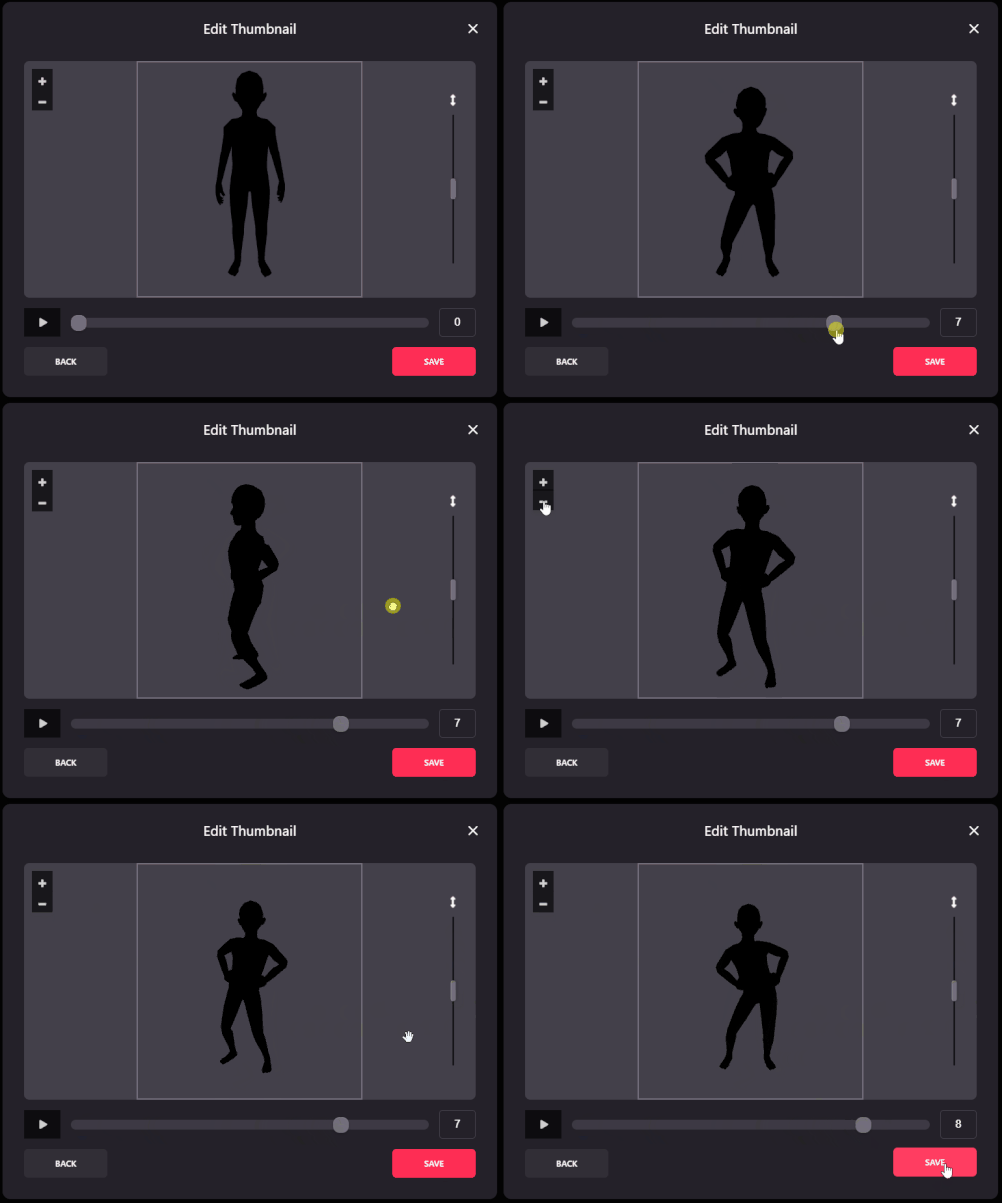
Rotate, zoom in or out, pan up and down. Use the tools to get the best shot of your animation!
Setting the Price #
Next, you will have to set the price of your emote and the beneficiary address. This can all be edited later on, so don’t worry if you haven’t decided on the price yet. You can skip this for now by clicking on Skip. Or you can set whatever price you want, click on Save and edit that before you actually publish the emote.
Remember that when you mint wearables, they are minted directly on Matic/Polygon. When a user purchases your item, the transaction will be conducted in Matic/Polygon MANA.
You could also Make it Free, which means that the price will be set as 0 MANA and the beneficiary address will be null. Know that making it free (primary sale) does not prevent it from being sold at any price as a secondary sale.
Don’t forget to set the beneficiary address, which is the one that will receive the MANA from your sales. You can use any Ethereum address you like. To automatically fill in the address you are logged in with, click I’m the Beneficiary.
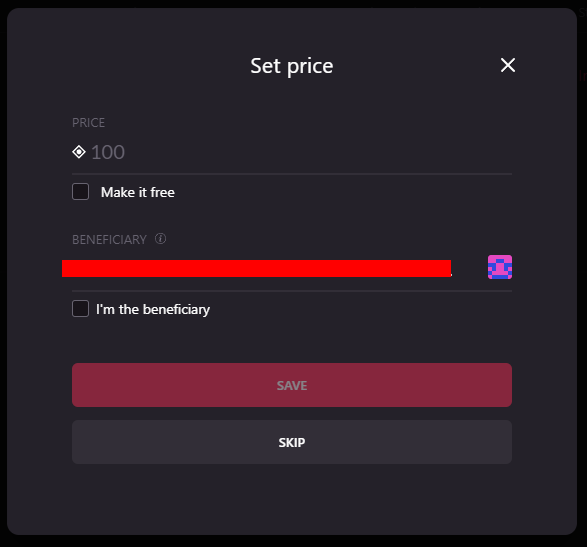
Set the price or skip it for the time being. You can always edit it later on.
The Editor #
Once you set a price or skip it, you will have the editor open. This is where you can check if the animation is playing well since a 3D avatar will be performing it.
By clicking on the icon at the lower left you will be able to edit the avatar. Click on the cilinder icon on the lower right to check if you animation is staying within the boundaries of height and space.
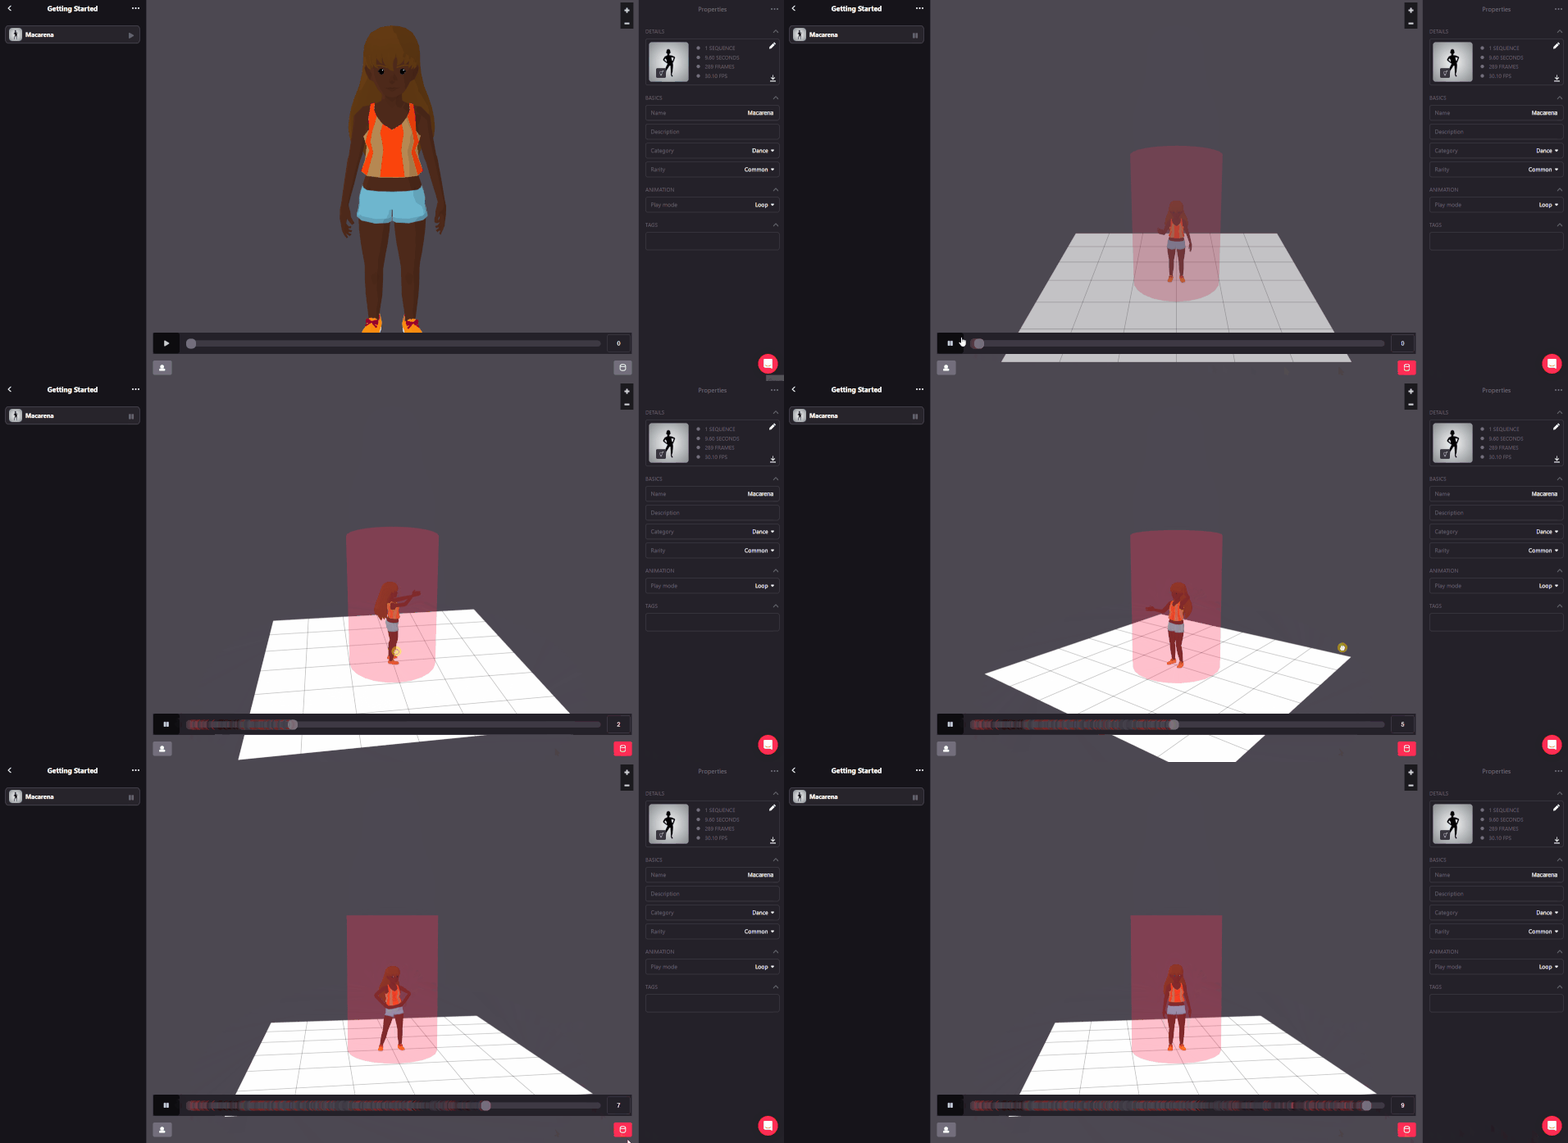
Cylinder icon shows the boundaries for the animation.
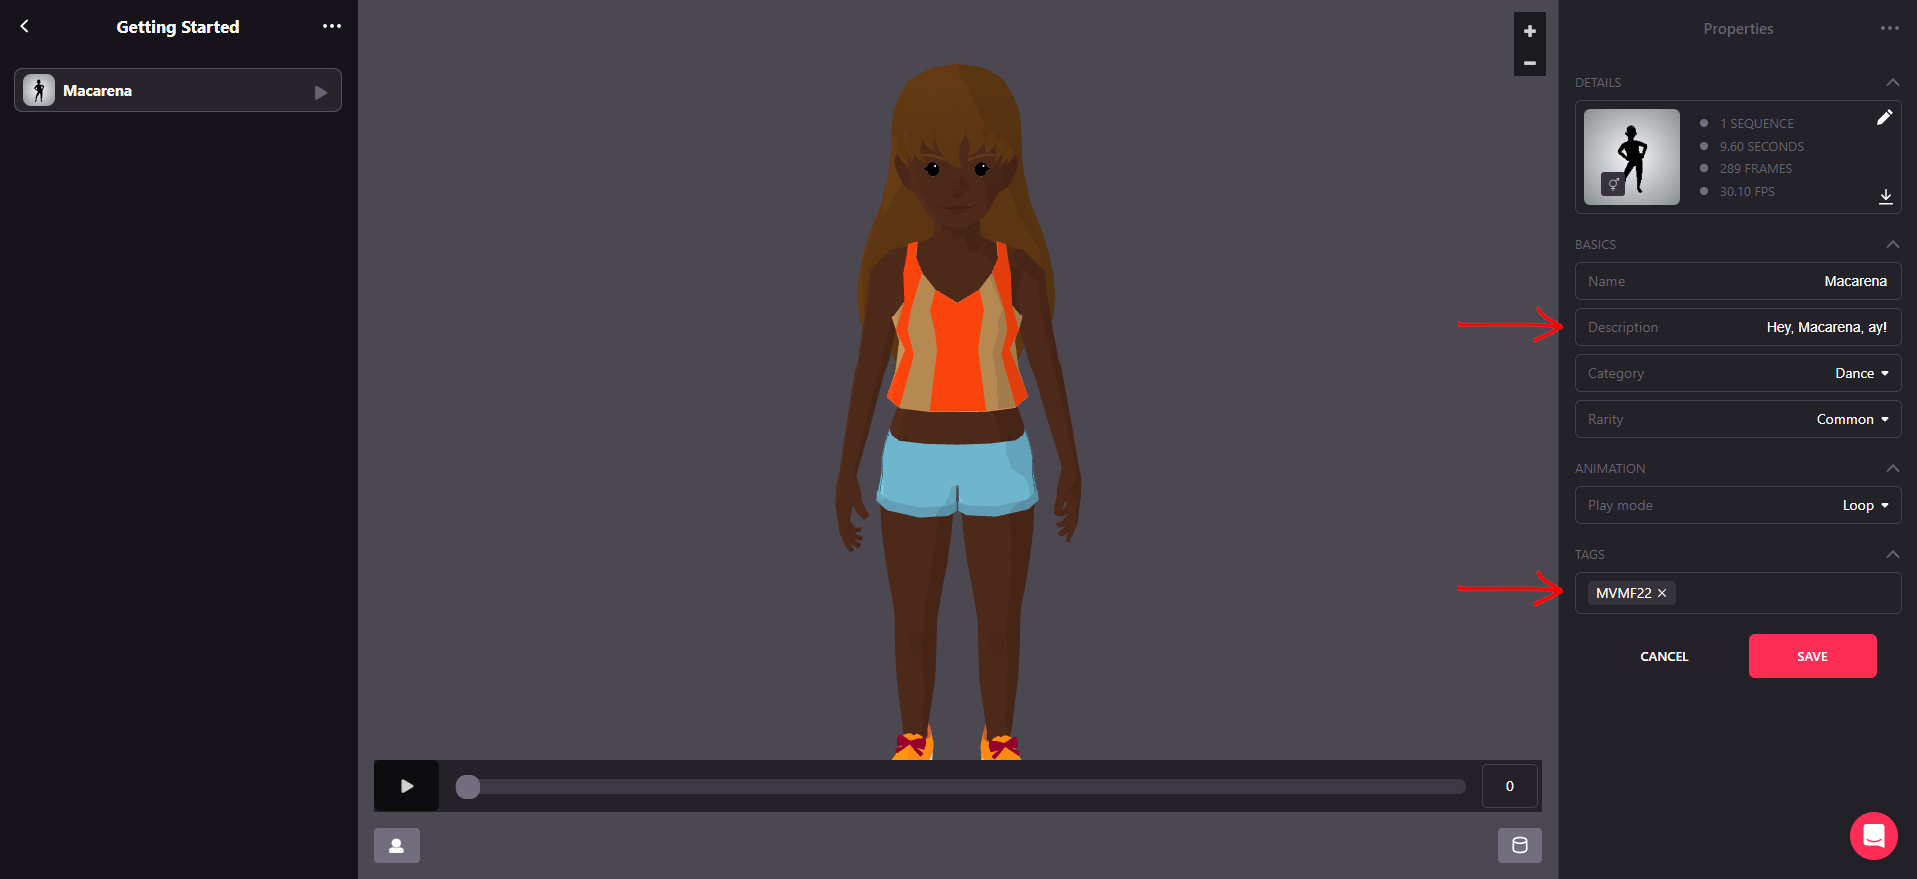
You can also edit the emote’s name, thumbnail, category, rarity and play mode, as well as add a description of the animation and add tags to it. Click on Save when you are done.
- Description: This is a brief statement describing your item that will be displayed in the marketplace.
- Tags: Tags are simply descriptive words that users can use when searching or filtering for items. These are relevant to competitions or events!
Testing in World #
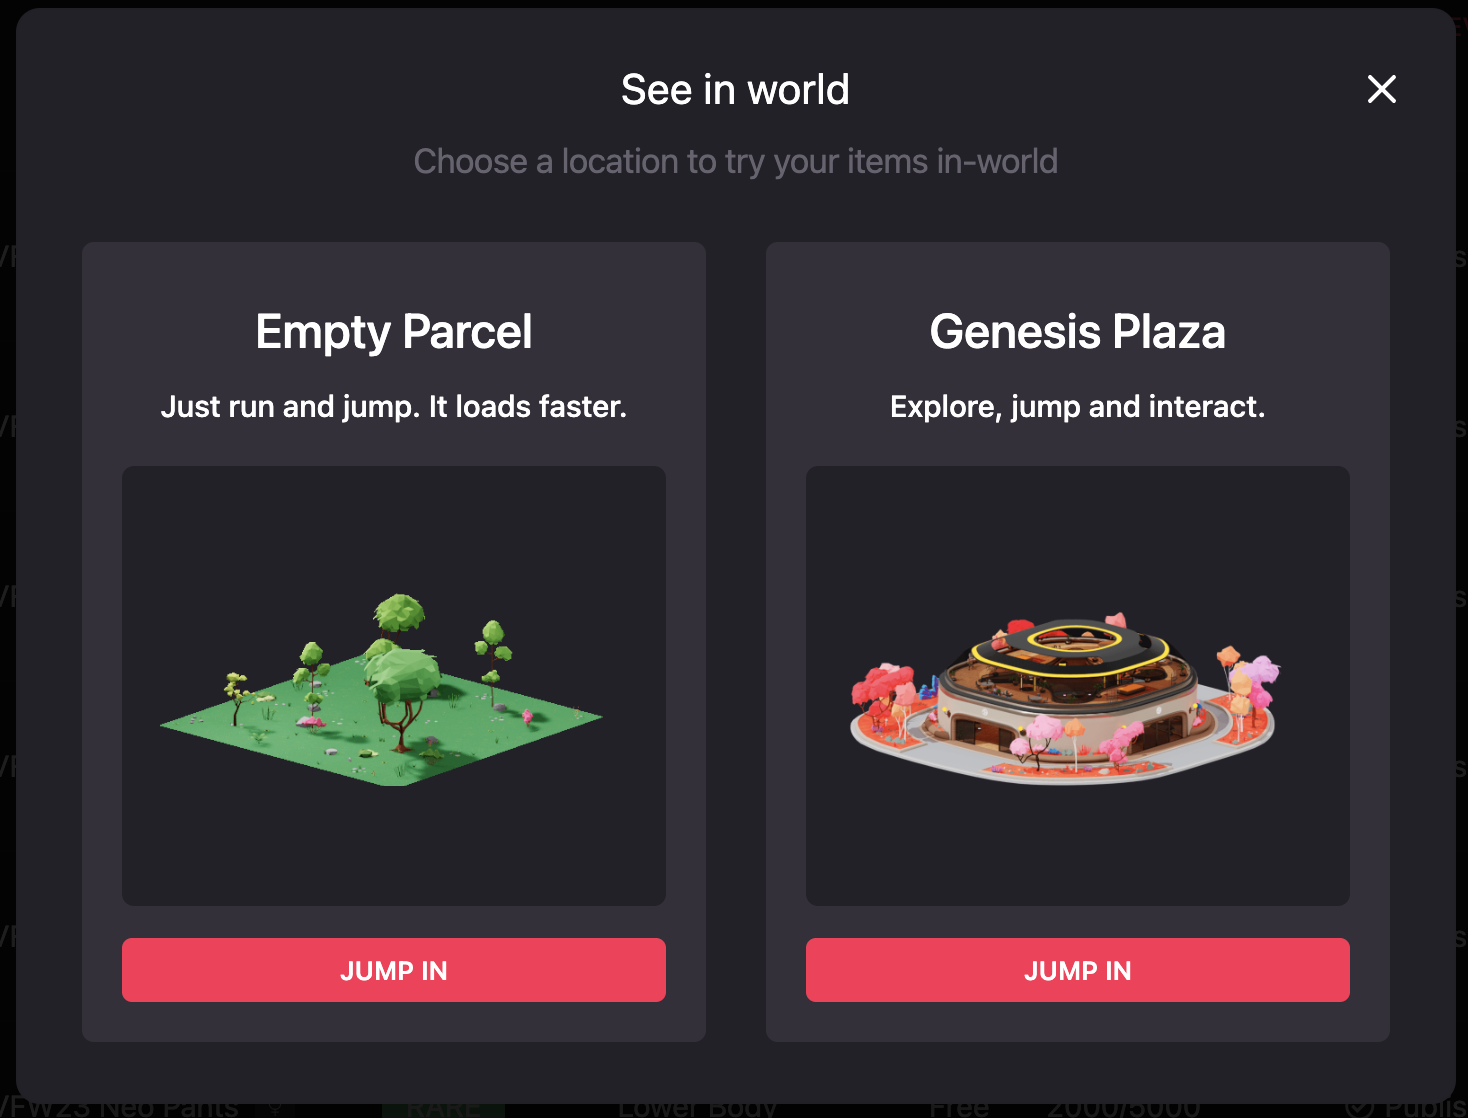
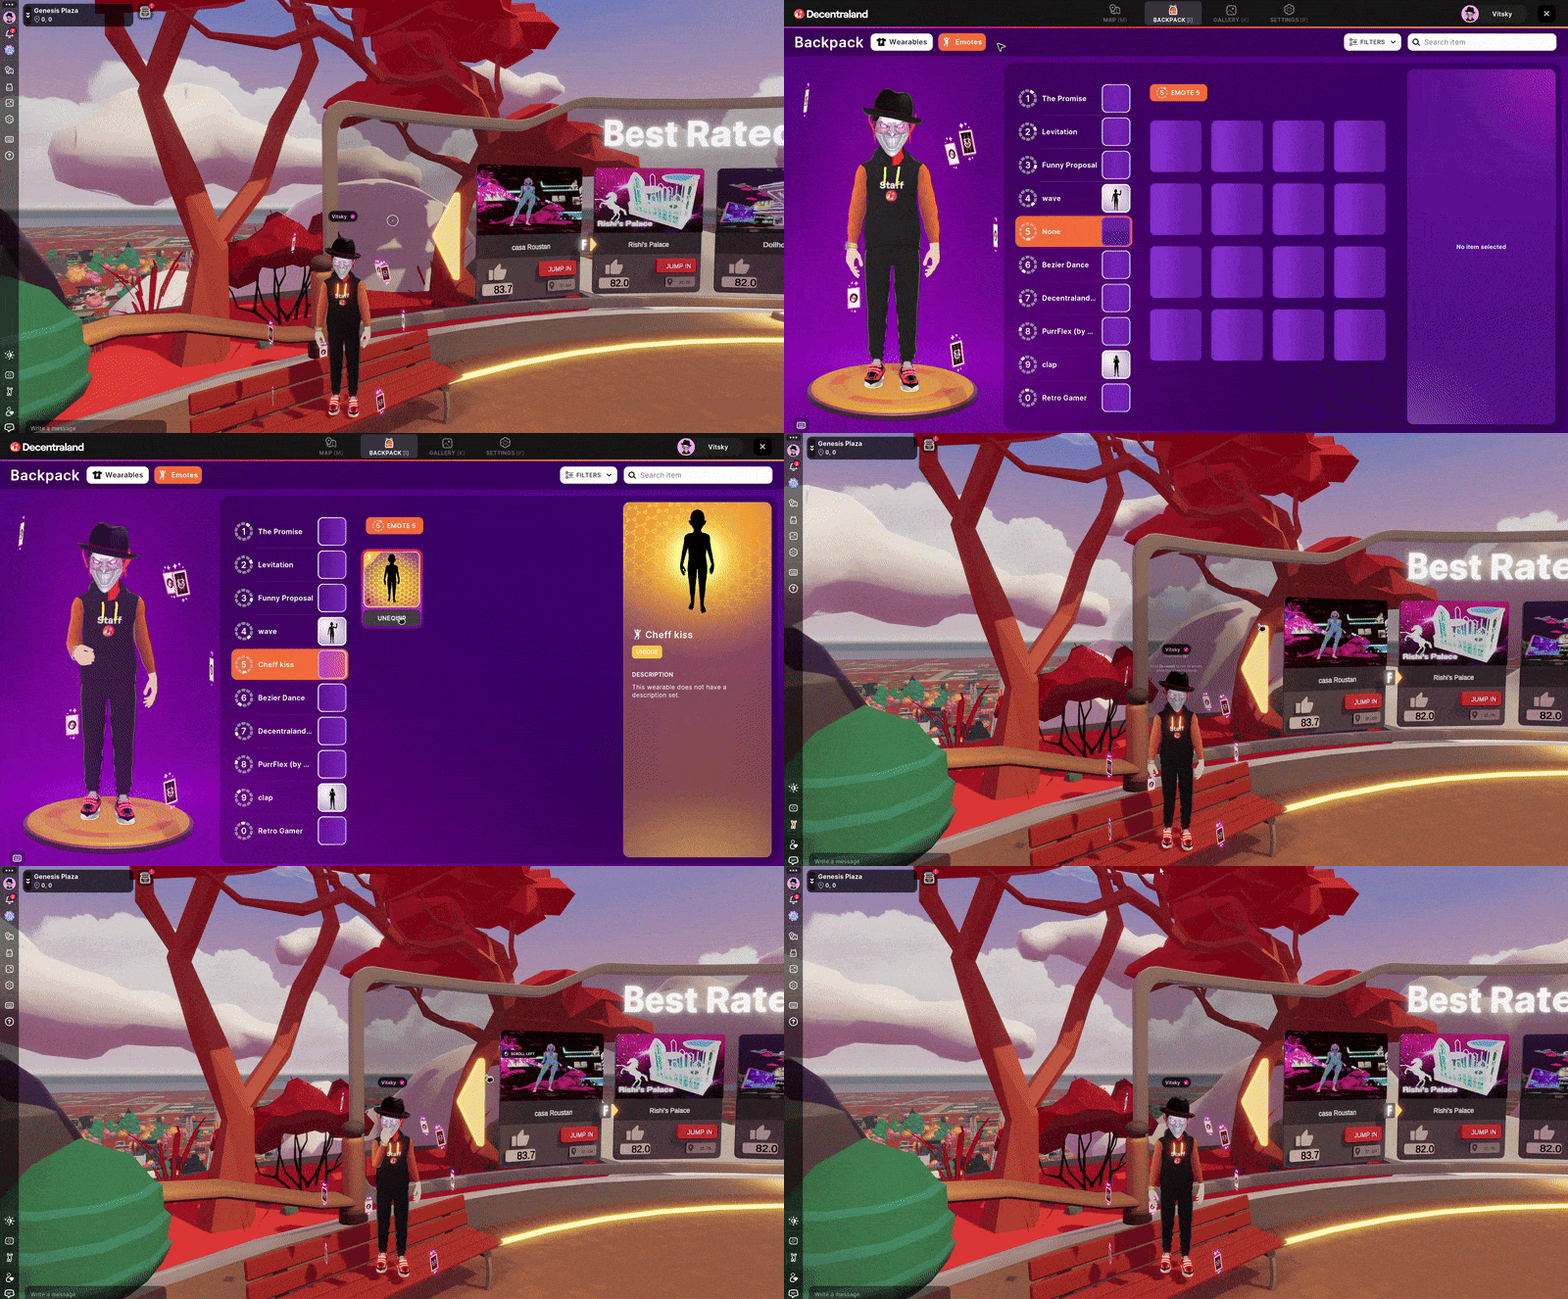
Even after testing the animation in the editor, it’s important to check how it’s actually going to look like and behave in Decentraland. To test it in world, go to the Collections tab, select the desired collection and it will show all the items you have in it. Select the desired collection and click the button See in World.

After clicking the following pop up is going to appear. Selecting Empty Parcels will teleport you to a place without too much content, which will load faster. Selecting Genesis Plaza will take you to the main plaza.
Once you select See in world, a new tab will open on your browser and you will get this message.
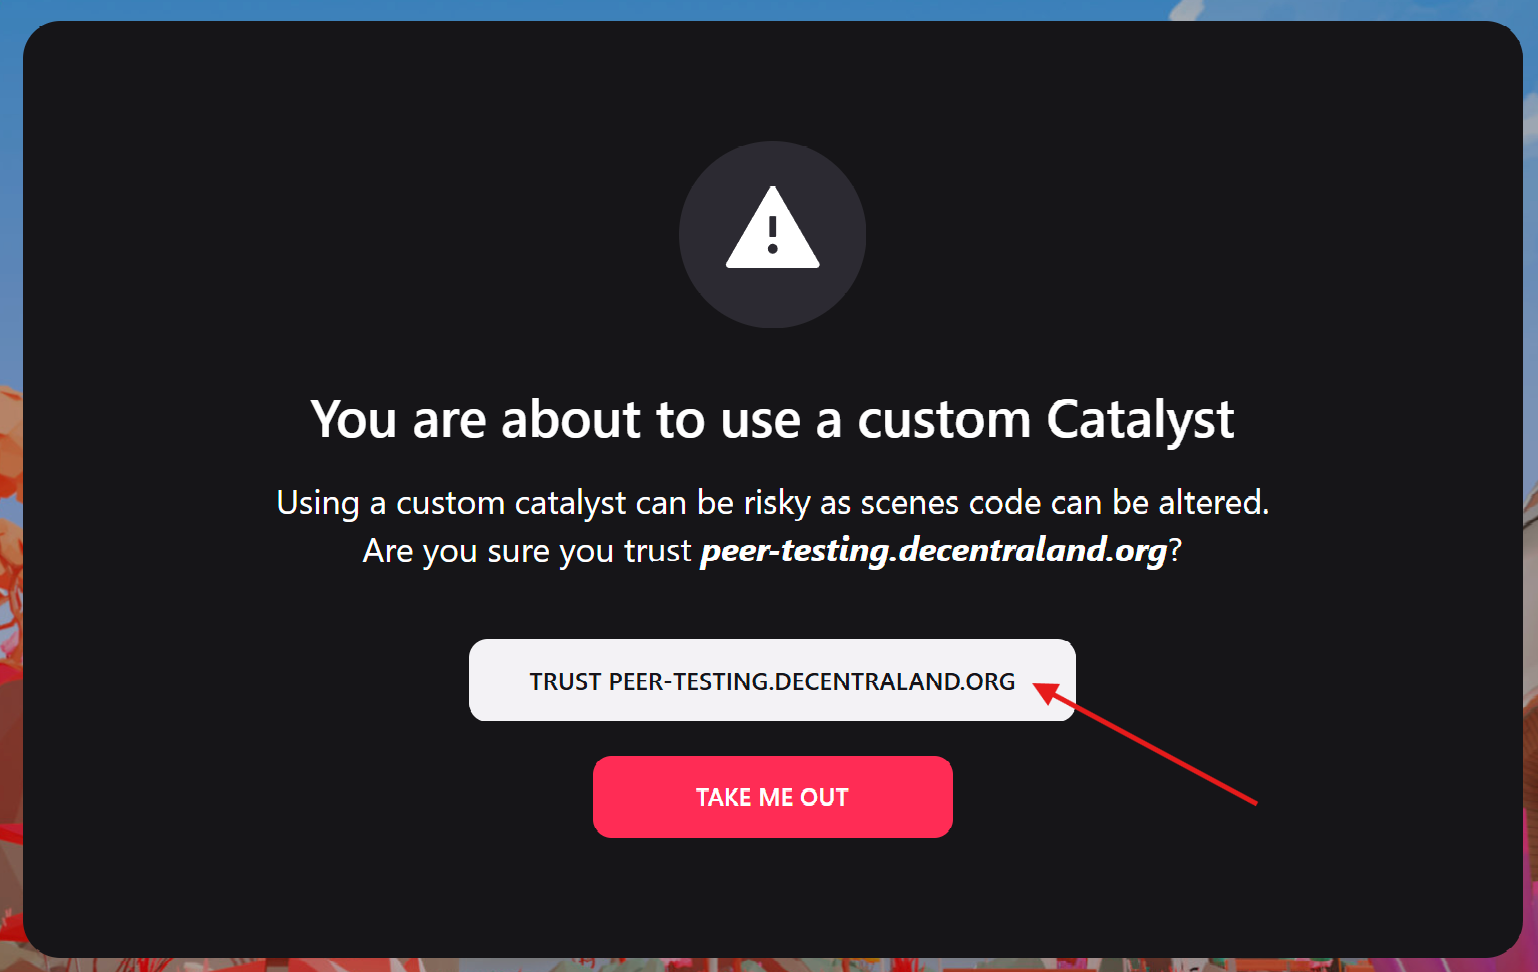
Click on TRUST PEER-TESTING.DECENTRALAND.ORG and a pop-up will show up. Simply click on Open Decentraland. To test your emote, go to the backpack, switch to the Emotes tab, equip it, then open the emote wheel and play it.
Before Publishing #
Make sure to set the price properly, add a nice description and verify if all the information and settings are right. Double check the thumbnail too. If you’ve filled all the information necessary you will see Done as the status of your item.

The Done status means that your file is ready be published!