Adding Props and Sounds to your Emotes
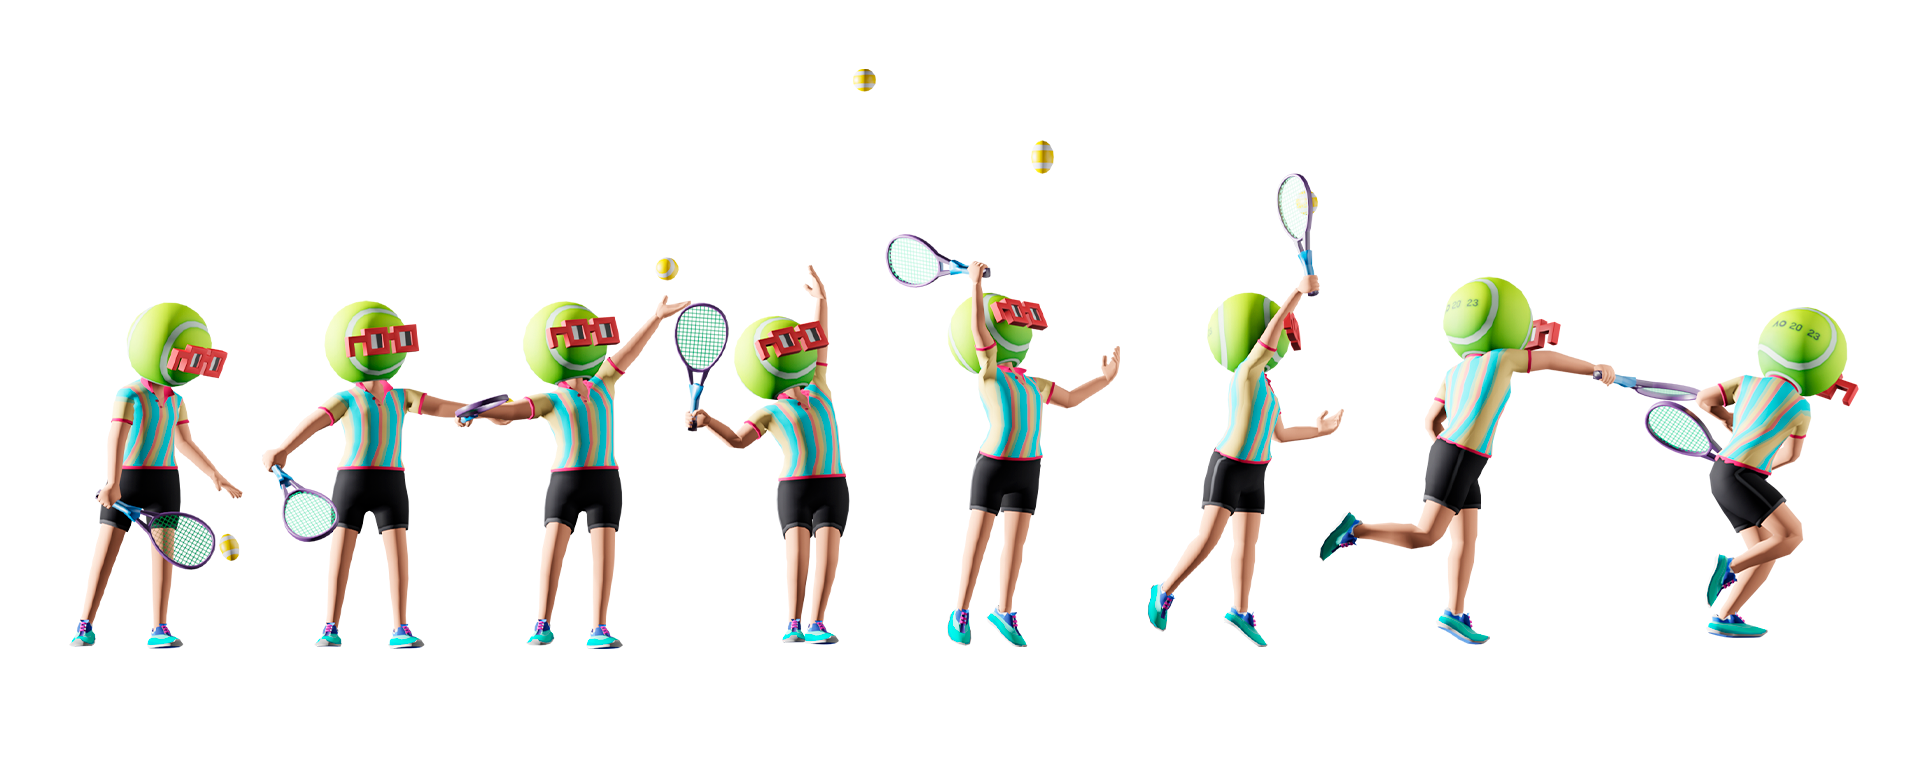
In order to take your Decentraland Emotes to the next level you can add props (3d geometry) and/or sounds to them, doing the emotes much more fun and engaging! In this guideline you will find everything you need to know to export them correctly!
The Basics and Limitations #
To start adding the props to your emotes it’s important to use the Decentraland Template File which will have the rig for the avatar and also the Ground Reference to keep your work inside the allowed space boundaries.
Currently, the props animations only work with Armature/Bones Animations meaning that transform animations are not allowed.
The emote with their props must be exported all together in one single .glb file (Avatar_Armature + Props_Armature with its animations).
-
The size limit per emote is 3MB (megabytes) in total (incluiding prop and sounds).
-
The tris limit per emote is 3000 tris (including all props).
-
No more than 2 materials and 2 textures for props.
-
No more than 62 bones for the armature.
-
The emote must have one animation for the avatar and one animation for the prop. Currently multiple animations are not allowed.
-
Both animations (Avatar and Prop) must have the same keyframe length.
-
Each animation cannot exceed more than 299 frames or 10 seconds.
-
The space boundaries are the same as standard emotes. For more information check the space limitations .
Naming Conventions: #
Naming conventions must be strictly followed for the emotes to work! Otherwise they will not play correctly neither in the builder nor in world.
Armatures Name Conventions: #
For Avatar:
Armature
For Props:
Armature_Prop
Animations Name Conventions: #
For Avatar:
AnimationName_Avatar
- Example:
TennisServe_Avatar,GunShoot_Avatar
For Props:
AnimationName_Prop
- Example:
TennisServe_Prop,GunShoot_Prop
Getting Started #
Before starting you animation, you will have to create a rig for the prop. If you’re not familiar with the process, check Create a Rig for more information on how to do it.
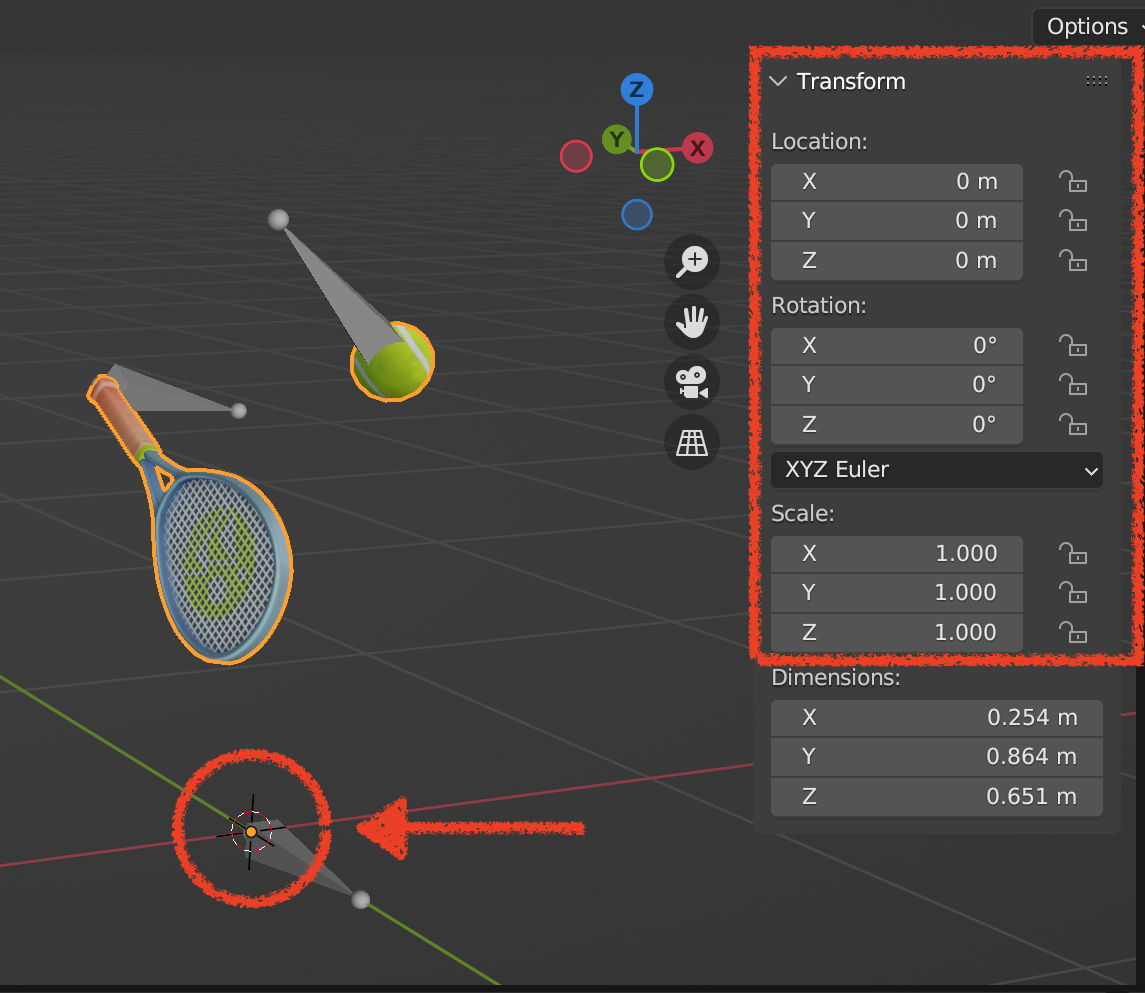
Ensure that the prop object and armature have their origins located at the 0,0 location within Blender. Additionally, apply transformations to the prop object and armature, ensuring they are frozen at a scale of 1,1,1. This is crucial to prevent any potential issues with the prop’s behavior when being utilized within the world or during animations.
Making the Prop Follow the Avatar Rig #
Some props might have to be attached to certain body parts, like a tennis racket to the hand. That can be done by simply adding a constraint. To do so, in Pose Mode, select the prop bone (the tennis racket one, for example), press CTRL + Shift + C on your keyborad and select Child of or just click on the Bone Constraint Properties tab and, in the drop down menu, select Child of.
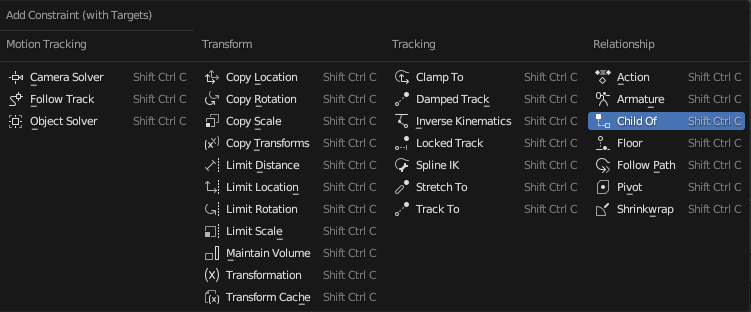
Add a constraint by pressing Ctrl + Shift + C on your keyboard.
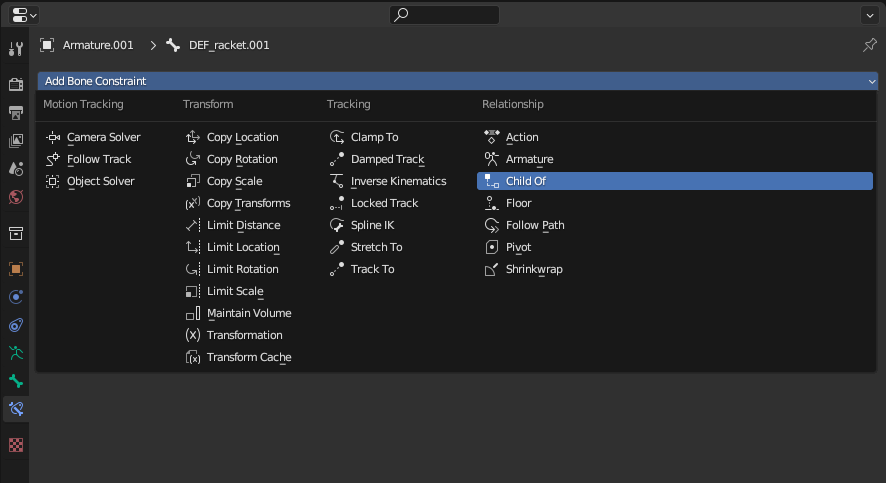
Then, in Target, select the avatar armature and in Bone select the bone you want the prop to follow. To maintain the prop’s original position, click on Set Inverse once you add the constraint. If the influence is 1, the prop will fully follow the selected bone, if it’s 0, the constraint will be disabled. You can set keyframes on the influence to turn it on and off throughout the animation. To do that, just press I while the cursor is on top of Influence.
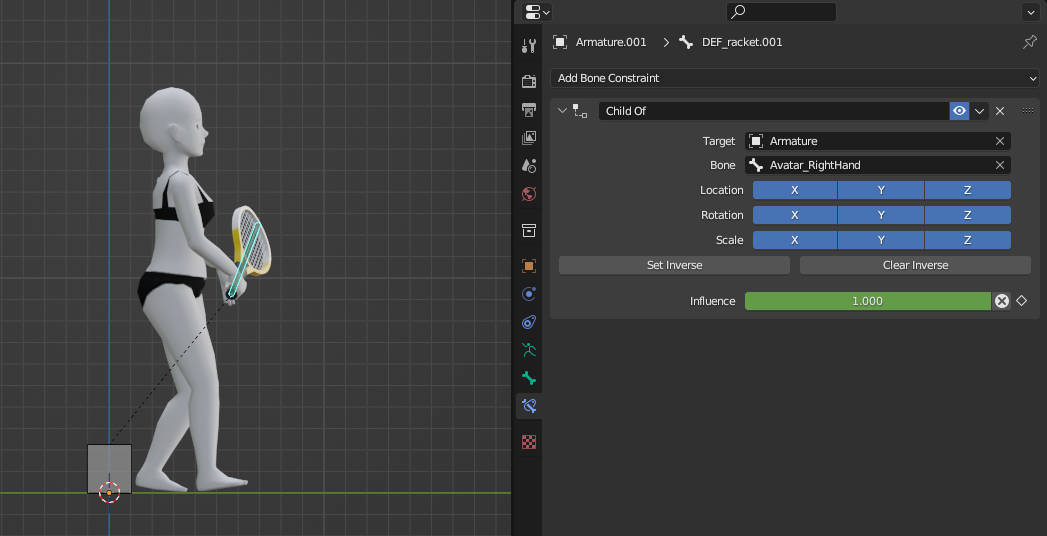
Chlid of constraint menu. Keyframe the influence to turn it on and off.
If you use the slide to turn off the Influence, the prop will not maintain its previous position, making it hard to keep the animation fluid. To avoid having to manually fix the position, instead of using the slide, click on the X next to Influence, set a keyframe on it and another one on all the transform attributes. This way the prop will keep the same poistion as when the Influence was on!
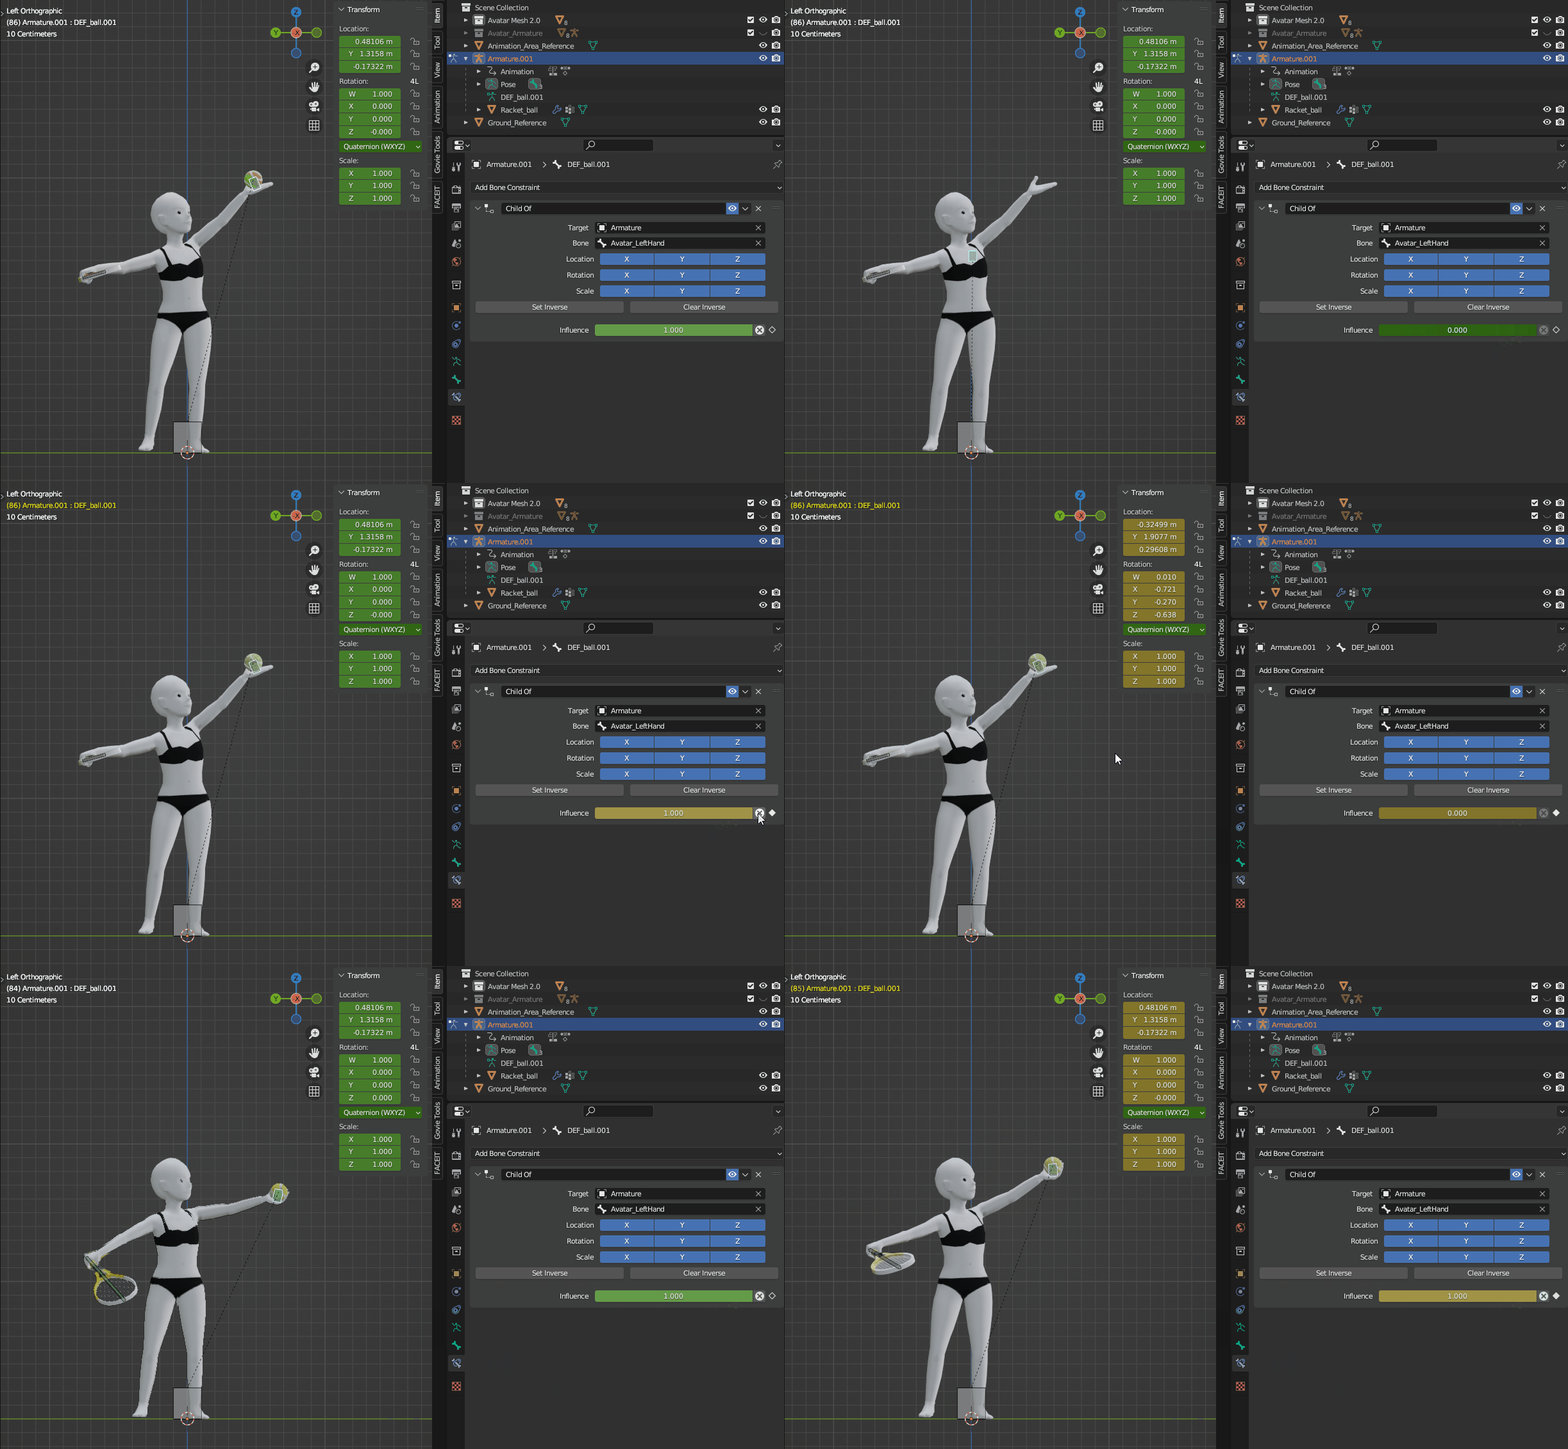
💡Animation Tip
Don’t leave the prop visible from the start! To avoid spoiling what’s about to happen and an abrupt transition, start the animation with the prop scaled down to 0.001 and only turn it to 1 when you want it to appear. Remember to scale back down to 0 by the end of the action. This will make the transitions much more fluid and cool!
Exporting #
In order for all the animations to be exported, the clips should be added to the NLA Tracks. Make sure there’s only one animation clip for the avatar and another one for the prop, they must have the exact same number of frames.
In Object Mode, select the avatar armature, select the respective animation clip in the Browse Action menu and click on the Push Down button.
Then, select prop armature, select the proper animation clip for it and click on the Push Down button again.
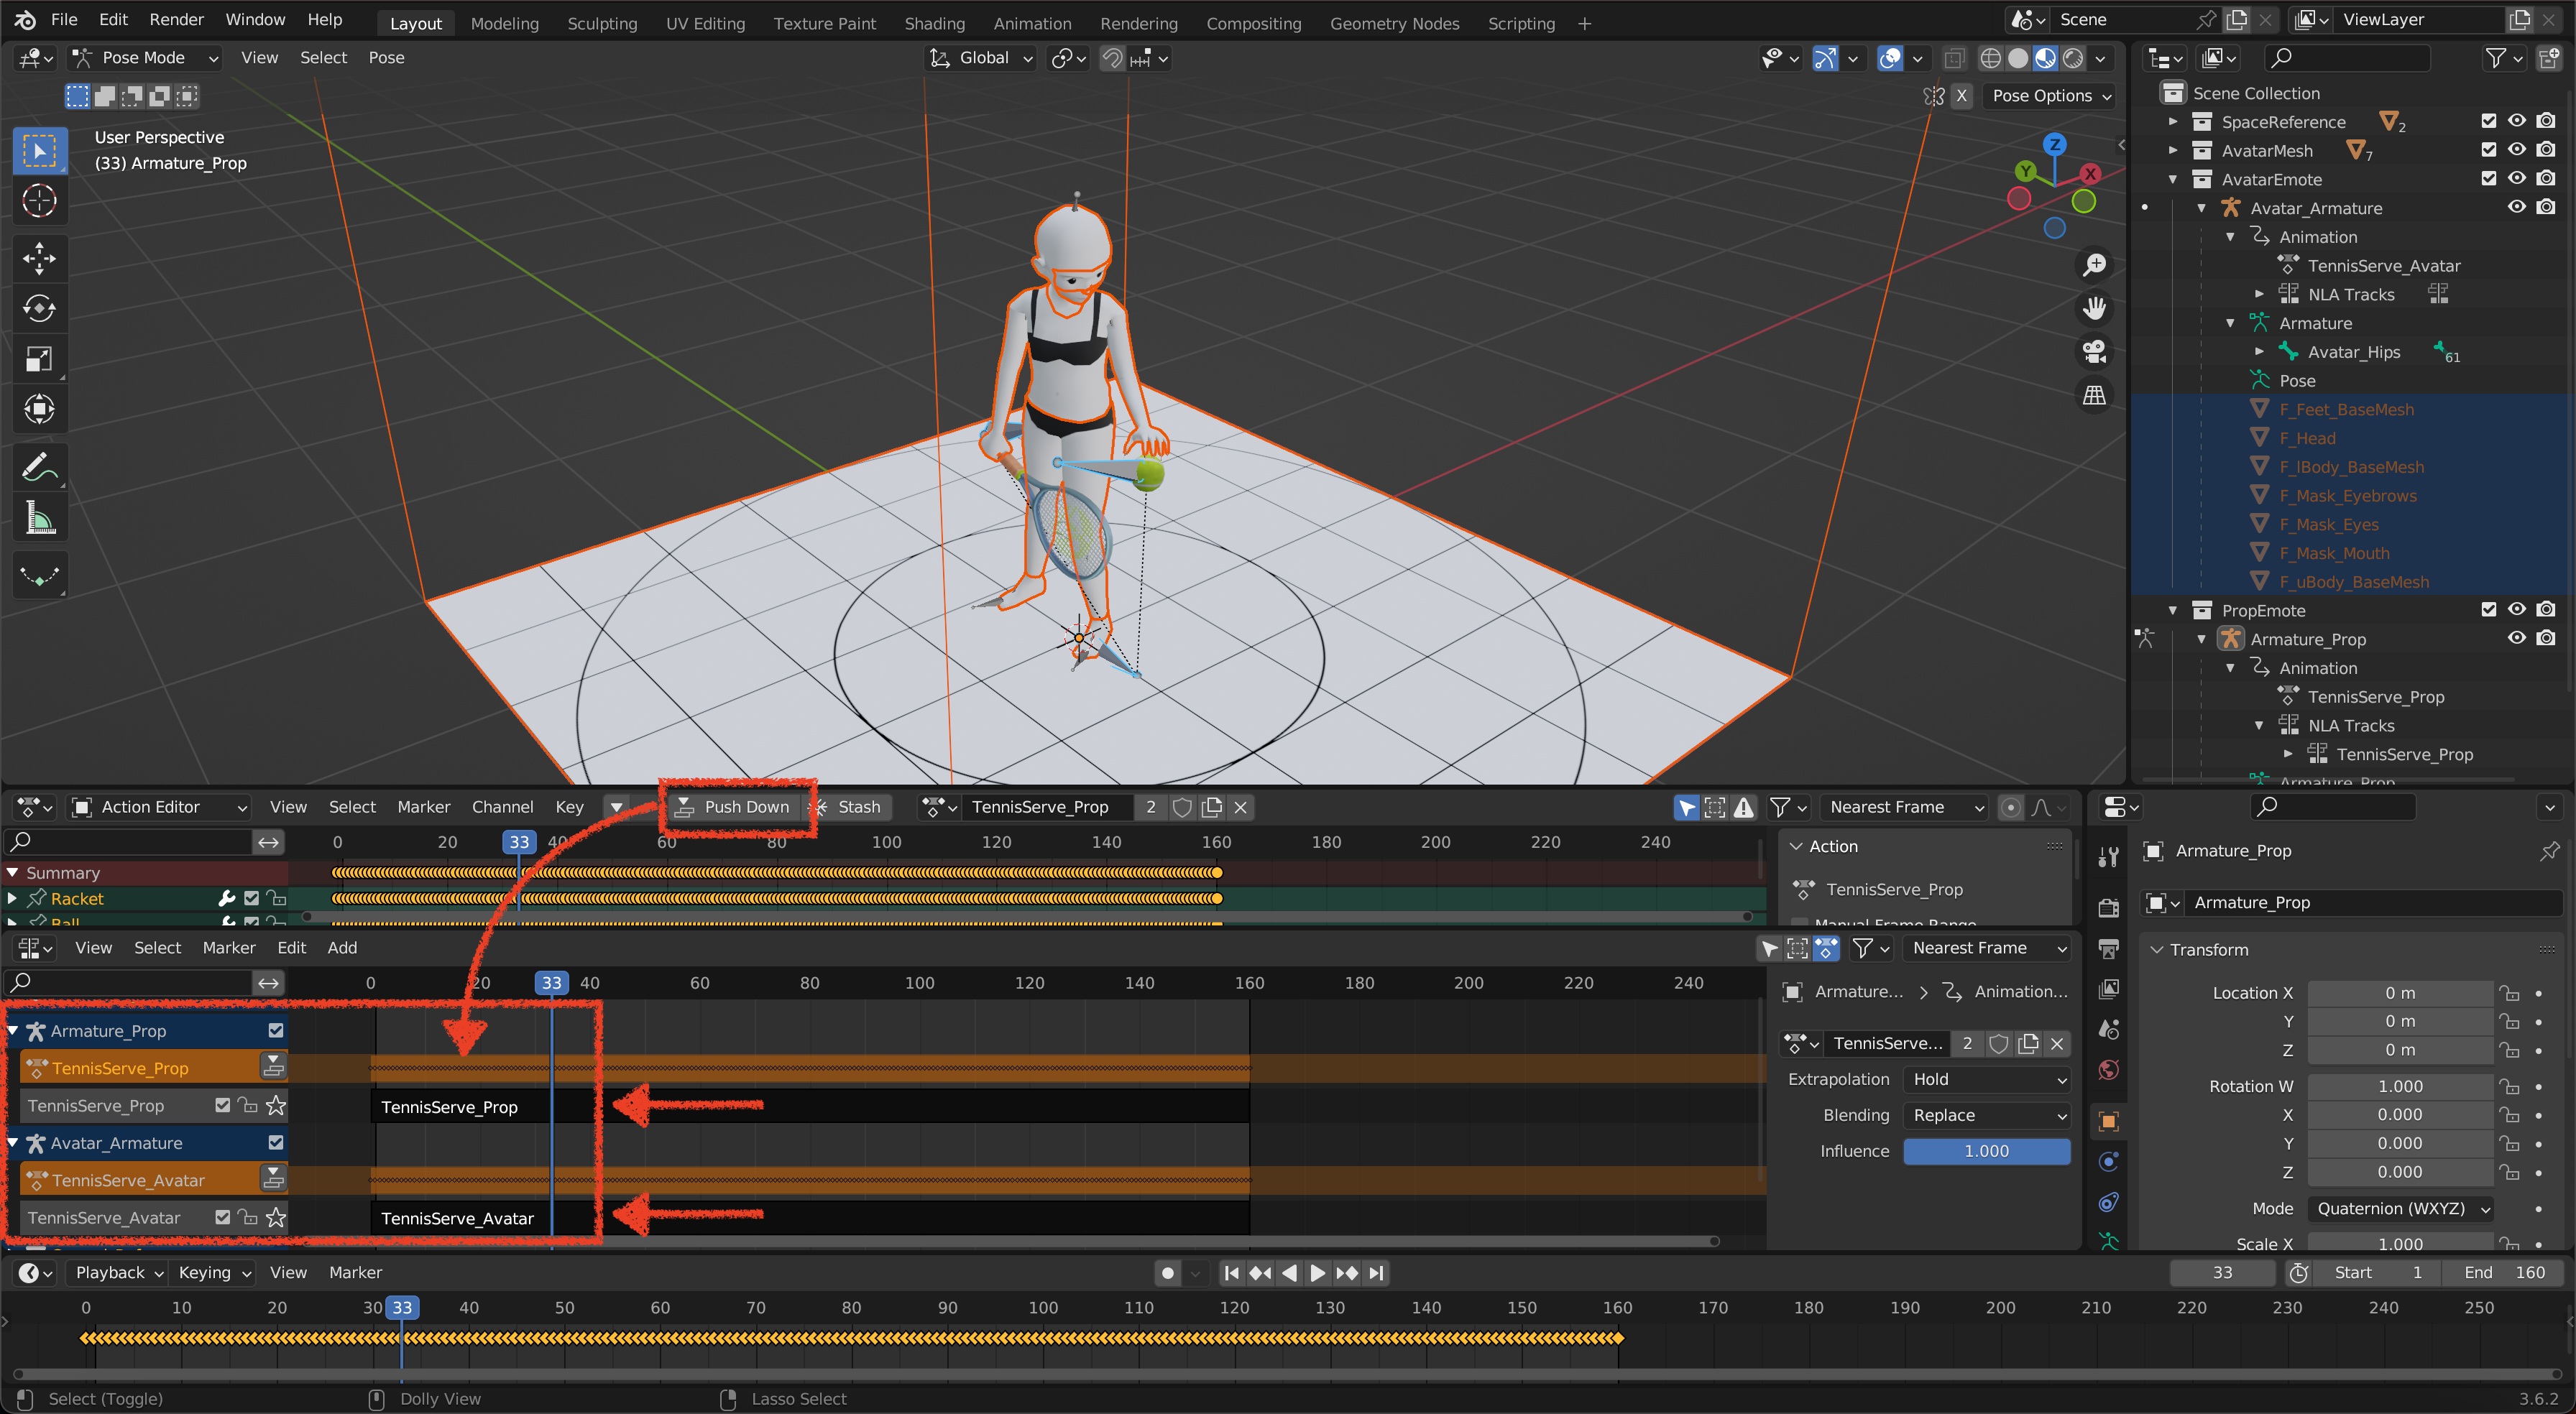
🔥 Optimization Tip
Before this step make sure to do a backup of your project.
If you have different objects for your props you can merge them together in one single mesh. This would help to reduce the draw calls in game making the emote more performant.
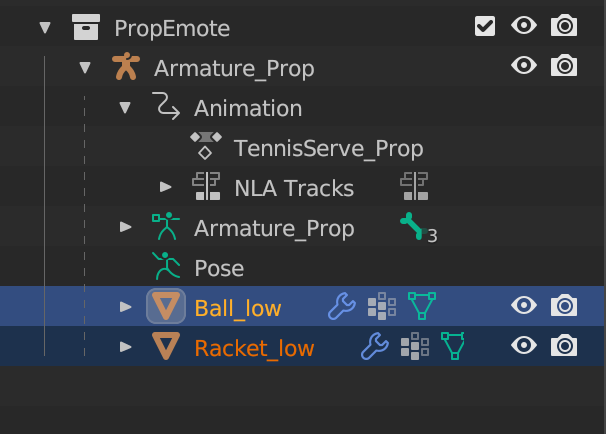
Select objects and press
Ctrl+Jto merge them together.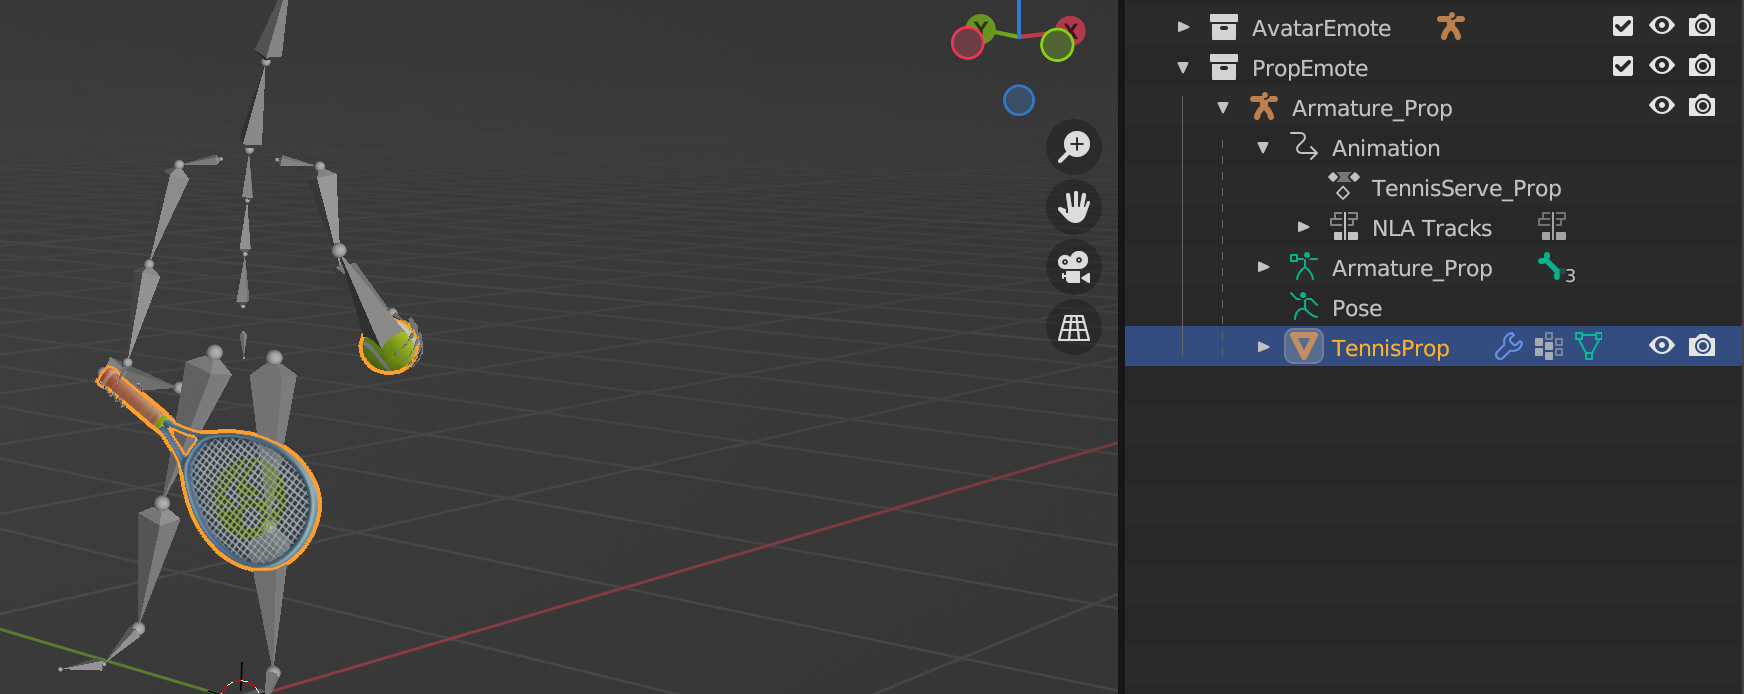
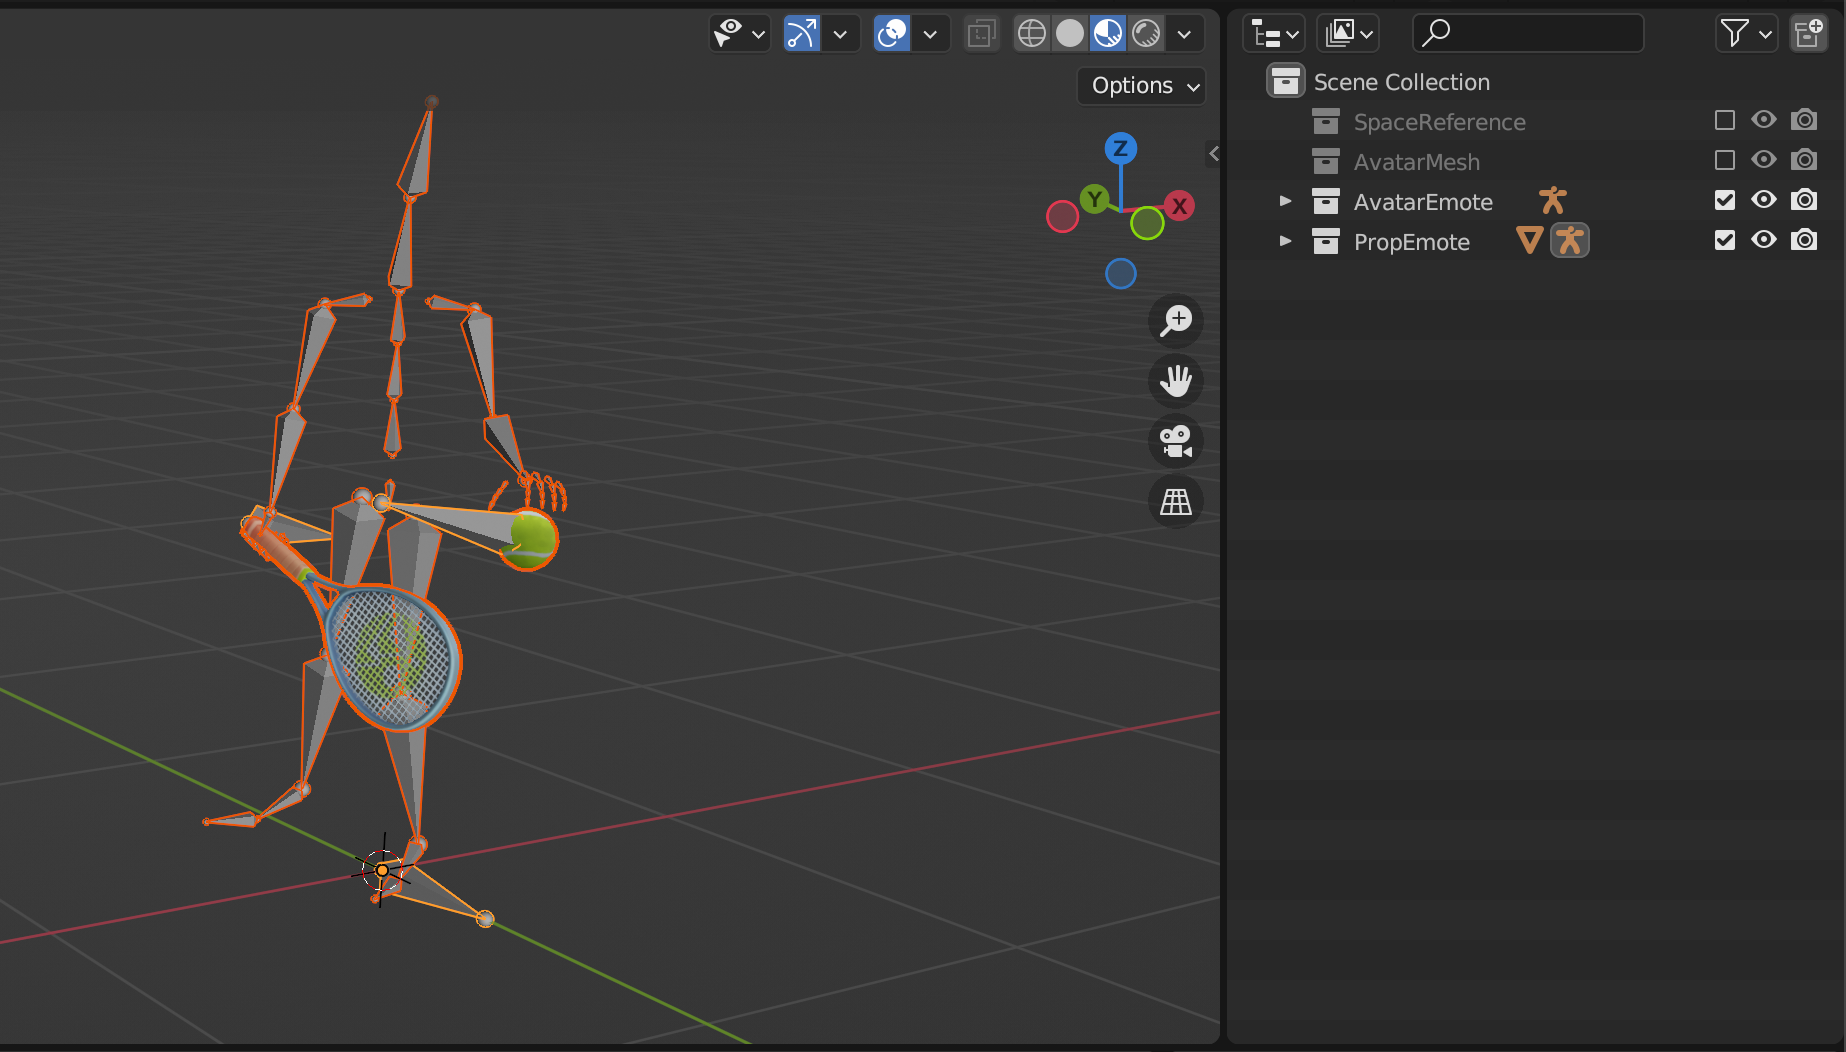
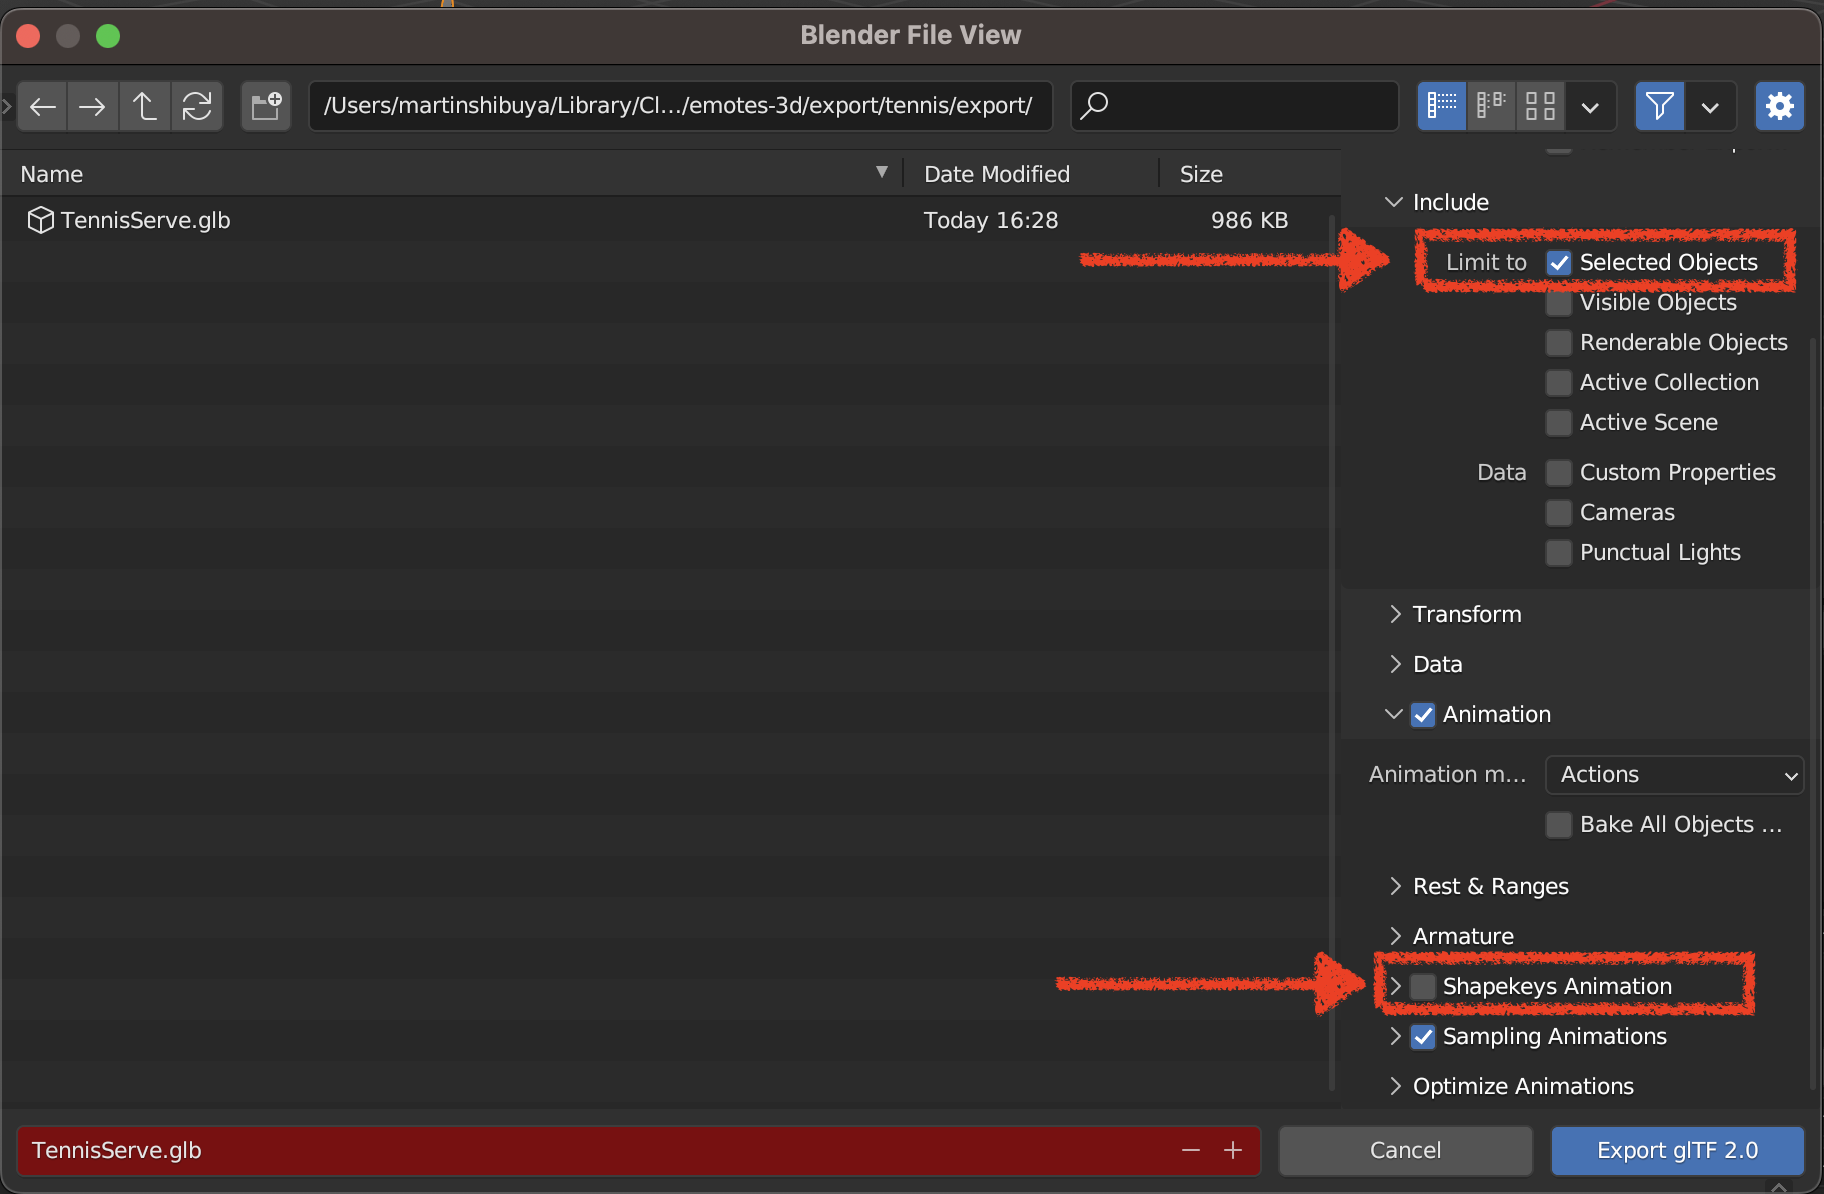
To export be sure to select only both Avatar and Prop Armatures with its animations and the Prop mesh. Then go to the export glb settings and be sure to export only selected objects and untoggle unnecessary features like Shapekeys Animation. Always remember to enable Export Deformation Bones Only, so you don’t end up exporting unnecessary bones, like controls.
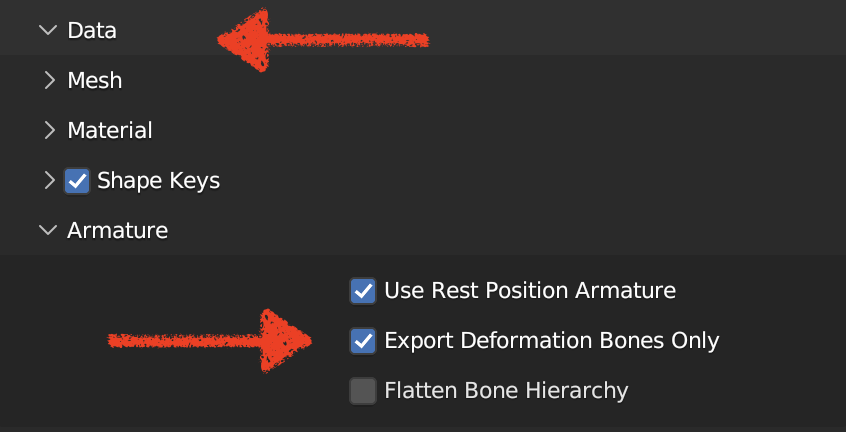
Under Data>Armature make sure to toggle Export Deformation Bones Only
💡 Attention! You should NOT export the avatar mesh into the .glb.
Add Audio to the Emotes #
Format and Limitations for Audio Clips #
-
The correct format to export sounds for your emotes are
.mp3and.ogg. -
The audio clip must have the same duration as the emote.
-
While there is no limitation for size in the audio, the emote with props and sounds cannot be bigger than 3mb.
📔 Note: If the emote has sound (mp3 or ogg), it must be zipped with the .glb. After that, just drag and drop the .zip to the builder. More details can be found here: Uploading emote with sound
💡 Attention! Take into consideration that audio clips used in the emote must be original IP (Intellectual Property), having the rights for reproducing and follows the Content Policy criteria.
Editing Sounds #
To add sounds to your emotes you can do it in different ways:
- Edit your sounds directly on Blender
One way to add sounds to your emotes is using the video sequencer editor that Blender provides.
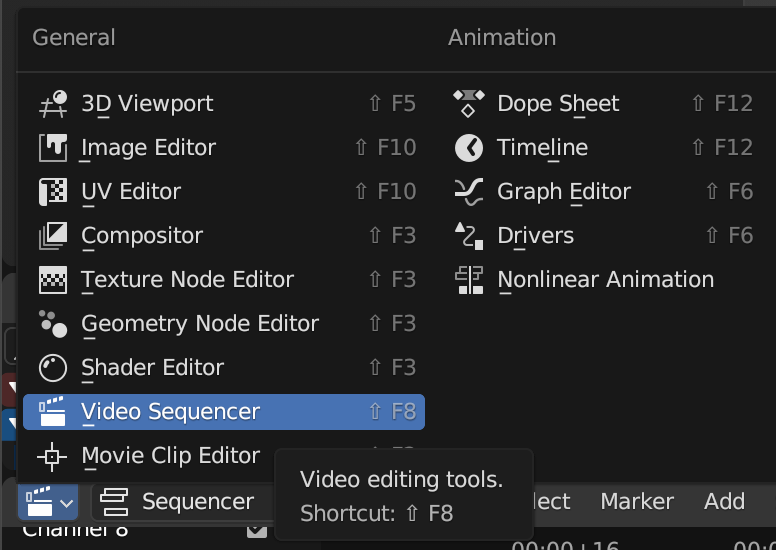
To start adding sounds go to Editor Type> Video Sequencer.
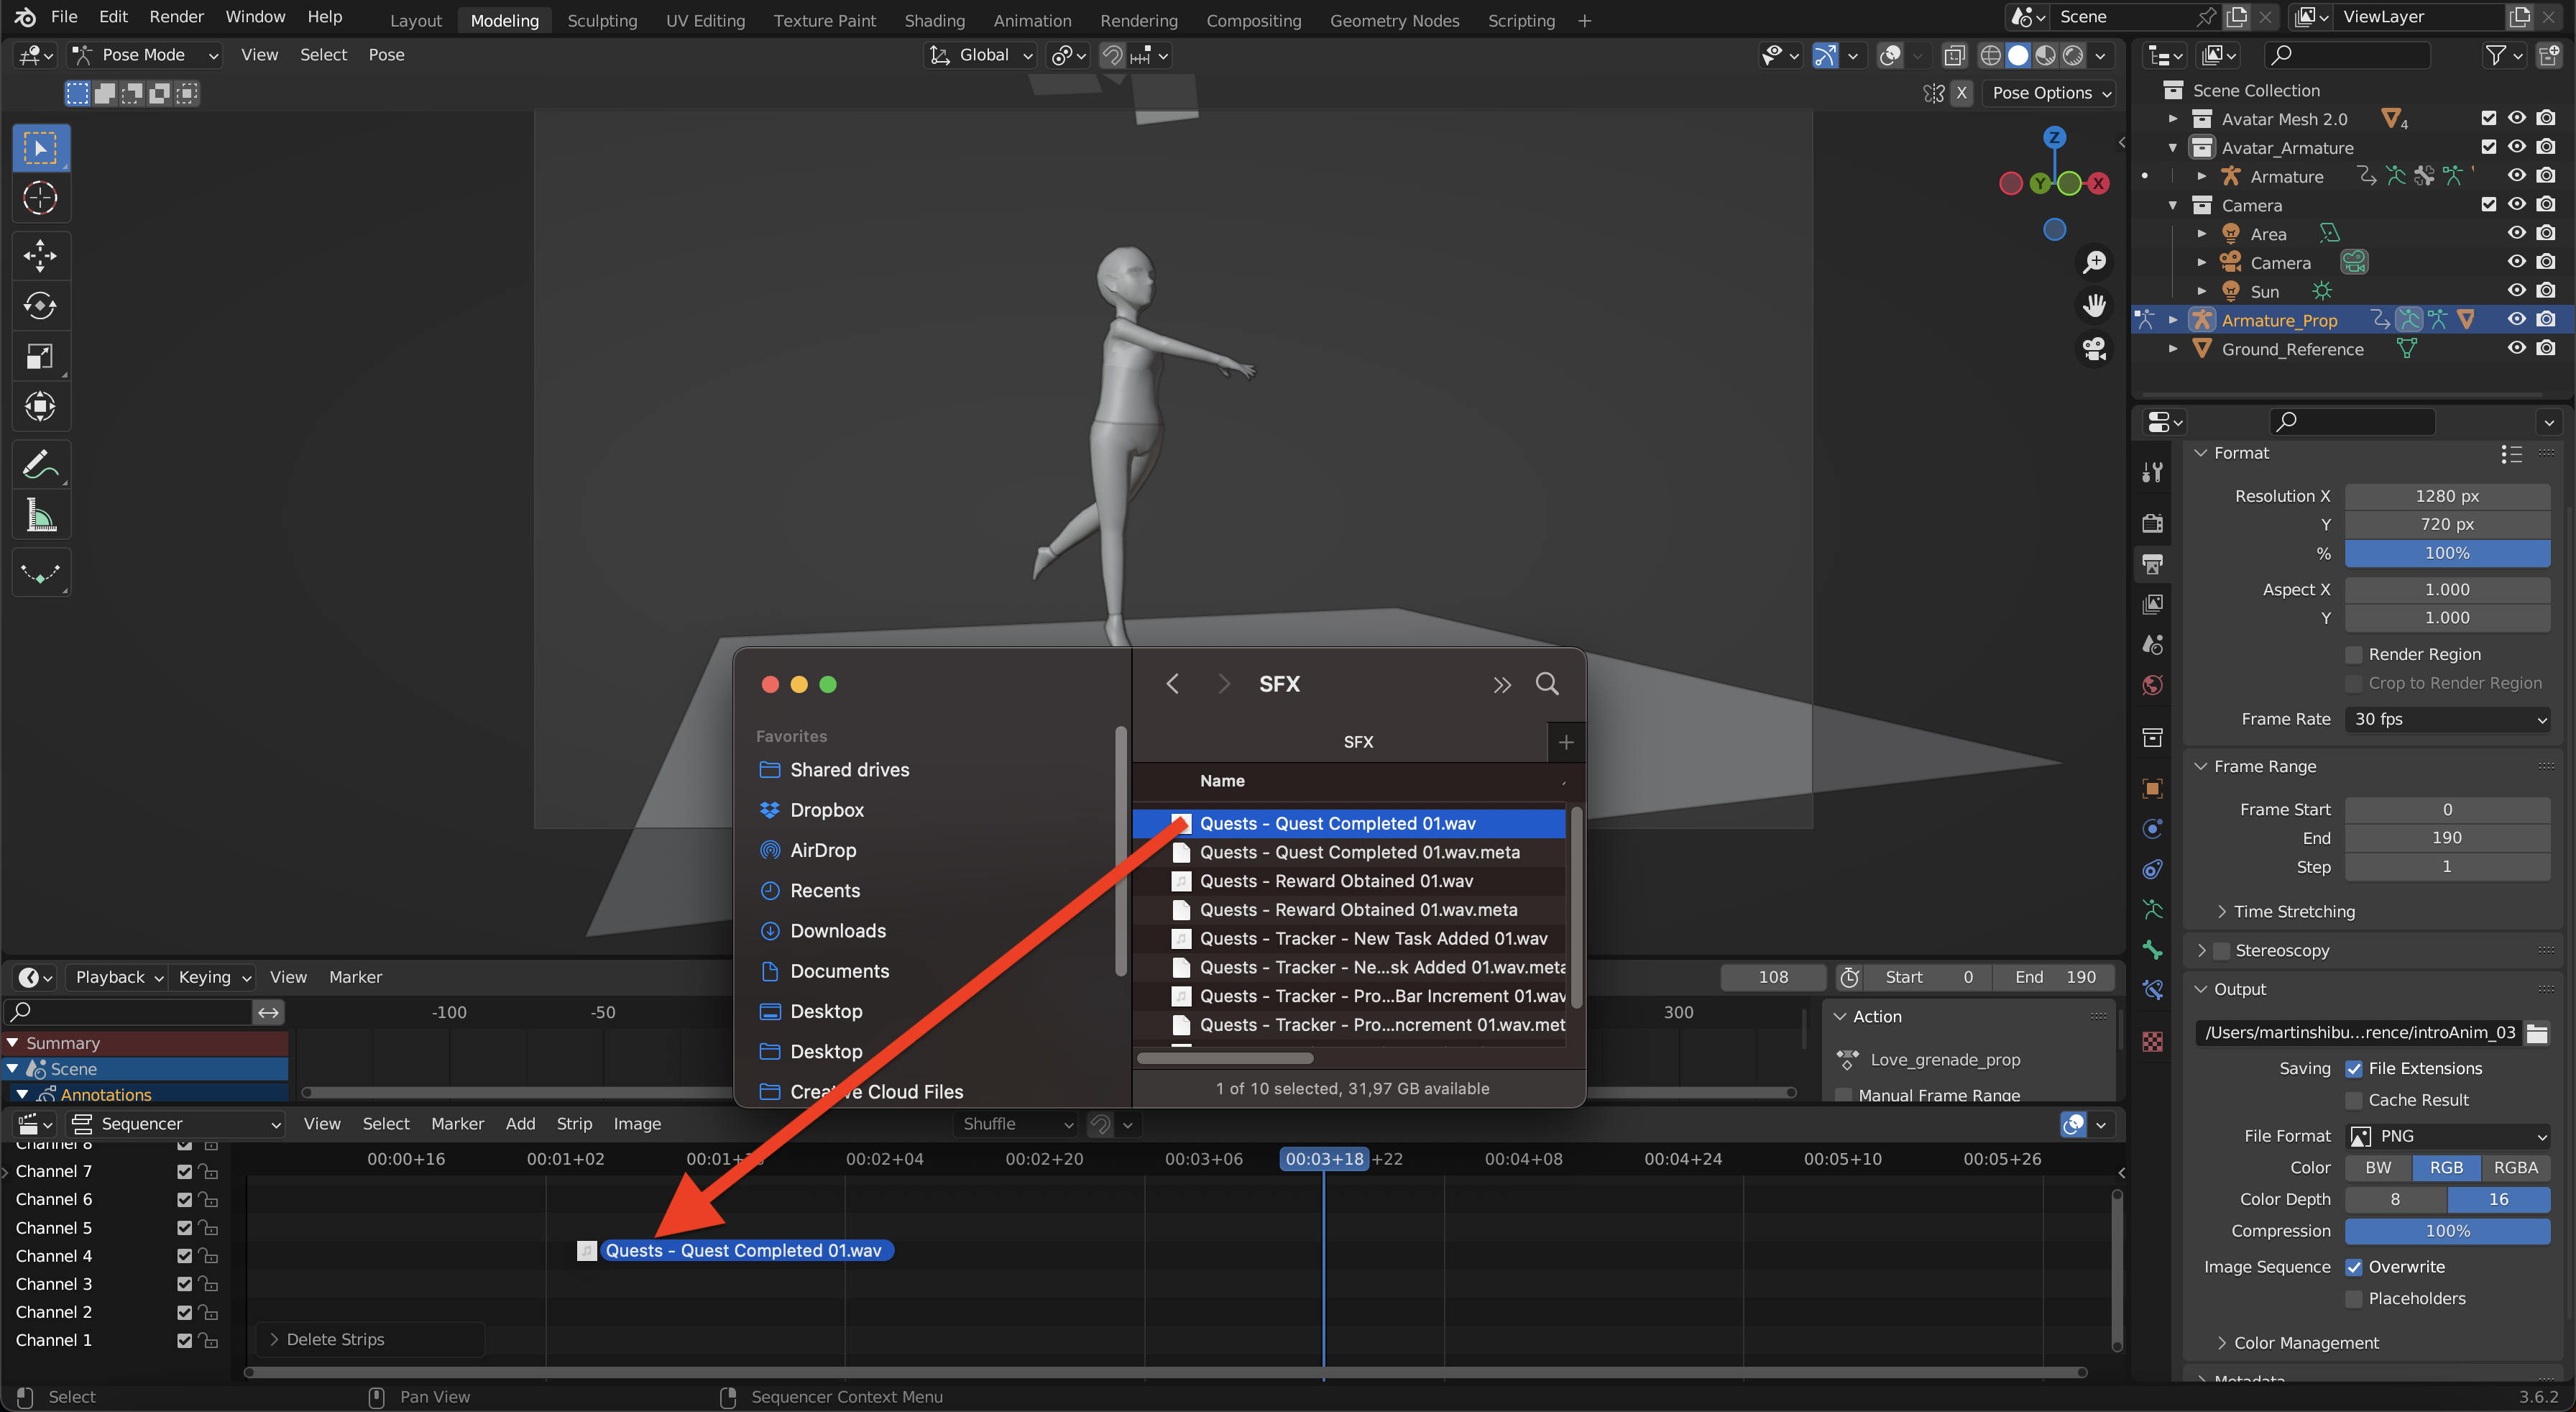
Drag and Drop you sounds to the channels interface.
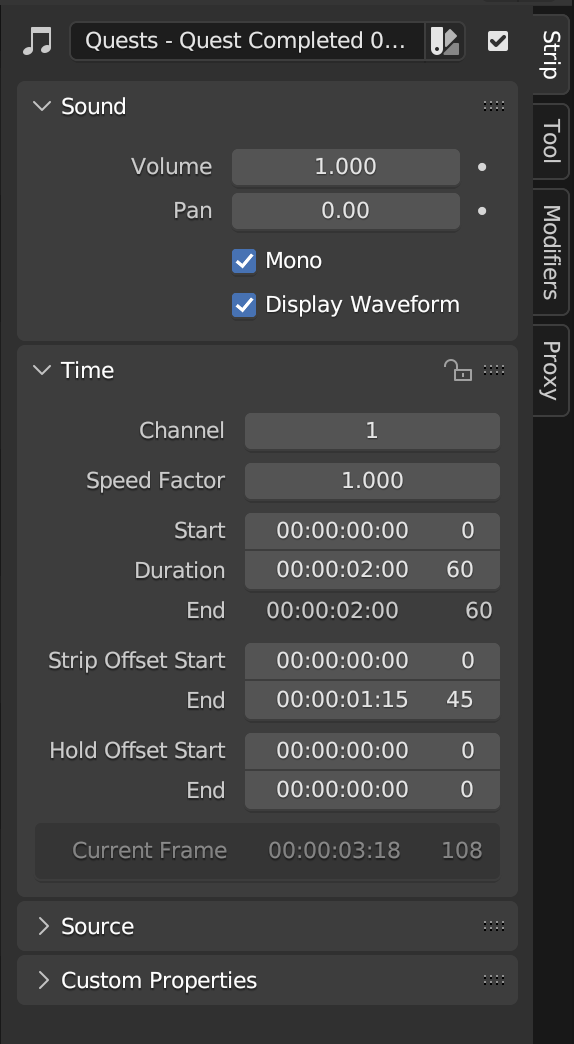
Press the shortcut N to see more options to handle your sounds like displaying waveform, make your sounds Mono or changing the volume.
If you want to fade in and out you can simply do it by adding keyframes from 0 to 1 and viceversa to the volume property.
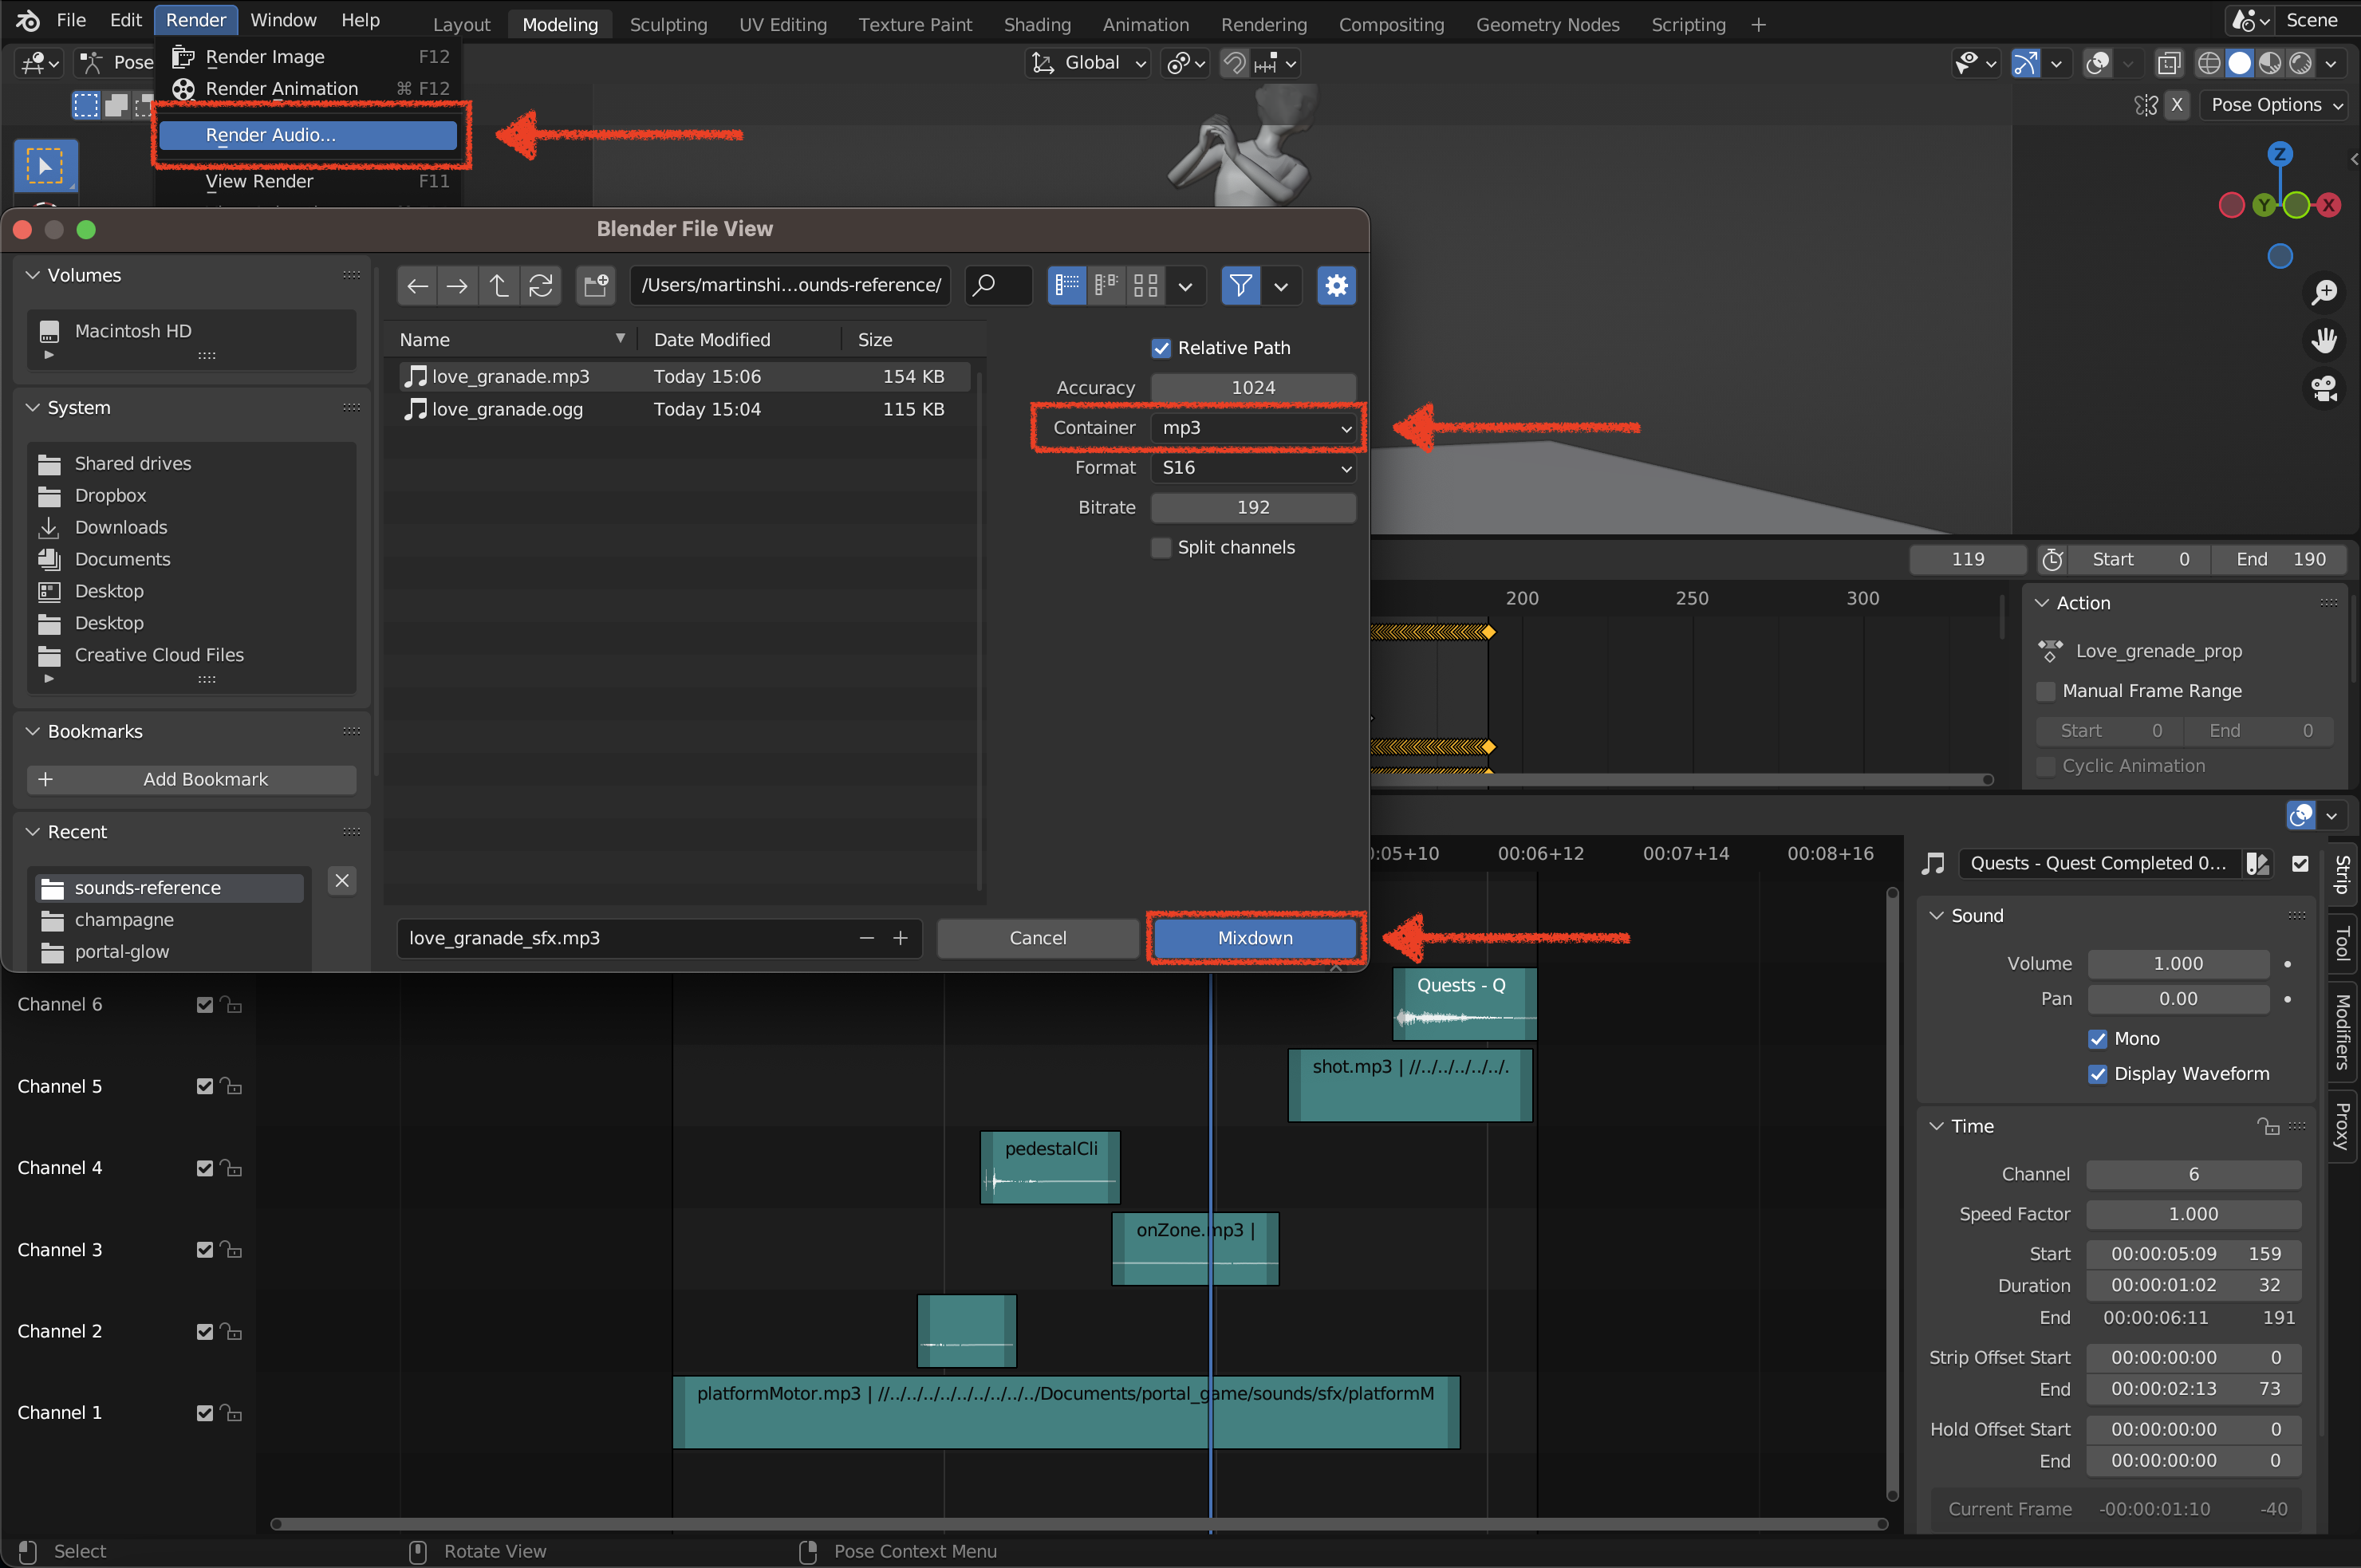
Once you finished to edit your sounds you can export it going to Render> Render Audio. In the exporting option you need to select .mp3 or .ogg format in the Container section and then Mixdown. Only the audio within the frame range will be exported.
- Render animation and add sound with a sound edit software
While editing sounds directly in Blender can be convenient, it is not very flexible because the software is not primarily focused on sound editing. The available tools are very basic. If you want to add a more professional touch to your sounds, we recommend using dedicated sound editing software of your choice.
There are several software options you can use, such as Audacity (Free and OpenSource), Adobe Audition, Ableton Live, or ProTools. Using dedicated sound editing software will provide you with a wider range of tools, functionalities, and sound effects, allowing you to enhance your sounds and give them a more professional feel.
To render your emote you can simply add a camera to your Blender scene and position it in a way you can see all the elements as clearly as possible to later have a good reference to add sounds.
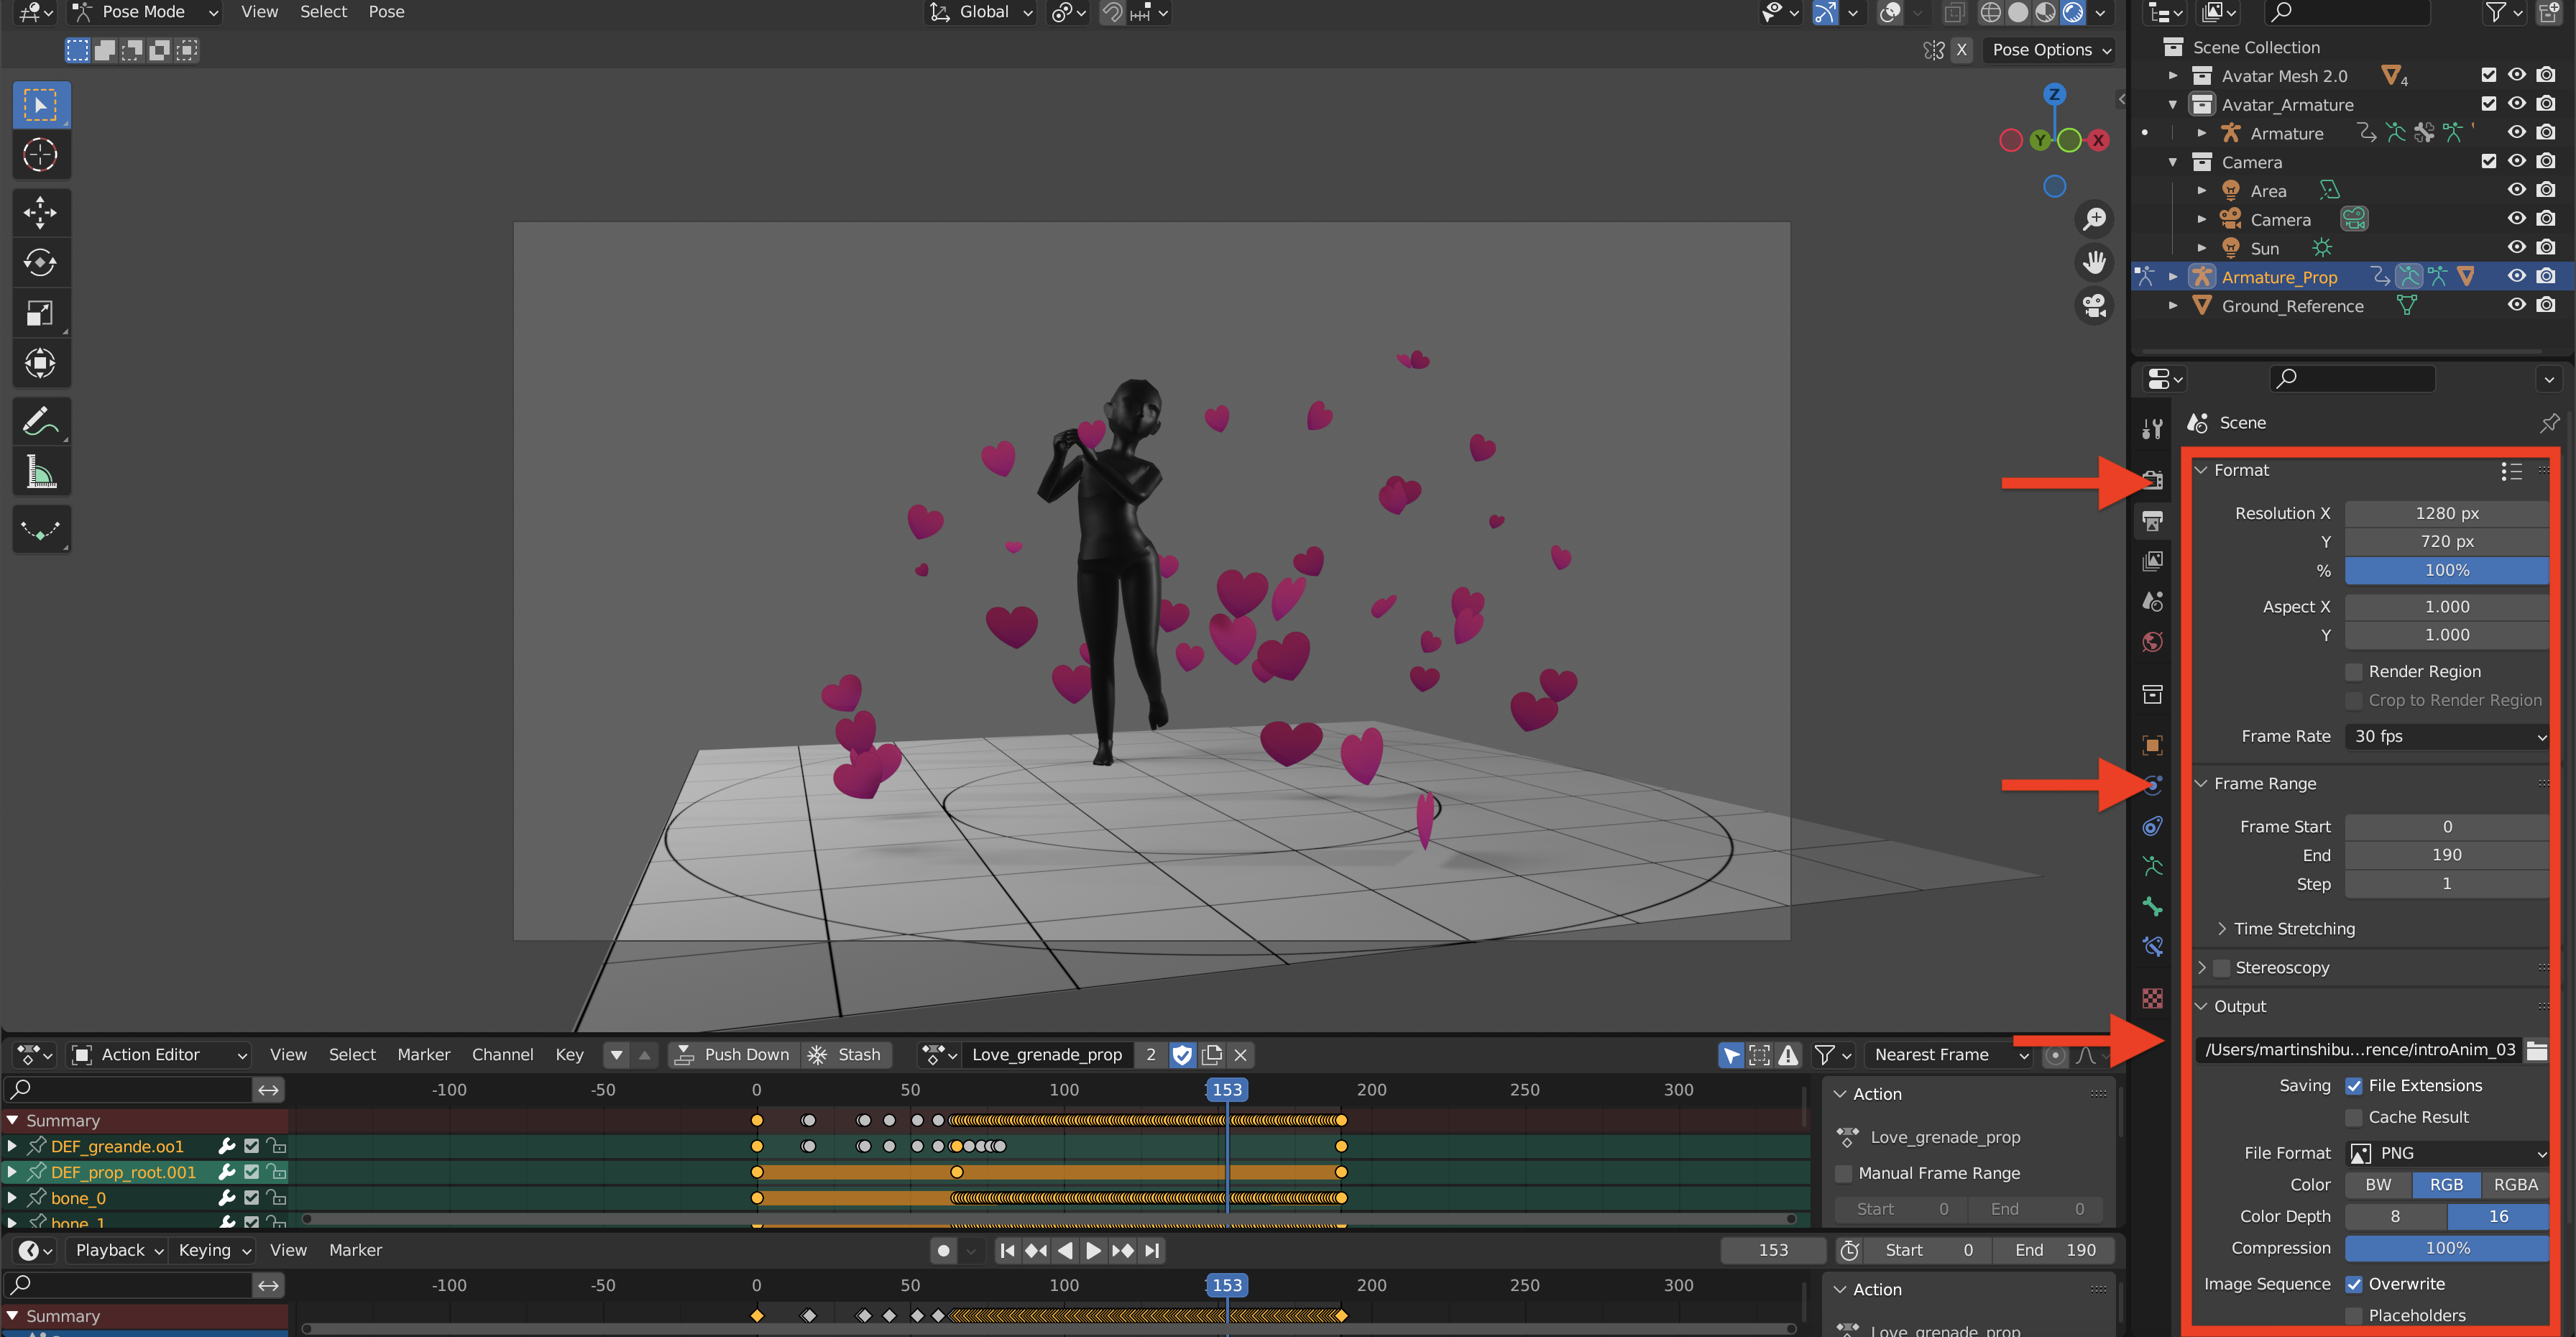
When rendering an emote, it is important to only include the frame range of your emote and not more. Choose an aspect ratio that suits your needs and select the output folder where you want the video or image sequence to be saved.
Hint!
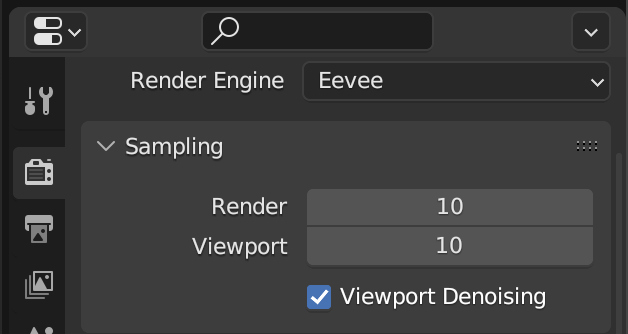
Before rendering make sure you do a low sampling rendering to save time in your render!
Once this step is completed, use your video as a reference to create the corresponding sounds using your preferred sound editing software. Ensure that the video sequence matches the animation’s framerate of 30 frames per second (fps)