Preview your scene
Once you have built a new scene or downloaded a scene example you can preview it locally.
Using the Scene Editor #
Make sure you’ve installed the Creator Hub .
- Open your scene project.
- Click the Preview button on the top-right corner. This will open a new window with the Decentraland Desktop Explorer, running just your scene. There you can move around the scene and interact with interactive items.

Configure different preview options from the dropdown menu next to the Preview button:
- Open Console Window During Preview: Opens a new window with the console output of the scene. This is useful to debug errors in the scene.
- Skip Auth Screen: Skips the account selection screen and automatically logs you in with your currently logged in account. This is disabled by default, enable it if you want to test multiple accounts.
- Landscape Terrain Enabled: Toggles the landscape around the scene. This is enabled by default, disable it to lower the scene’s memory footprint.
Using the CLI #
To preview a scene run the following command on the scene’s main folder:
npm run start -- --explorer-alpha
Any dependencies that are missing are installed and then the CLI opens the scene in a new browser tab automatically. It creates a local web server in your system and points the web browser tab to this local address.
Every time you make changes to the scene, the preview reloads and updates automatically, so there’s no need to run the command again.
📔 Note: Some scenes depend on communicating with an external server to carry out custom logic or store and retrieve data. When previewing one of these scenes, you’ll likely have to also run the server locally on another port. Check the scene’s readme for instructions on how to launch the server as well as the scene.
Parameters of the preview command #
You can add the following flags to the npm run start command to change its behavior:
-- --web3Connects preview to browser wallet to use the associated avatar and account.-- --no-debugDisable the debug panel, that shows scene and performance stats.-- --explorer-alphaRuns the preview in the new Decentraland Desktop client.-- --skip-version-checksAvoids checking if the scene’s SDK framework version matches your CLI version, and launches the preview anyway.-- --portto assign a specific port to run the scene. Otherwise it will use whatever port is available.-- --no-browserto prevent the preview from opening a new browser tab.-- --wor-- --no-watchto not open watch for filesystem changes and avoid hot-reload whenever the scene’s code changes.-- --cor-- --ciTo run the parcel previewer on a remote unix server,
📔 Note: Parameters need to be added with two series of dashes, for example npm run start -- --web3.
Upload a scene to decentraland #
Once you’re happy with your scene, you can upload it and publish it to Decentraland. For this you must own LAND, a Decentraland NAME, or an ETH ENS name, or have permissions given by someone that does. See publishing for instructions on how to do that.
Preview scene size #
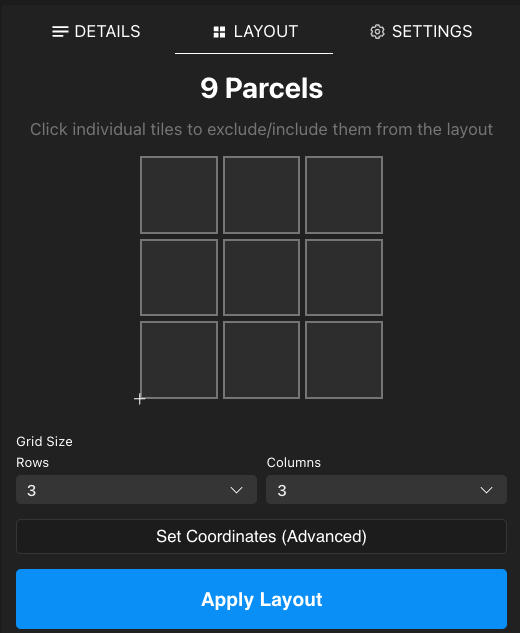
The scene size shown in the preview is based on the scene’s configuration.
Edit this on the second tab of the scene menu in the Scene Editor.

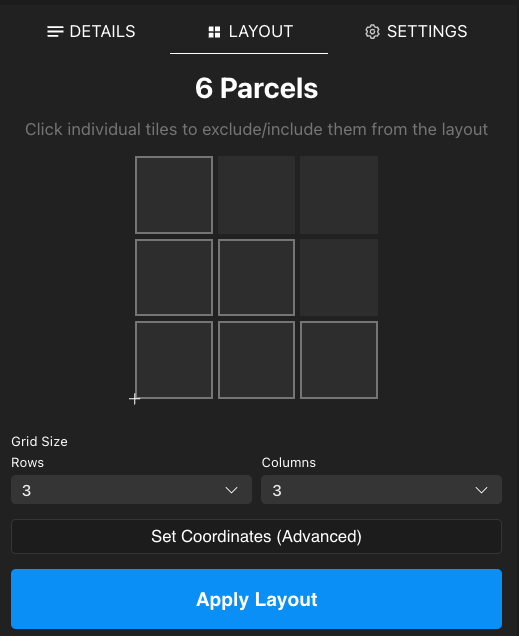
Use the dropdowns and click Apply Layout to change the dimensions of your scene. You can also click each individual parcel to toggle it off from your layout.

Y can also edit the scene.json file to list multiple parcels in the “parcels” field. See set parcels via the command line for more details.
💡 Tip: While running the preview, the parcel coordinates don’t need to match those that your scene will really use, as long as they’re adjacent and are arranged into the same shape. You will have to replace these with the actual coordinates later when you deploy the scene .
View the scene console #
Press the ` key on your keyboard to open the scene console. Here you can see any error messages, and also any text that your scene prints to the console via console.log().
You can also press Shift + ` to open the console even wider, in case you need to view more text.
Test a multiplayer scene locally #
If you launch a scene preview and open it in two (or more) different explorer windows, each open window will be interpreted as a separate player, and a mock communications server will keep these players in sync.
Interact with the scene on one window, then switch to the other to see that the effects of that interaction are also visible there.
Using the Creator Hub, click the Preview button a second time, and that opens a second Decentraland explorer window. You must connect on both windows with different addresses. The same sessions will remain open as the scene reloads.

As an alternative, you can open a second Decentraland explorer window by writing the following into a browser URL:
decentraland://realm=http://127.0.0.1:8000&local-scene=true&debug=true