Custom Items
Define a Custom Item to reuse it easily on any of your scenes, or share it with other scene creators. Custom items can consist of a single entity, or as many entities as you want. Custom items can be variations of existing Smart Items, or entirely custom, with their own tailored models and functionality.
How to Define a Custom Item #
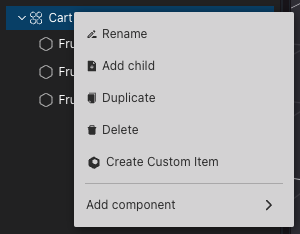
Right-click on an entity on the Entity Tree , or select several entities and then right-click on them. Select Create Custom Item.

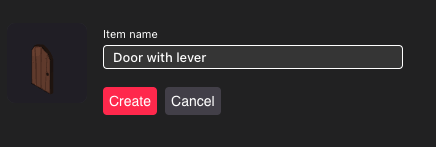
On the lower section of the screen you are then asked to give your new Custom Item a name.

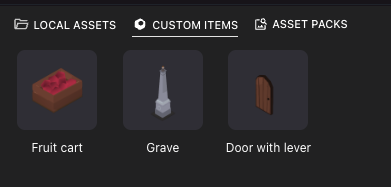
The item is now listed on the Custom Items tab, at the bottom of your screen. This tab is only displayed if at least one Custom Item exists in your workspace.

When defining a custom item, you can select several entities at a same hierarchical level, but not entities from separate parents if they don’t share a common ancestor. Any nested entities are automatically included as part of the custom item, they don’t need to be selected.
The original entities in your scene aren’t affected by the action of defining a Custom Item.
📔 Note: When defining a Custom Item, you take a snapshot of the state of every component on the selected entities (except for the root entity’s position, rotation, and scale). This includes Actions, Triggers, Multiplayer, Visibility, and any other component.
Any smart item actions and triggers will self-reference their own copy. For example, if you define a Custom Item that includes an elevator and buttons, the buttons on each copy of the elevator will control the copy of the elevator that they belong to, not the original copy of the elevator.
Using Custom Items #
Simply drag the item from the Custom Items tab into your scene.
Once added, you’re free to alter any property of a Custom Item, the changes you make only affect that copy of the Custom Item. You can also edit or delete the original items that the Custom Item was defined from, this won’t affect existing or future copies.
Notice that Custom Items are displayed with a different icon on the Entity Tree. At the top of the Item properties menu on the right, you’ll also see a mention of which Custom Item they were created from.
To delete a custom item, right-click on the item on the Custom Items menu and select Delete. This action doesn’t affect any existing copies of the item on your scenes, orphaned Custom Items remain on your scene unchanged. Deleting a Custom Item definition only removes it from the Custom Items tab.
To rename a Custom Item, right click on the Custom Item definition on the Custom Items tab and select Rename.
You can’t modify the definition of a Custom Item that’s already created, you must create a new definition and delete the original.
Sharing Custom Items #
You can share your custom items with other creators, so they can use them on their own scenes.
Custom Items are stored each on a separate folder on your local machine. All Assets used by your Custom Item are also stored in the Custom Item’s folder. This includes any 3D models, images, sounds, and videos referenced by the item.
Open this folder by clicking the folder icon on the top right of the Custom Items tab.
![]()
You can also find the Custom Items folder in the following locations:
- In Windows: User/AppData/Roaming/creator-hub/Custom Items
- In Mac: Users/username/Library/Application Support/creator-hub/Custom Items
📔 Note: The Library folder is hidden in Mac by default. The easiest way to access it is by opening Go > Go to Folder, and Typing application support/creator-hub
To share with someone else, simply navigate with your file explorer of choice and copy the full folder for the item. The person using your Custom Item must then paste it on their own Custom Item path on their machine. This folder contains everything needed to use your Custom Item.
📔 Note: If after pasting a Custom Item folder, you can’t see it in your Custom Items tab, you may need to click the refresh button on the top right of the Custom Items tab.