
Combine with code
The Creator Hub plus custom code is a very powerful combination for creating content. You can use the canvas to visually position items intuitively, and then write code that interacts with these items with complete freedom. You can even place a smart item, that has its own default behavior, and write code that reacts to when the item is activated.
For example, you can take advantage of an existing lever smart item, that already comes with its sounds and animations and states, and write code that detects when the lever is pulled to run your own custom logic.
Editing code #
You must install a code editor on your machine to edit the code of your scene. The recommended options are:
-
 Visual Studio Code
: This is the recommended option for experienced developers.
Visual Studio Code
: This is the recommended option for experienced developers. -
 Cursor AI
: This is a powerful code editor that is integrated with AI. It lets you pick different AI models to help you write code, all of them are free. This is a good option for developers who are new to Decentraland or TypeScript, or if you want to save time writing code.
Cursor AI
: This is a powerful code editor that is integrated with AI. It lets you pick different AI models to help you write code, all of them are free. This is a good option for developers who are new to Decentraland or TypeScript, or if you want to save time writing code.
📔 Note: If you are on macOS, make sure the code editor app is in the Applications directory.
Once installed, you may need to select your Code Editor in the settings of the Creator Hub. To do this,
-
Open the wheel icon in the top-right of the screen

-
Under Code editor of choice, select your Code Editor. You may find your editor listed in the dropdown, or you may need to select Chose from your device to find it.
Open a scene’s code #
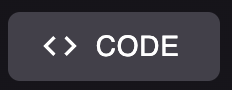
Once you installed a code editor on your machine, and selected it in the settings of the Creator Hub, you can click the < > CODE button to open it on your scene project.
This opens a separate window with the code editor. On the left margin you can navigate the files and folder structure of your project.
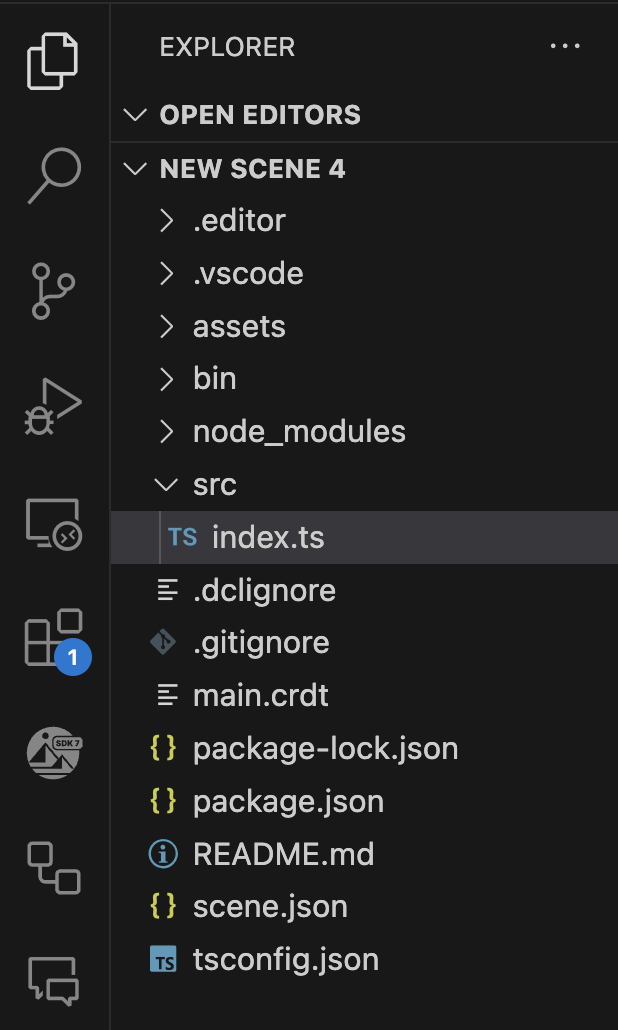
Add your custom code in the index.ts file under /src, inside the main() function. You can otherwise add custom code outside that function or create new .ts files inside the /src folder, but these must be somehow referenced inside the main() function of index.ts.
📔 Note: If you have VS Code or Cursor installed but the CODE button doesn’t open it, it may be that VS Code is not properly configured on your machine to open via the command line. In most cases, this is handled as part of the default installation, but in case it’s not, see these instructions from VS to enable VS Code from the command line.
If you have a preview window open running your scene, whenever you change the code in your files and save, the scene reloads automatically with your changes.
Using AI with Cursor #
If you are using Cursor, you can use the AI assistant to help you write code. To do this,
-
Open the Cursor AI assistant by clicking the AI button in the top-right of the screen
-
There you can prompt the AI assistant to help you write code. You can also select a model to use from the dropdown.
Decentraland provides a context folder for the AI assistant to help you write code, this context folder is located at /dclcontext in your scene project. The AI assistant will know to search this context whenever generating code, to get familiar with the Decentraland SDK.
This folder is updated with the latest context files every time your scene’s dependencies are updated. You can also force update this folder by running the following:
npx sdk-commands get-context-files
💡 Tip: You can also add your own context files to this folder to help the AI assistant understand your scene and project. If you do, make sure to add them to a new file in that folder, as the default files are overwritten when SDK updates happen.
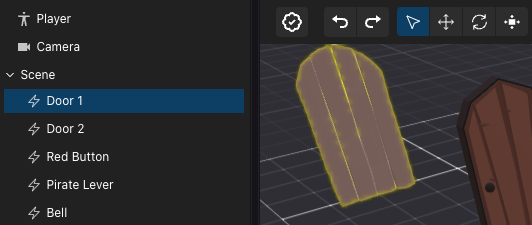
Reference an item #
When using the Creator Hub and adding entities by dragging them into the canvas, each entity has a unique name. Use the
engine.getEntityOrNullByName() function to reference one of these entities from your code.
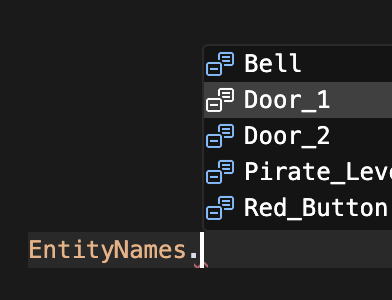
Use the EntityNames enum to easily access the names of the entities that you added via the Creator Hub, or write the name as a string as written on the scene’s entity tree view in the Scene Editor.
import { EntityNames } from '../assets/scene/entity-names'

function main() {

	// Use the EntityNames enum
	const door1 = engine.getEntityOrNullByName(EntityNames.Door_1)

	// Write the name as a string
	const door2 = engine.getEntityOrNullByName('Door 2')

	// Ensure both doors exsist in the scene
	(if door1 && door2){
		//
	}

}
The EntityNames enum contains the full list of entities added by the Creator Hub and is updated immediately as soon as you make any changes.
If you import EntityNames. into your code, your IDE will present you with a dropdown including all the names of the entities available.
You can also use the engine.getEntityByName<EntityNames>() function, passing <EntityNames> as a
TypeScript generic
, to validate that an entity by that name really exists in your scene. If the referenced entity is renamed on the Creator Hub, this method will warn you with an error. As the output of this function can’t be null, you can avoid checking that the entity exists.
import { EntityNames } from '../assets/scene/entity-names'

function main() {

	const door1 = engine.getEntityByName<EntityNames>(EntityNames.Door_1)

	// Ne need to check for null
	console.log(Transform.get(door1).position.x)

}
📔 Note: Make sure you only useengine.getEntityOrNullByName()andengine.getEntityByName()inside themain()function, in functions that run aftermain(), or in a system. If used outside one of those contexts, the entities created in the Scene Editor may not yet be instanced.
Once you fetched a reference to an entity with any of the above methods, you’re free to perform any action with it, like add or remove components, modify values of existing components, or even remove the entity from the engine.
import { EntityNames } from '../assets/scene/entity-names'

function main() {
	// fetch entity
	const door = engine.getEntityOrNullByName(EntityNames.Door_3)
	// verify that the entity exists
	if (door) {
		// add a pointer events callback
		pointerEventsSystem.onPointerDown(
			{
				entity: door,
				opts: { button: InputAction.IA_PRIMARY, hoverText: 'Open' },
			},
			function () {
				// open door
			}
		)
	}
}
All the entities added via the Scene Editor have a Name component, you can also iterate over all of them like this:
function main() {
	for (const [entity, name] of engine.getEntitiesWith(Name)) {
		console.log({ entity, name })
	}
}
Fetch by Tag #
You can also fetch entities by their tags. Tags are a way to group entities together, and are useful to identify entities that have the same purpose or behavior.
Add Tags to an entity via the Tags section at the top of the item’s properties panel. You can pick from the generic tags like Tag Group 1 through to Tag Group 4, or create your own with a more specific name.

💡 Tip: A single entity can have multiple tags assigned to it.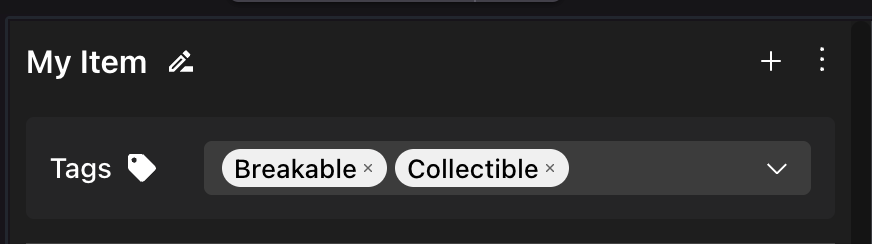
You can then fetch all entities that have a specific tag by using the engine.getEntitiesByTag() function. This is ideal for when you want to iterate over a group of entities that have the same purpose or behavior.
import { engine } from '@dcl/sdk/ecs'

export function main() {
	const taggedEntities = engine.getEntitiesByTag('myTag')

	for (const entity of taggedEntities) {
      // Do something with each entity
    }
}
You can also add or remove tags to an entity from your code. This is useful if you want to change tags based on some logic, or to spawn entities dynamically that have specific tags.
import { Tags } from '@dcl/sdk/ecs'

Tags.remove(entity, tagName);
Tags.add(entity, tagName);
Fetch all the children of an item #
You can also write a script that lets you deal with all of the items that are grouped as children of a certain item on the entity tree on the left of the screen.
The following script iterates over all entities that have a Transform and a parent, and checks if the name of the parent matches the name some-parent in this case. You can then apply any custom logic you want to those specific entities.
import { engine, Entity, Transform, Name } from '@dcl/sdk/ecs'
import { EntityNames } from '../assets/scene/entity-names'

function main() {
	// get parent entity
	const parent = engine.getEntityByName<EntityNames>(EntityNames.ParentEntity)

	// obtain all children entities of that parent
	const childEntities = getChildren(parent)

	// loop over each child
	for(const entity of childEntities){
		// handle entity
	}

}

// reusable function to obtain all the child entities of a parent
function getChildren(parent: Entity): Entity[] {
	const childEntities: Entity[] = []
	for (const [entity, transform] of engine.getEntitiesWith(Transform)) {
		if (transform.parent === parent) {
			childEntities.push(entity)
		}
	}
	return childEntities
}
Smart item triggers #
You can detect a smart item’s Trigger events, and respond to these with custom code. For example, you could place a button smart item, and activate custom code when the button is clicked.
Use getTriggerEvents to fetch an object that can handle trigger events on from a particular smart item, then use the .on() function of the returned object to subscribe a callback function. This callback function gets executed every time that the trigger event happens.
For example, if a scene has a button with the following generic On Click event, you can write the code below to run custom code whenever the button is activated.
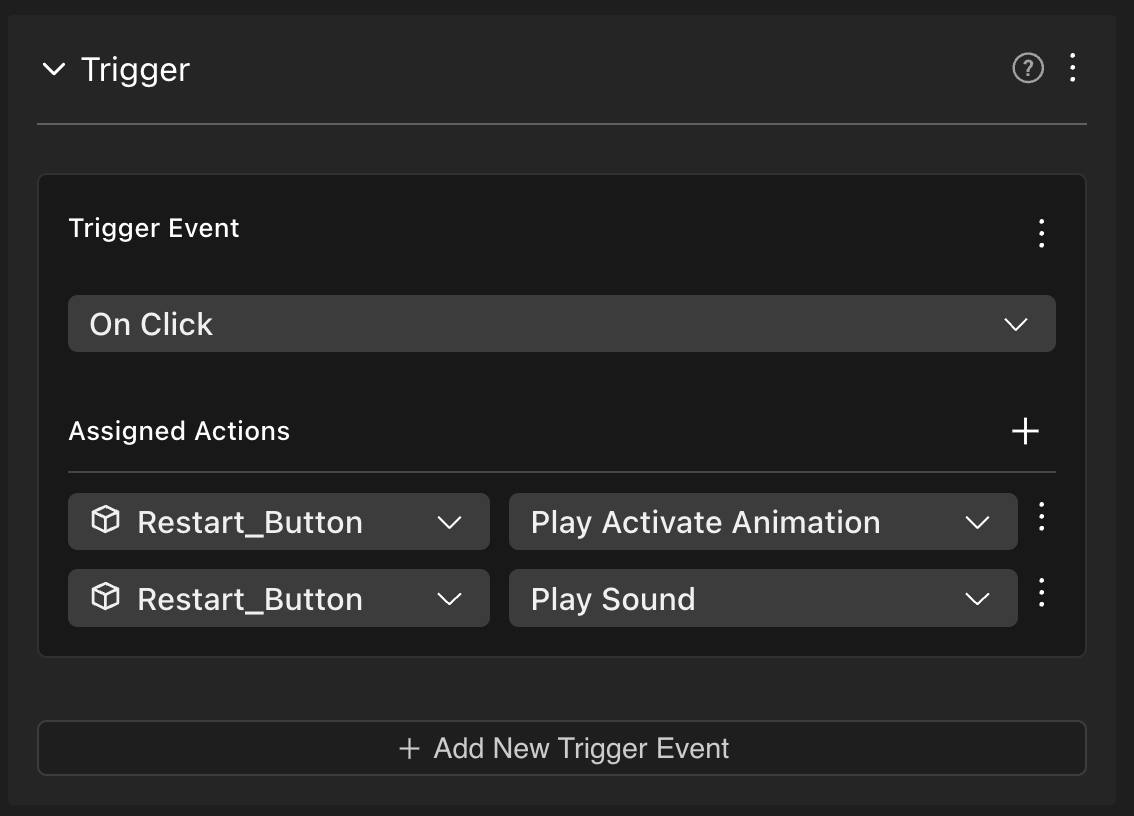
import { engine } from '@dcl/sdk/ecs'
import { getTriggerEvents, getActionEvents } from '@dcl/asset-packs/dist/events'
import { TriggerType } from '@dcl/asset-packs'
import { EntityNames } from '../assets/scene/entity-names'

function main() {
	const restart = engine.getEntityOrNullByName(EntityNames.Restart_Button)
	if (restart) {
		const restart_event = getTriggerEvents(restart)
		restart_event.on(TriggerType.ON_CLICK, () => {
			// restartGame()
		})
	}
}
You can similarly subscribe to any other type of trigger events, like ON_PLAYER_ENTERS_AREA, ON_SPAWN, ON_TWEEN_END, etc.
Smart item actions #
You can detect the activation of a smart item’s Actions, and respond to these with custom code. For example, you could place a door smart item, and run custom code whenever the Open action gets called.
Use getActionEvents to fetch an object for handling the actions of a specific smart item. Then you can use the .on() function of the returned object to subscribe a callback function. This callback function gets executed every time that the action happens, regardless of if the action was activated by another smart item, or even by custom code of your own.
For example, if a scene has a door with the following default Open action, you can write the code below to run custom code whenever the door is opened.
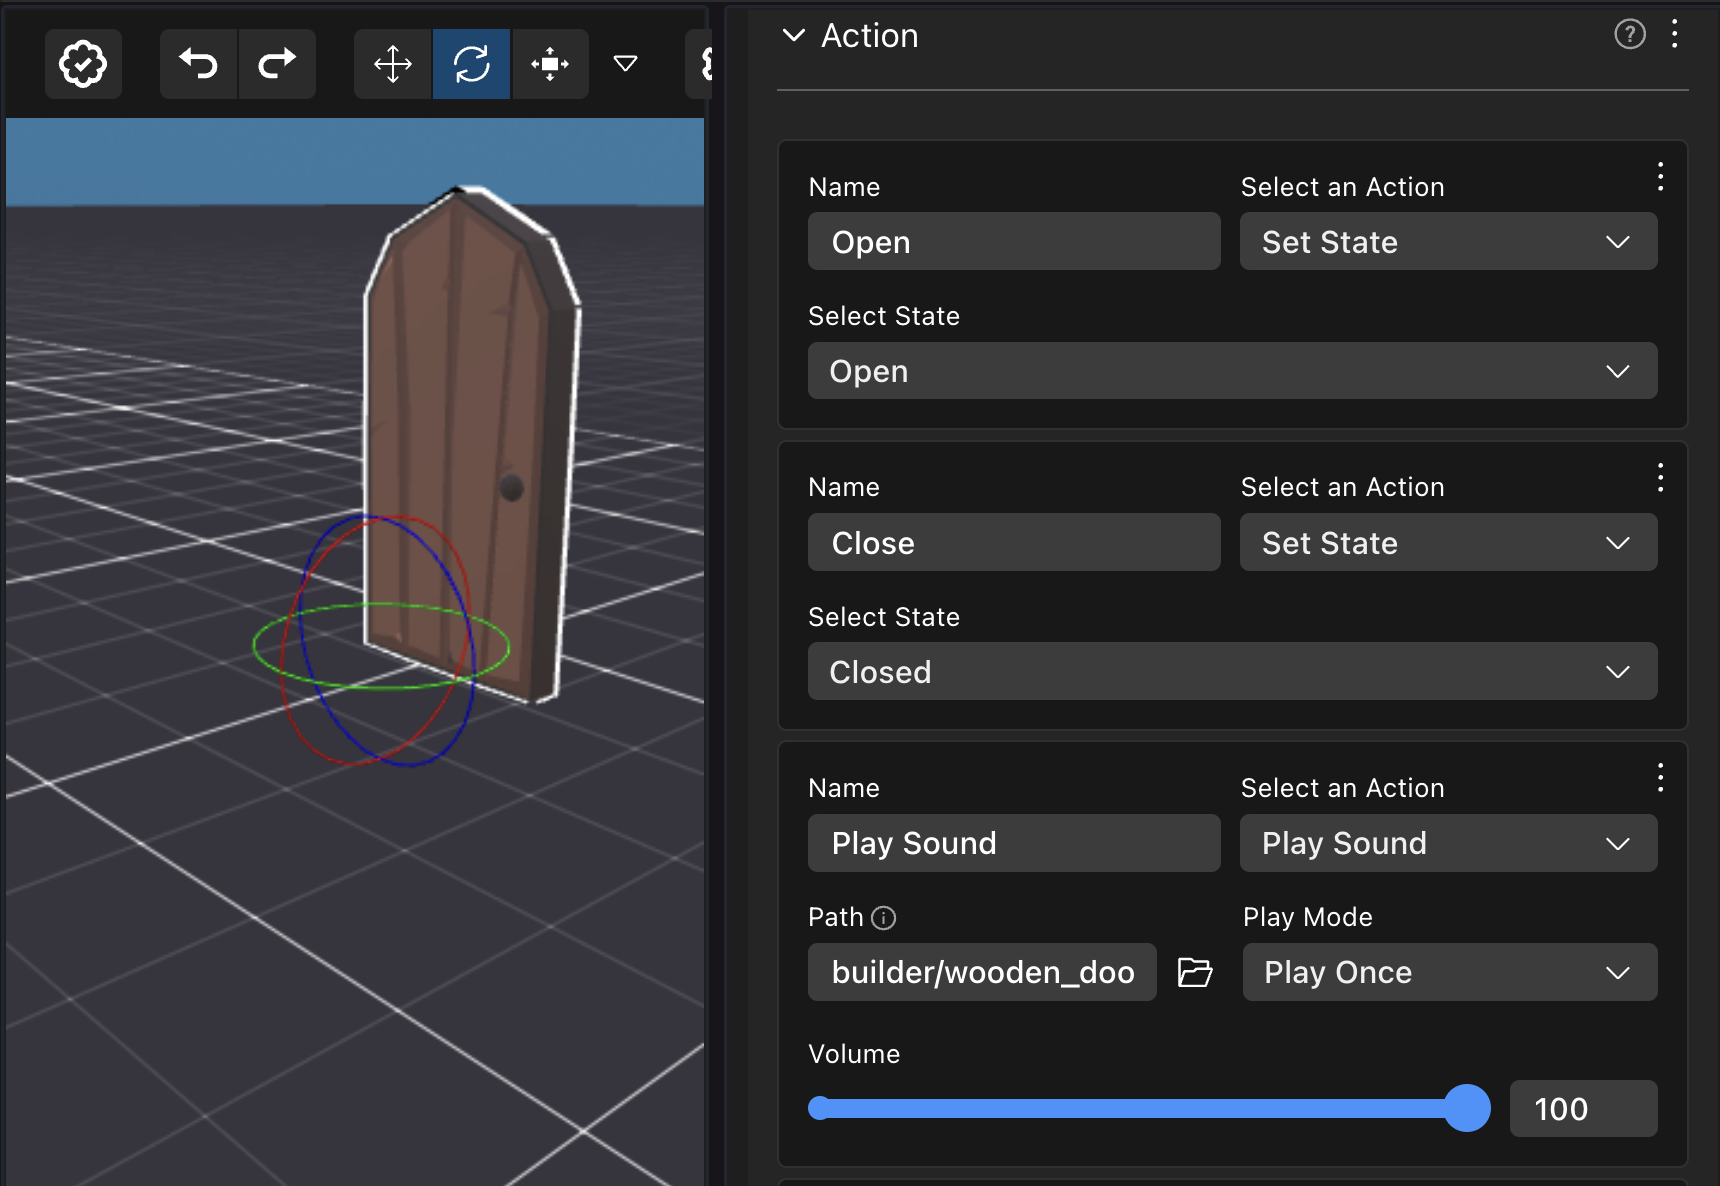
import { engine } from '@dcl/sdk/ecs'
import { getTriggerEvents, getActionEvents } from '@dcl/asset-packs/dist/events'
import { TriggerType } from '@dcl/asset-packs'
import { EntityNames } from '../assets/scene/entity-names'

function main() {
	const door = engine.getEntityOrNullByName(EntityNames.Wooden_Door)
	if (door) {
		// detect actions
		const actions = getActionEvents(door)
		actions.on('Open', () => {
			console.log('Door opened!!')
			// custom code
		})

		// detect triggers
		const triggers = getTriggerEvents(door)
		triggers.on(TriggerType.ON_CLICK, () => {
			console.log('Door clicked!!')
			// custom code
		})
	}
}
You can also emit action events from your code, this allows you to take advantage of actions that are already defined inside the smart item’s Action component. The following snippet calls the “Open” action on a door smart item whenever a button smart item is triggered.
import { engine } from '@dcl/sdk/ecs'
import { getTriggerEvents, getActionEvents } from '@dcl/asset-packs/dist/events'
import { TriggerType } from '@dcl/asset-packs'
import { EntityNames } from '../assets/scene/entity-names'

function main() {
	const button = engine.getEntityOrNullByName(EntityNames.Red_Button)
	const door = engine.getEntityOrNullByName(EntityNames.Wooden_Door)
	if (button && door) {
		// references to actions and triggers
		const buttonTriggers = getTriggerEvents(button)
		const doorActions = getActionEvents(door)

		// detect triggers on button
		buttonTriggers.on(TriggerType.ON_INPUT_ACTION, () => {
			// open door
			doorActions.emit('Open', {})
		})
	}
}
💡 Tip: If you’re not trying to do something very complicated, instead of writing code you can also create a custom smart item to handle the actions you want to perform. See Making any item smart .
Other smart item components #
Smart items can include special components that are part of the asset-packs library, like States or Counter. These components are not part of the Decentraland SDK, but they can be fetched via the getComponents() function from the library. You can then read or write values to these components from your scene’s code, to have an even tighter integration between smart item behavior and code.
The example below reads and logs the value of a State component of a chest smart item, whenever the chest’s actions are triggered.
import { engine } from '@dcl/sdk/ecs'
import { getComponents } from '@dcl/asset-packs'
import { getTriggerEvents } from '@dcl/asset-packs/dist/events'
import { TriggerType } from '@dcl/asset-packs'
import { EntityNames } from '../assets/scene/entity-names'


export function main() {

    const chest = engine.getEntityByName<EntityNames>(EntityNames.chest)

    if (chest) {

        const chestTriggers = getTriggerEvents(chest)

        chestTriggers.on(TriggerType.ON_INPUT_ACTION, () => {
            const { States } = getComponents(engine)
            let state = States.getMutableOrNull(chest)?.currentValue
            console.log( "chest new state ", state)
        })
    }
}
Version control #
We recommend that you create a repo for your project on GitHub, and use it to keep track of your project’s versions and to work collaboratively with others.
If you’re not familiar with how to do this, see Quickstart for repositories , or use the GitHub desktop appliacation for an simpler UI-based flow.
📔 Note: Upload the entire project folder to a GitHub repo, but make sure the/node-modulesor/binfolders and thepackage-lock.jsonfile are all included in the.gitignorefile, to avoid syncing them. This should be the case if you configure the repo to be of typenode. These files are all auto-generated, and the content may differ for different machines.
See also #
-
SDK Quick start : follow this mini tutorial for a quick crash course.
-
Development workflow : read this to understand scene creation from end to end.
-
Examples : dive right into working example scenes.