Publish a Scene
Before you begin #
Make sure of the following:
-
Your scene complies with all of the scene limitations . Most of these are validated each time you run a preview of your scene.
-
You have a Metamask account, with your LAND parcels or NAME assigned to it.
-
You own the necessary amount of adjacent LAND parcels or a Decentraland NAME. Otherwise you can purchase LAND in the Market or a NAME in the Builder .
📔 Note: Multi-parcel scenes can only be deployed to adjacent parcels.
Check your scene’s details , make sure you provide an appealing name, description, thumbnail, categories, etc.
❗Warning: When planning live events, make sure you don’t make last minute changes to the scene right before the event.
After each publish, an internal process optimizes all 3D models before they can be rendered. This takes around 15 minutes. If you visit the scene before this is done, the scene may appear broken. This process runs even if the 3D models were all previously published.
Publish your scene #
To publish your scene:
-
Open your scene in the Scene Editor and click Publish. This opens a browser tab, showing details.
-
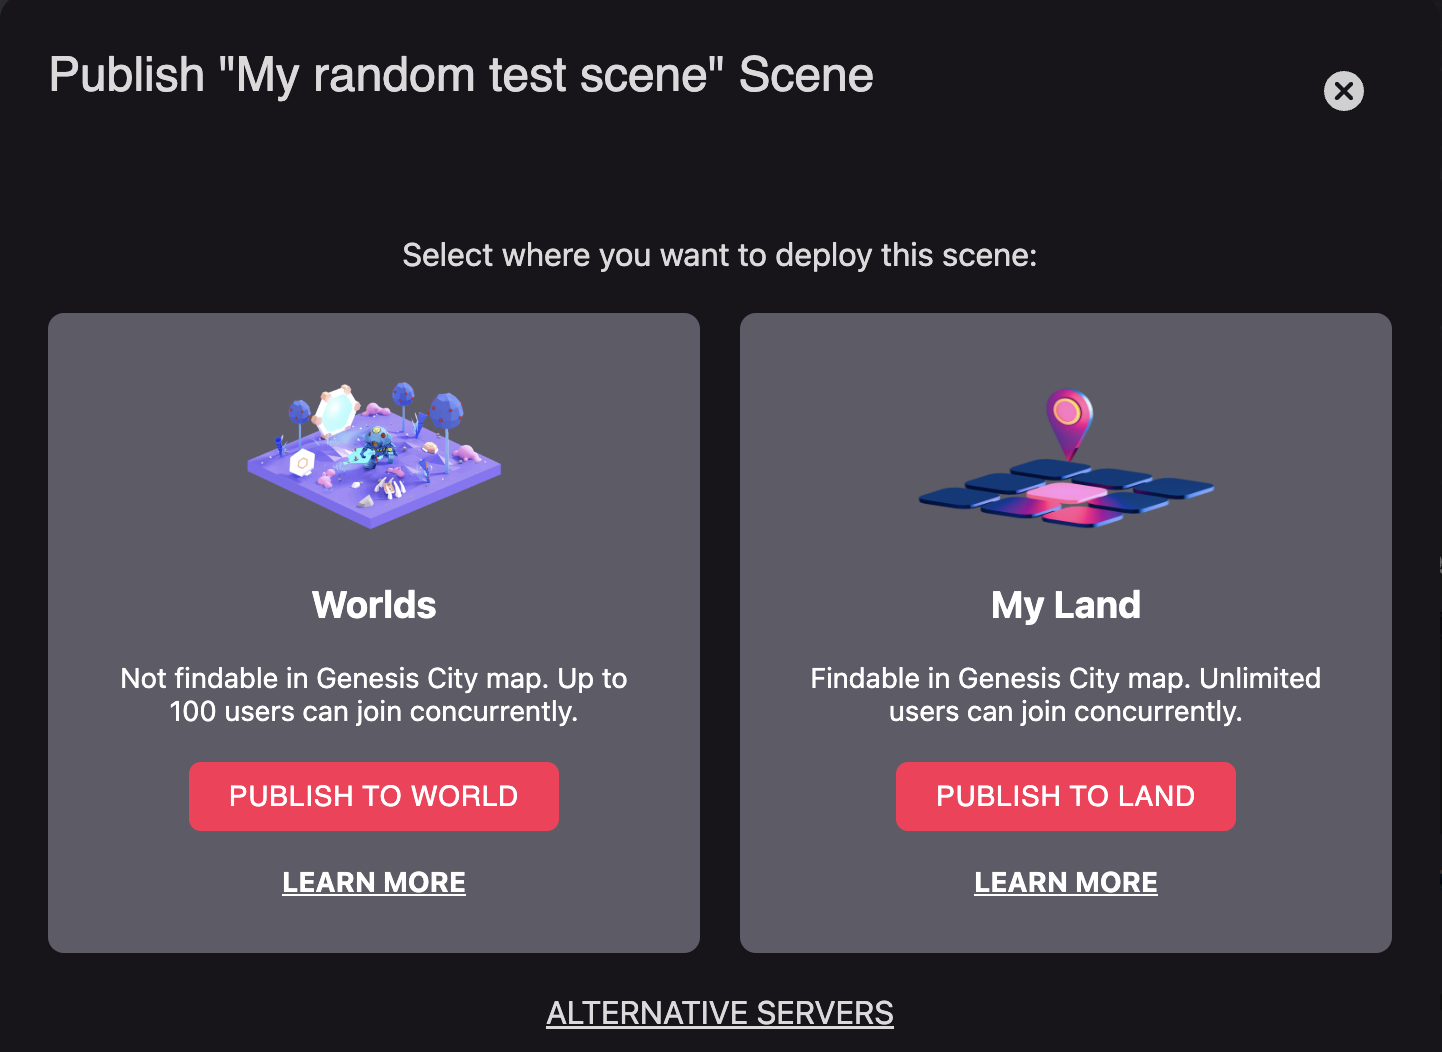
Select if you want to publish to LAND or to a WORLD. See Kinds of projects to better understand the different options.

-
If publishing to LAND, select the location on the map. You’ll see your eligible parcels marked in red. If publishing to a WORLD, you’ll see your eligible NAMEs in a dropdown.
💡 Tip: If you don’t see your parcels or NAMEs, make sure you’re connected to the Creator Hub using the right user account. Otherwise exit the project and click the user settings icon on the top-right corner, then select Sign Out and sign back in again.
-
The next screen shows all of the files you’re currently uploading and their sizes, confirm the operation.
-
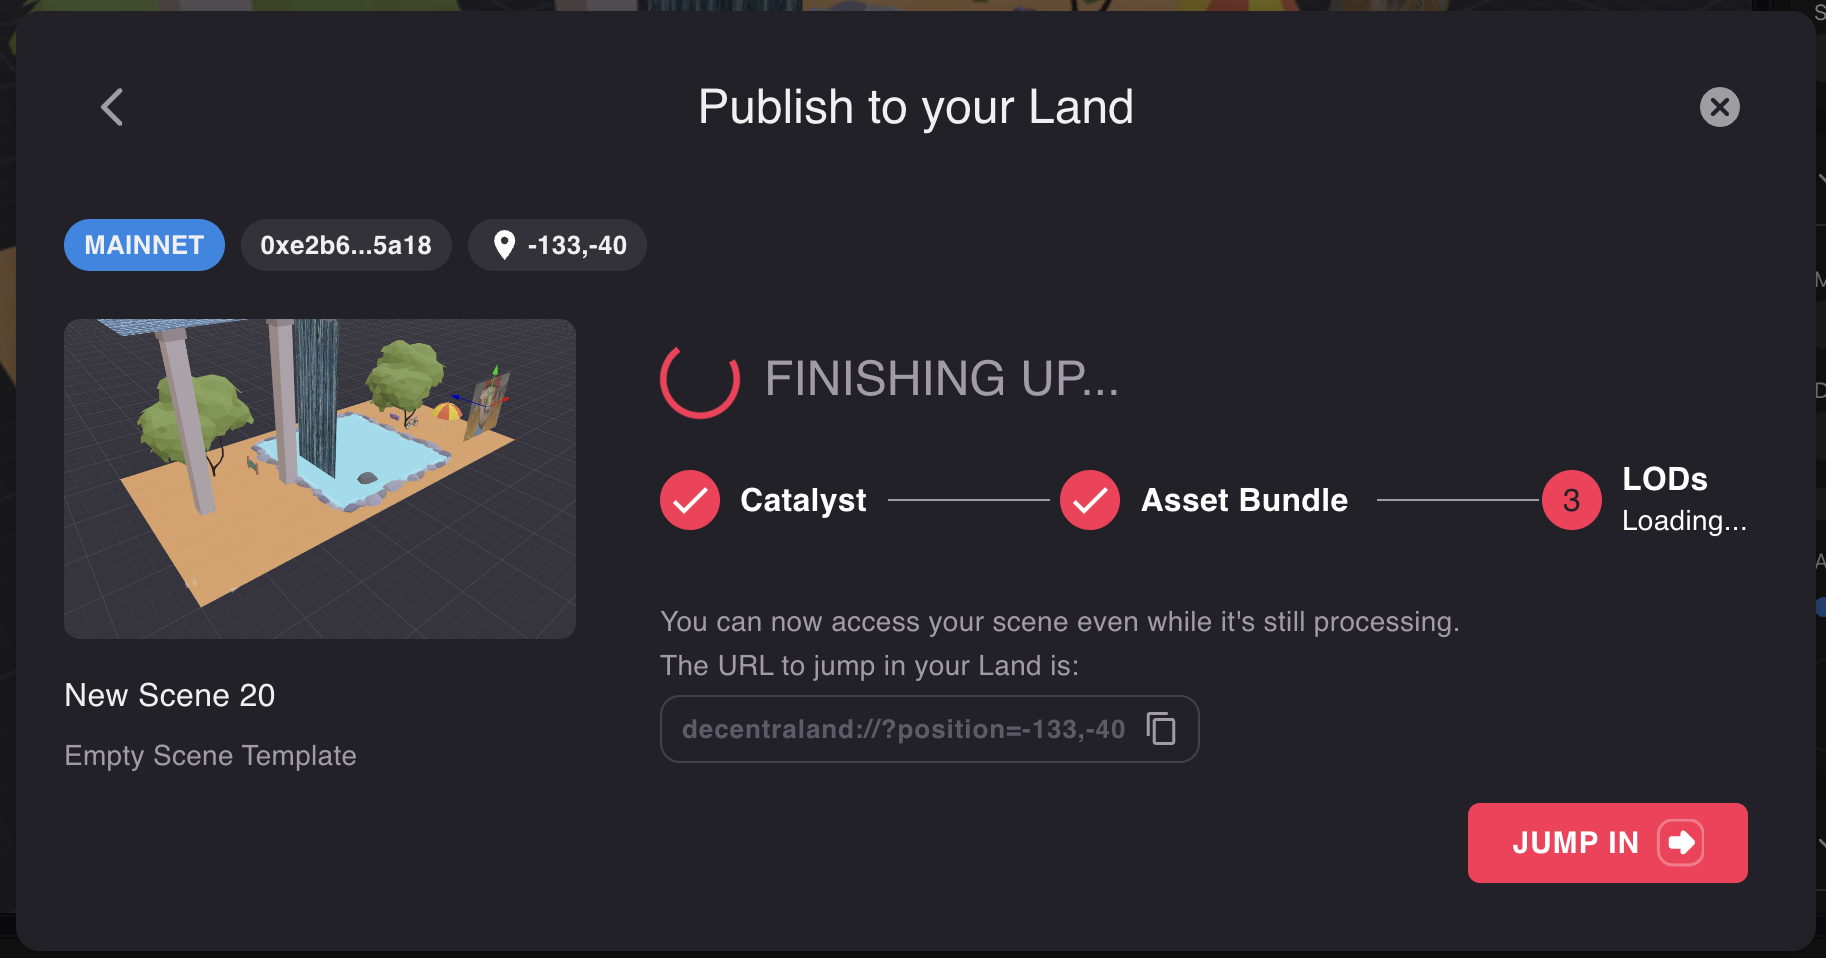
The publication process will then start. Stages 1 and 2 are necessary for your scene to be playable, once done a Jump In button appears. You don’t need to wait for Stage 3 to try out your scene.

📔 Note: The three stages of the deployment involve:
- 1. Uploading: Uploading the files to the servers.
- 2. Converting: The scene’s 3D models are compressed into Asset Bundles for faster rendering. This may take 15 minutes or less. It may delay more for very large scenes, or if the servers are currently busy converting other scenes.
- 3, Optimizing: Low Level of Detail (LOD) versions of your assets are generated. These are only used to render your scene from far away, meaning you don’t need to wait for this to finish to jump in and test your scene.
Publish from a hardware wallet #
Instead of storing your LAND tokens in a Metamask account, you may find it more secure to store them in a hardware wallet device, such as a Ledger or a Trezor , that’s physically plugged in to your computer.
If you’re using one of these devices, you can link the hardware wallet to Metamask to enable signing messages, while keeping the tokens more secure. See this article from Metamask for instructions to connect your account.
Once your hardware wallet can be used via Metamask, you can deploy following the same steps as if your tokens were on a Metamask account.
Scene overwriting #
When a new scene is deployed, it overwrites older content that existed on the parcels it occupies.
If a scene that takes up multiple parcels is only partially overwritten by another, all of its parcels are either overwritten or erased.
Suppose you deployed your scene A over two parcels [100, 100] and [100, 101]. Then you sell parcel [100, 101] to a user who owns adjacent land and that deploys a large scene (B) to several parcels, including [100, 101].
Your scene A can’t be partially rendered in just one parcel, so [100, 100] won’t display any content. You must build a new version of scene A that only takes up one parcel and deploy it to only parcel [100, 100].
Alternative servers #
The test server #
You can deploy content to the test catalyst server to run full tests with multiple users, the sourrounding scenes, and an environment that is identical to production. The test server is identical to all other catalyst servers, the difference is that the content that is deployed to this server isn’t propagated to the others. Content deployed to other servers on the other hand does get propagated to this server, so surrounding scenes should look as they will in production.
📔 Note: To deploy to parcels in the test server, you must have the same permissions required to deploy to those parcels in the main network.
Players are never directed to this server, the only way to access it is to explicitly provide a URL parameter to connect to it.
If you’re working in a confidential project that you don’t want to unveil until launch, note that the test server is relatively hidden from players, but anyone explicitly using the test server’s URL could potentially run into it.
Custom servers #
You can deploy content to a custom server that doesn’t belong to the official DAO-maintained network of catalyst servers. To do this, you don’t need to own any LAND or NAME tokens, as you can configure the server to use any validation logic you prefer to control who can deploy where. Custom servers can chose to have content from the official servers, that you can overwrite, or start from a blank slate and publish entirely new content.
See How to run your own Catalyst Node for more info on what you can do with your own server and how to set it up.
📔 Note: Players will need to manually type in a URL to access your custom server. Certain validations from services like the rewards server or the quests server might fail in these contexts, as often these services require that the request comes from an official server.
Players are never directed to this server, the only way to access it is to explicitly type in the URL to connect to it.
Verify deployment success #
Once you deployed your scene, these changes will take a few minutes to be propagated throughout the various content servers in the network. If you enter Decentraland right after deploying, you might still see the previous version of your content, or that 3D models are missing entirely.
After you sign to authorize the deployment of your scene, the signing dapp will start displaying confirmations that the new version of your content has been propagated throughout all of the servers in the network,
You’ll see a list of each of the servers that make up Decentraland’s content network. For each server, it specifies the timestamp of the last uploaded change on that parcel. Each one of these servers refers to a different realm, you can reference how these server names map to realm names in the catalyst monitor screen .