Scene Editor Essentials
The Scene Editor’s UI is divided into a few different sections, with different purposes.
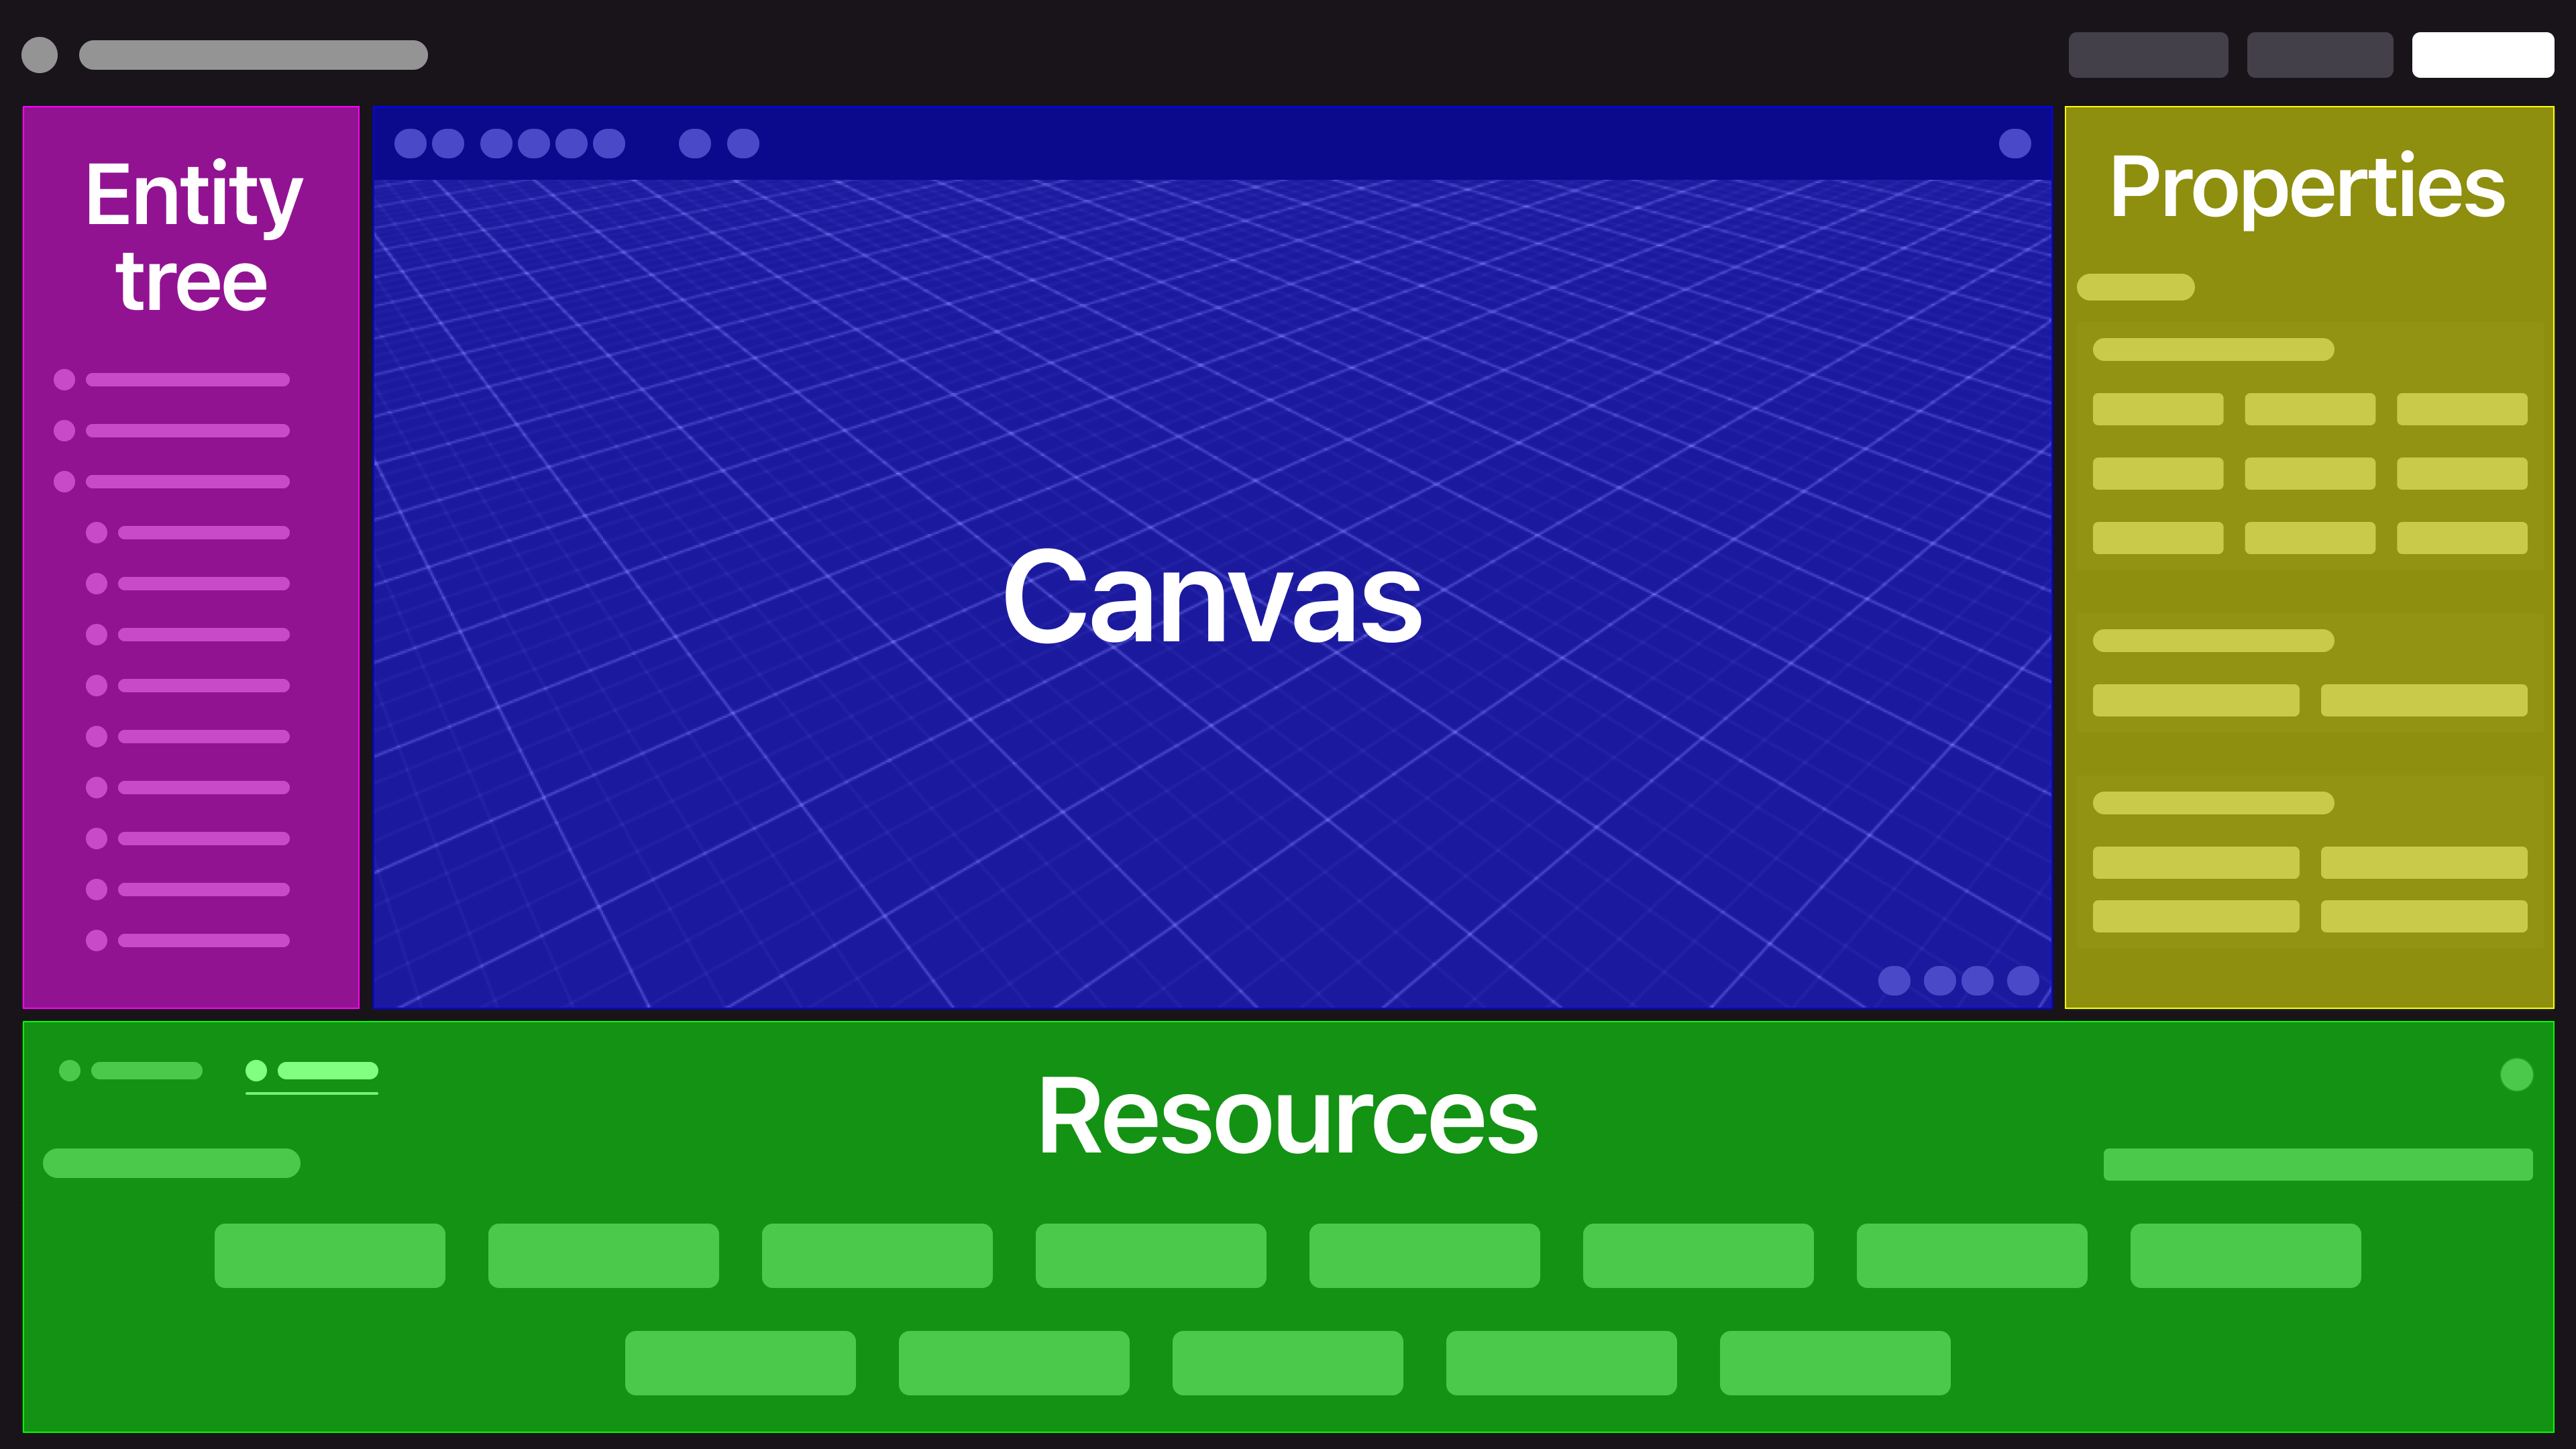
- Canvas: Manipulate items directly and see what your scene looks like.
- Entity tree: Contains a list of all items in the scene and their hierarchy.
- Properties: Displays details about the currently selected item.
- Resources: Shows resources that are available to use.
Moving around #
To find your way around the Scene Editor:
- Use A and W to move close or far. You can also use the mouse scroll wheel, or + and - keys
- Use S and D to move sideways.
- Use Q and E to move up and down.
- Click the Right Mouse Button and drag to rotate the camera.
- Press Space bar to reset the camera back to the default position
- Use Left Mouse Button to click and select items and to move them around.
Set the Ground #
The scene’s ground can use various different textures. You can find these in the different themed asset packs in the item menu.
Items of type Ground have a paint bucket icon on them. If you drag one of these into your scene, it covers all of your scene’s ground with copies of this item.

You can also add a single copy of the item by holding Shift while you drag the ground onto the scene.
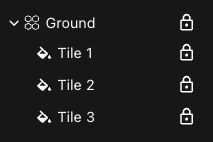
The collection of ground items appear in the entity tree inside a folder. Each one of them is locked, to prevent accidentally selecting. Untoggle the items to move or edit them.
Add items #
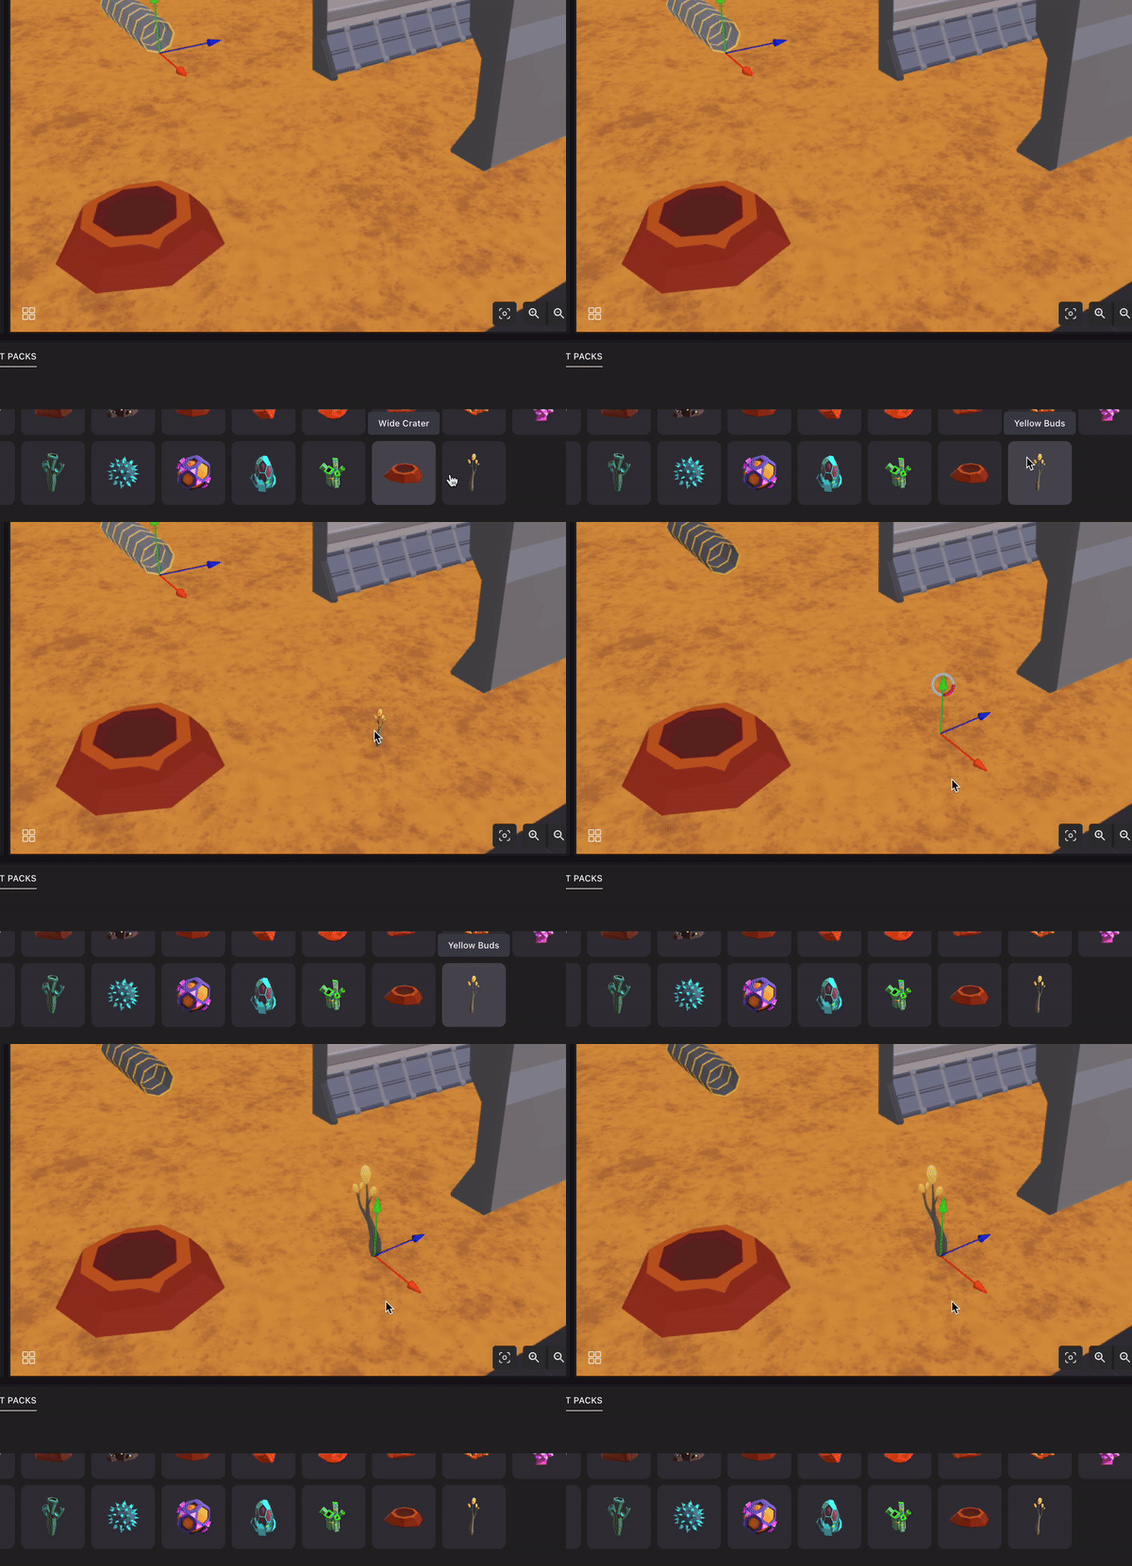
Navigate the themed asset pack categories on the menu on the bottom to find different items that you can place on your scene.

You can also use the search box. Note that when you’re inside an asset pack, the search only looks in that asset pack.
To place an item, click and drag it in from the asset pack menu into a location on your scene in the canvas. You’ll
💡 Tip: Your changes are saved automatically whenever you add, move, or edit properties of any of the items in your scene.
To duplicate an item, select it and hit Ctrl + C and then Ctrl + V. You can also find the item on the entity tree to right-click and select the option Duplicate. The new item will be perfectly overlapping the original.
To delete an item from the scene, select it press the Delete key.
See Import items for adding your own custom 3D models from disk.
📔 Note: Once you dragged a 3D model into your scene, it’s downloaded into your project folder and remains there even if you delete it. These unused models can increase the size of your scene.
Open the Local Assets tab to delete any unused models.
Position items #
Click with the Left Mouse Button and drag a selected item to move it freely around the scene at ground level.
You can also use the tools on the top menu:

-
Move tool: Click and drag each arrow to move the item in a single axis at a time. With this tool you can also position things above the ground level.
-
Rotate tool: Click and drag each of the hoops around the item to rotate the item on one axis at a time.
-
Scale tool: Click on the center of the gizmo and drag in or out to enlarge. This tool also lets you stretch an item in a single axis to change its proportions, to do this click on one of the axis of the gizmo and drag.
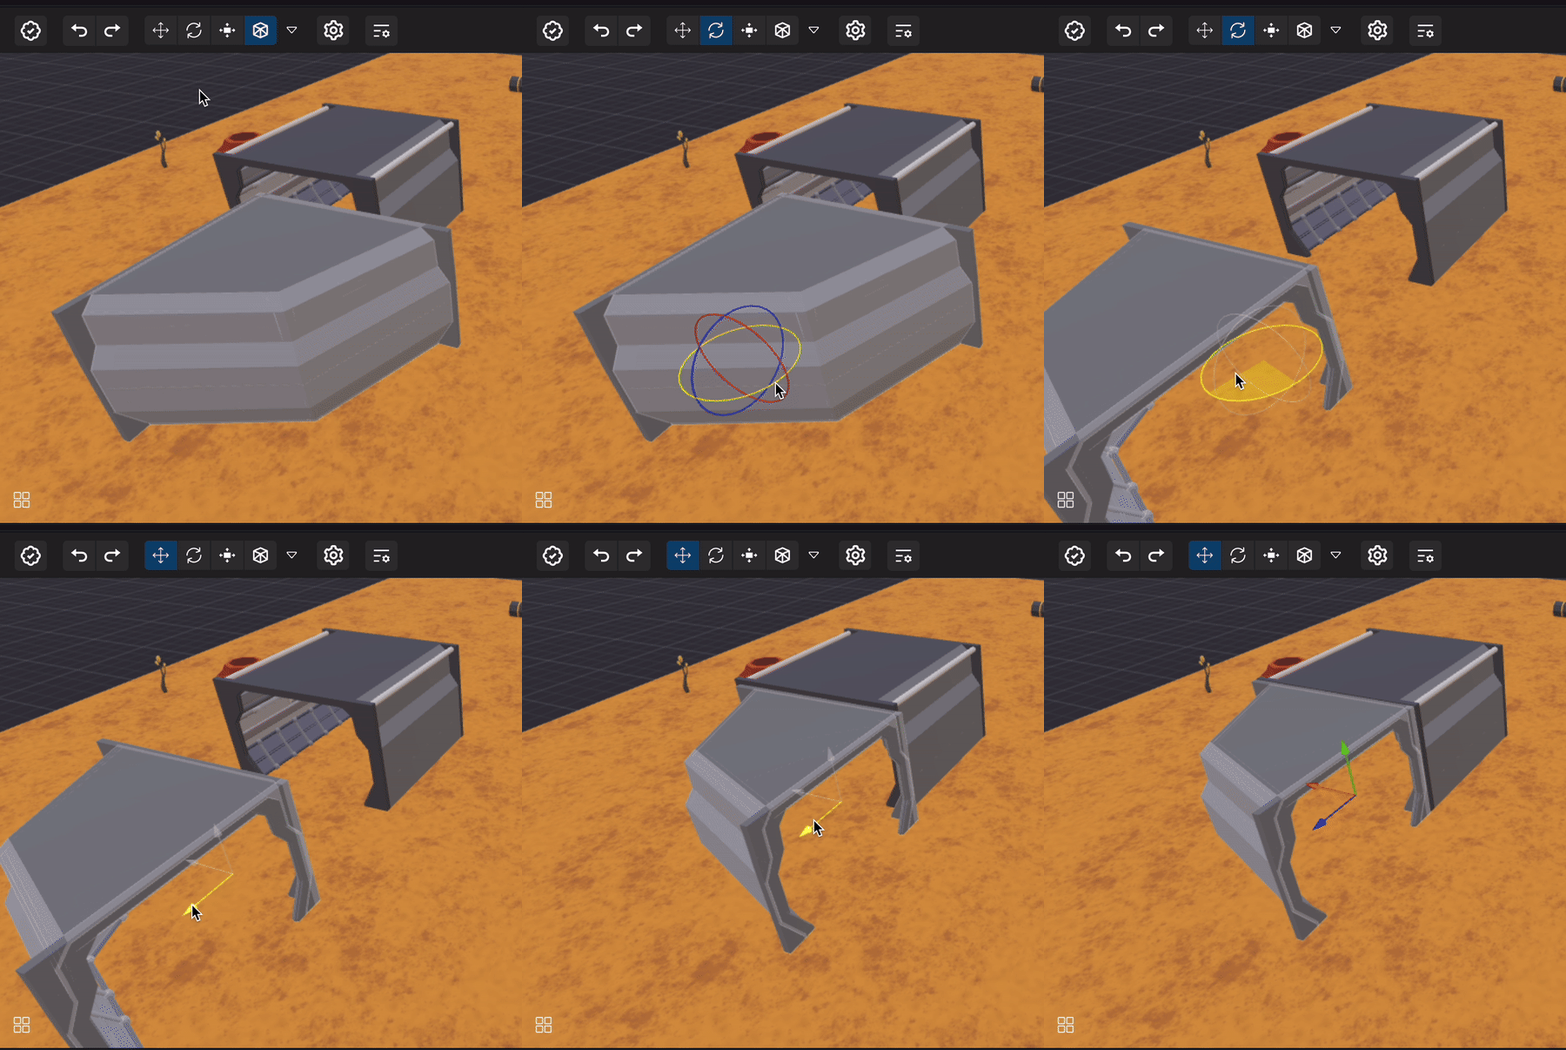
To have greater precision while moving, rotating or scaling an item, press and hold the Shift key while making adjustments. This will avoid snapping to the grid.
To change the movement granularity and other settings, click the downward arrow on the right of the tools. The following settings are available:
- Snap: Toggle the grid on or off. When off, the behavior of Shift is inverted: you don’t follow the grid by default, you do if you hold Shift.
- Position: The size of movement increments in meters when Snap is on.
- Rotation: The size of rotation increments in degree when Snap is on.
- Scale: The size of scale increments when Snap is on.
- Align to world: Refers to the axis of movement and rotation. They can either always align with the world, or align with the object’s orientation. If aligned to world, the axis don’t change with the object’s orientation.
- Position: Does the Move tool axis align with the direction that the object faces? Or with the world?
- Rotation: Do the Rotate tool axis align with the object’s orientation, or with the world?
To select multiple items at the same time, press and hold the Control key while selecting them. You can then move, rotate, scale, duplicate or delete all of them in a single action.
Smart items #
Smart items are special items that come with built-in interactive behaviors. See Smart items for more details.

The entity tree #
On the left margin, you’ll see a tree structure with all of the entities in the scene. This includes all of the items you add, as well as a few default entities.
💡 Tip: Everything in a scene is an Entity, they are the basic building blocks of scenes. Items are Entities that have at least a position and a visible shape.
Instead of selecting an item by clicking on it from the 3D view of the scne, you can select it from the tree view. Click the right-mouse button on an entity to reveal more options: you can rename, delete, or duplicate, also create a child entity, or add a component to the entity.
Entities follow a hierarchy that can have as many levels as you want. Establish a parent-child relationship between two entities by dragging one item onto another on the tree. A child entity inherits the position of the parent, so when the parent moves, it carries any children with it. This can be practical while building a scene, for example you can set glasses and plates as children of a table, and then move the table without needing to readjust anything else. It can also be important when interacting with the scene, for items to move together.
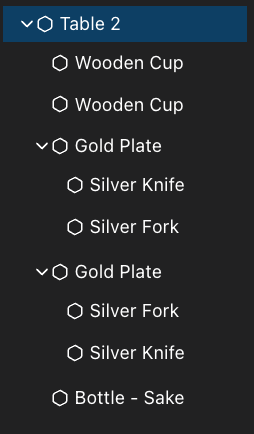
You can also minimize or expand the children of an entity to keep the view simple, this action has no effect on the scene.
Special entities #
The scene includes a couple of special entities that you can see in the entity tree.
- Scene: This refers to the root entity, everything you add in the scene is a child of this entity. You can open it to view scene settings .
- Player: The player’s avatar. You can add special components to this entity that can change gameplay mechanics. You can also drag other entities to be children of the avatar. If an entity is a child of the avatar, its position will be fixed to the player. Use this for example to add a floating marker over the player’s head, that follows the player around.
- Camera: The player’s camera. You can drag other entities to be children of the camera. If an entity is a child of the camera, its position will be fixed on screen. Use this for example to display a gun in a shooter game, that is always in view even if the player points up or down.
Lock or hide items #
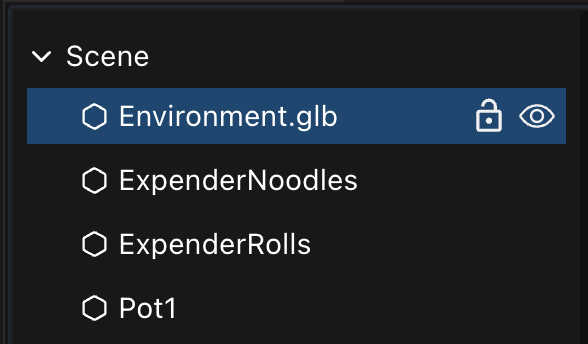
You might find it handy to sometimes lock an item, to prevent accidentally selecting and moving it. This is especially useful for background items, like the ground, or a building. To lock an item, look for it on the entity tree on the left, hover over it, and select the lock icon. You can toggle this behavior on and off via that same icon.
You might also want to hide an item that could obstruct your view while placing others. This is especially useful to hide the roof or a building, while working on the interiors. Hidden items are only hidden in the Scene Editor’s canvas window, not to players entering the scene. To hide an item, look for it on the entity tree on the left, hover over it, and select the eye icon. You can toggle this behavior on and off via that same icon.
Properties panel #
Select an item by clicking on it on the canvas or the entity tree. You’ll then see its components displayed on the properties panel, on the right of the screen. Different items have different components that each display specific settings.
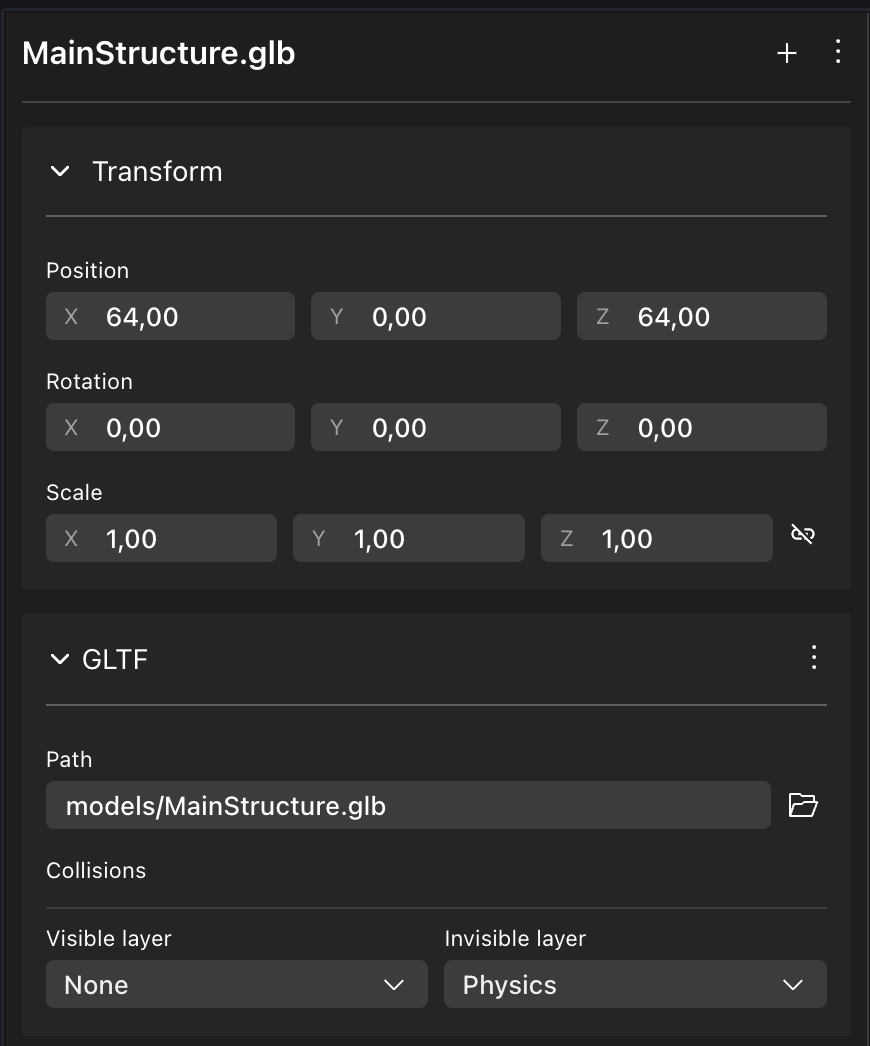
Most non-interactive items have the following components:
- Transform: Sets position, rotation, and scale of the item.
- GLTF: What 3D model to load.
Smart items can include other components.
See Components to learn more.
Scene limitations #
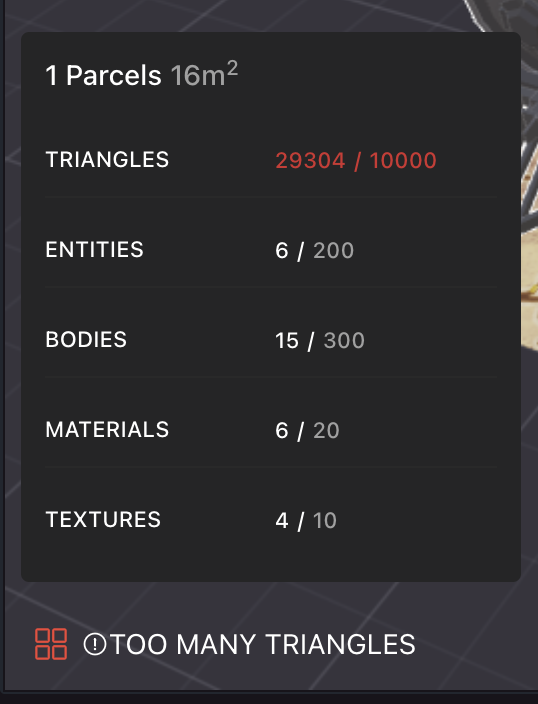
Decentraland scenes need to follow certain limitations, to be able to run them one next to another. There is a maximum number of materials, textures, triangles, etc, that is proportional to the number of parcels in the scene. See scene limitations for more details.
If the content in your scene exceeds any of these limits, the Scene Editor will notify this on the bottom-left corner.

You can expand this menu to view details.
💡 Tip: If you’re building a Decentraland World, you can always increase the scene size to increase your limits.
The content in a Decentraland scene must also avoid spilling onto neighbor parcels. If any part of the models in your scene extend beyond the limits, when you open the scene preview you will see these parts cut off. The Scene Editor will mark the entire model in red, but you should only really worry about the parts of the model that extend beyond the scene limits.
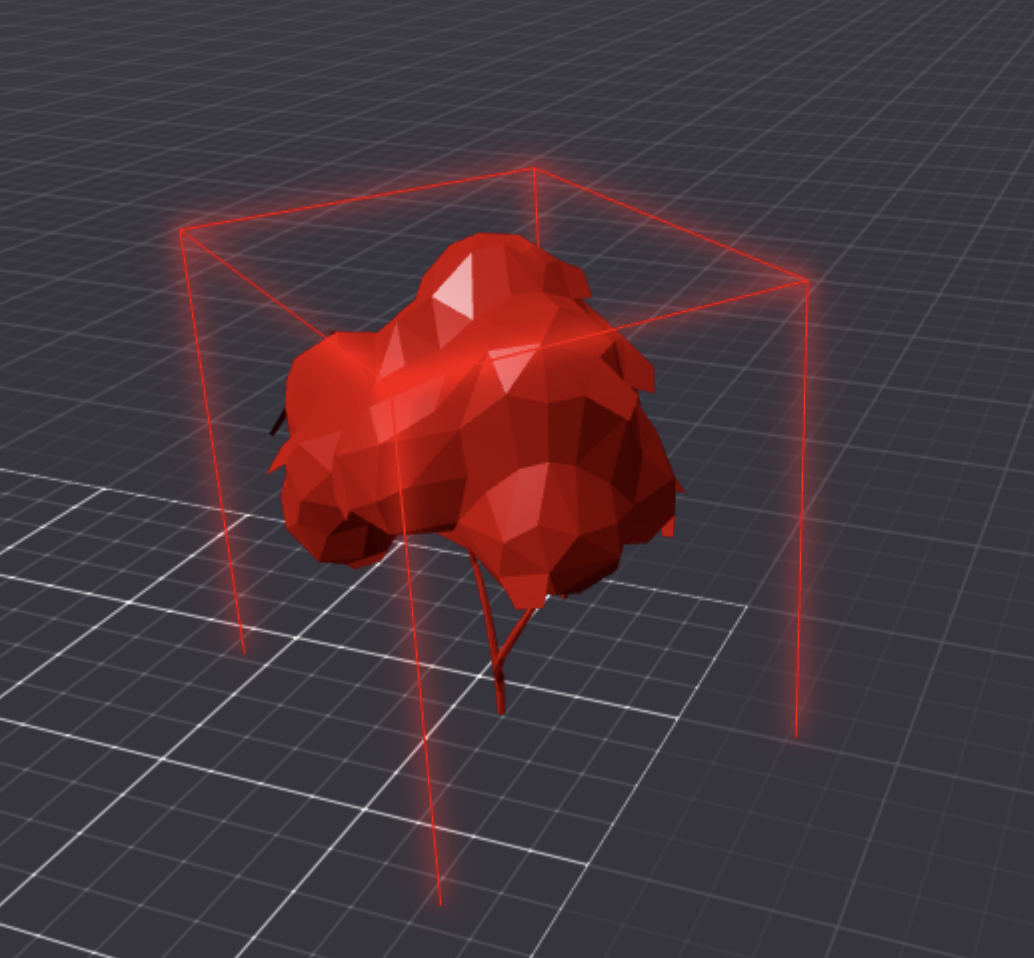
💡 Tip: If the models you want to display don’t fit, you may want to increase the size of your scene. See scene size to enlarge your scene.
Even if the whole geometry of the 3D model fits in your scene, a model might be marked in red if the model’s Bounding Box extends beyond the area. If this is the case, you can ignore the warnings, as the entire model will be displayed correctly. Learn more about Bounding Boxes .
Scene settings #
Click the *Pencil icon** on the top-right of the screen. This opens a series of scene-level properties to edit.
Here you can configure multiple properties including title and thumbnail, scene size, scene category and age rating, player spawn locations, and feature toggles.
See Scene Settings .
See also #
- See Smart items for how to add simple interactivity to your scene.
- See Combine with code for how to edit the code of your scene.
- See Publish scene for how to publish your scene to Decentraland.