States and conditions
Conditional logic #
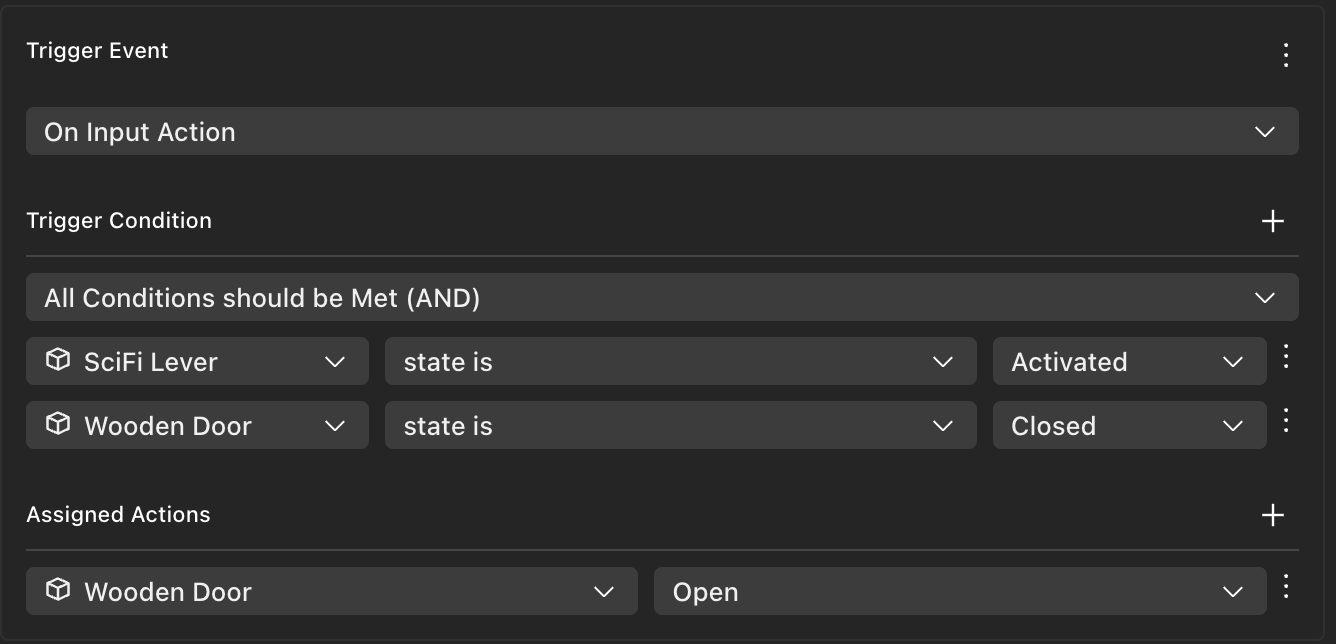
Add conditions on a trigger, so that the action only occurs if those conditions are met. For example, clicking on a door only activates the “Open” action if it wasn’t already open.
To add a condition, click the three dots icon next to Trigger event and select Add Trigger Condition.

A single trigger can include multiple conditions. Click the + icon to add more conditions. When more than one condition exist, you can select one of these options:
- All Conditions should be met (AND): The trigger only happens if every one of the conditions is true.
- Any Condition can be met (OR) The trigger happens if at least one of the conditions is true.

States #
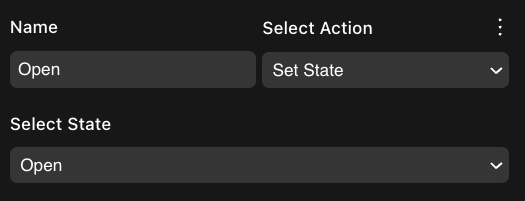
The States component is included on several smart items. It lists possible states that the smart item can be in. At any given time, the smart item is in one of these states. For example, a door can be Open or Closed. The Open action sets the state to Open, the Close action sets the state to Closed.
You can do the following things with states:
- Use a condition on a trigger to check the state of an entity. In that way the action is only carried out if a specific state is active.

- Change a state via the Set State action.

- React to changes in state via the On State Change trigger event.
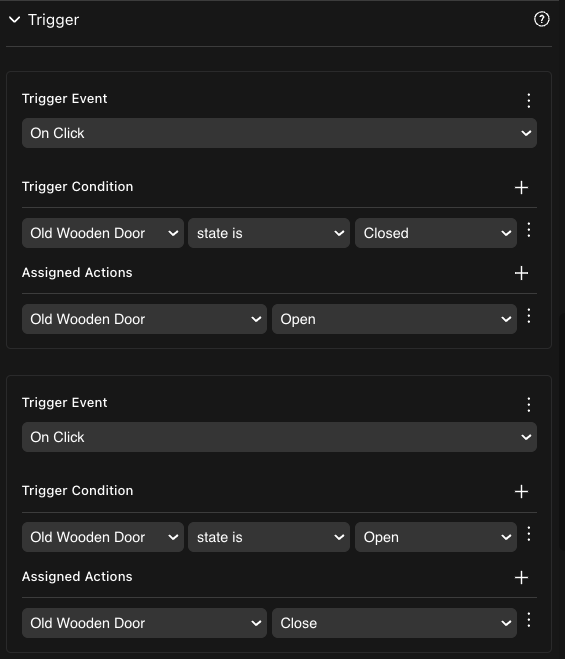
To toggle between two actions, define two triggers, each with a condition that checks a state. For example, doors have one trigger that activates the Open action, with a condition that first checks that the door’s state is Closed, and another trigger that activates the Close action, with a condition that checks that the door’s state is Open. Only one of the two is activated each time the player clicks on the door.

You can add as many states as you want to a smart item. Just click the Add New State button to add another one to the list.

One of the states is selected as the default, the item will always start in this state when the scene runs. You can assign a different state to be the default by clicking the three dots next to another one of the states and selecting Set as Default.
💡 Tip: Keep interactions between items simple. For example, avoid scenarios like having a button that opens a door by triggering three actions: play the door’s animation, play the door’s sound and change the door’s state. Instead, make the button change the door’s state. Then use an On State Change trigger so that the door itself handles playing the animation and sound whenever the state changes.
Counter #
Use the Counter component to keep track of a number, which can change as the player performs actions in the scene. You can use the values of the counter in conditional logic.
When an entity has a Counter component, you can run the following actions on it:
- Increment Counter: Increment the value of the counter by 1.
- Decrease Counter: Decrease the value of the counter by 1.
- Set Counter: Set the value of the counter to a specific number, for example to set it back to 0.
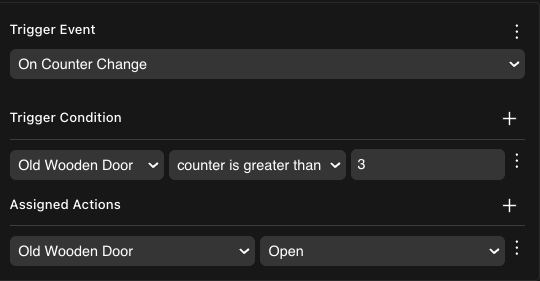
Use the On Counter Change trigger to perform an action every time the counter’s value changes. Add a condition to this trigger so that it only activates after passing a certain threshold.

On a condition, you can check if the value of the counter is
- Greater than a given value
- Lower than a given value
- Equal to a given value
💡 Tip: To check for greater or equal, you can add two conditions to the trigger event, using the AND option.
To make an action occur only once when passing a threshold, and not repeat on every increment after that, combine the counter with a State component. Set the State to “Done” whenever you reach the desired value, and add a condition to check this state on the trigger event.