Web Editor
The Web Editor is a simple visual tool that lets you create and publish Decentraland scenes without the need to install anything.
To access the web editor simply visit the builder page and go to scenes section.
📔 Note: The Creator Hub is the best alternative for creating Decentraland scenes for all skill levels. It allows you to combine the easy drag-and-drop interface with the ability to customize further with code.
See About the Scene Editor .
Create scene #
To create a scene, go to scenes section in the builder and press Create scene button. You will be able to create a scene from scratch or use any of the available templates.
Scenes in Decentraland occupy one or several adjacent LAND parcels. Each LAND parcel measures 16x16 meters.
To build something to deploy to LAND parcels you own, make sure the shape of the scene matches the shape of where you want it deployed.
📔 Note: The scene creation flow currently only supports rectangular-shaped scenes.
Moving around #
To find your way around the web editor:
- Use A and W to move close or far. You can also use the mouse scroll wheel, or + and - keys
- Use S and D to move sideways.
- Click the mouse and drag to rotate. You can click either with the Right or the Left button. It’s recommended to use the Right button, since with the Left you might accidentally select an item.
- Press Space bar to reset the camera back to the default position
Add items #
Navigate the themed asset pack categories on the menu on the bottom to find different items that you can place on your scene. There’s a great variety!
You can also use the search box. Note that when you’re inside an asset pack, the search only looks in that asset pack.
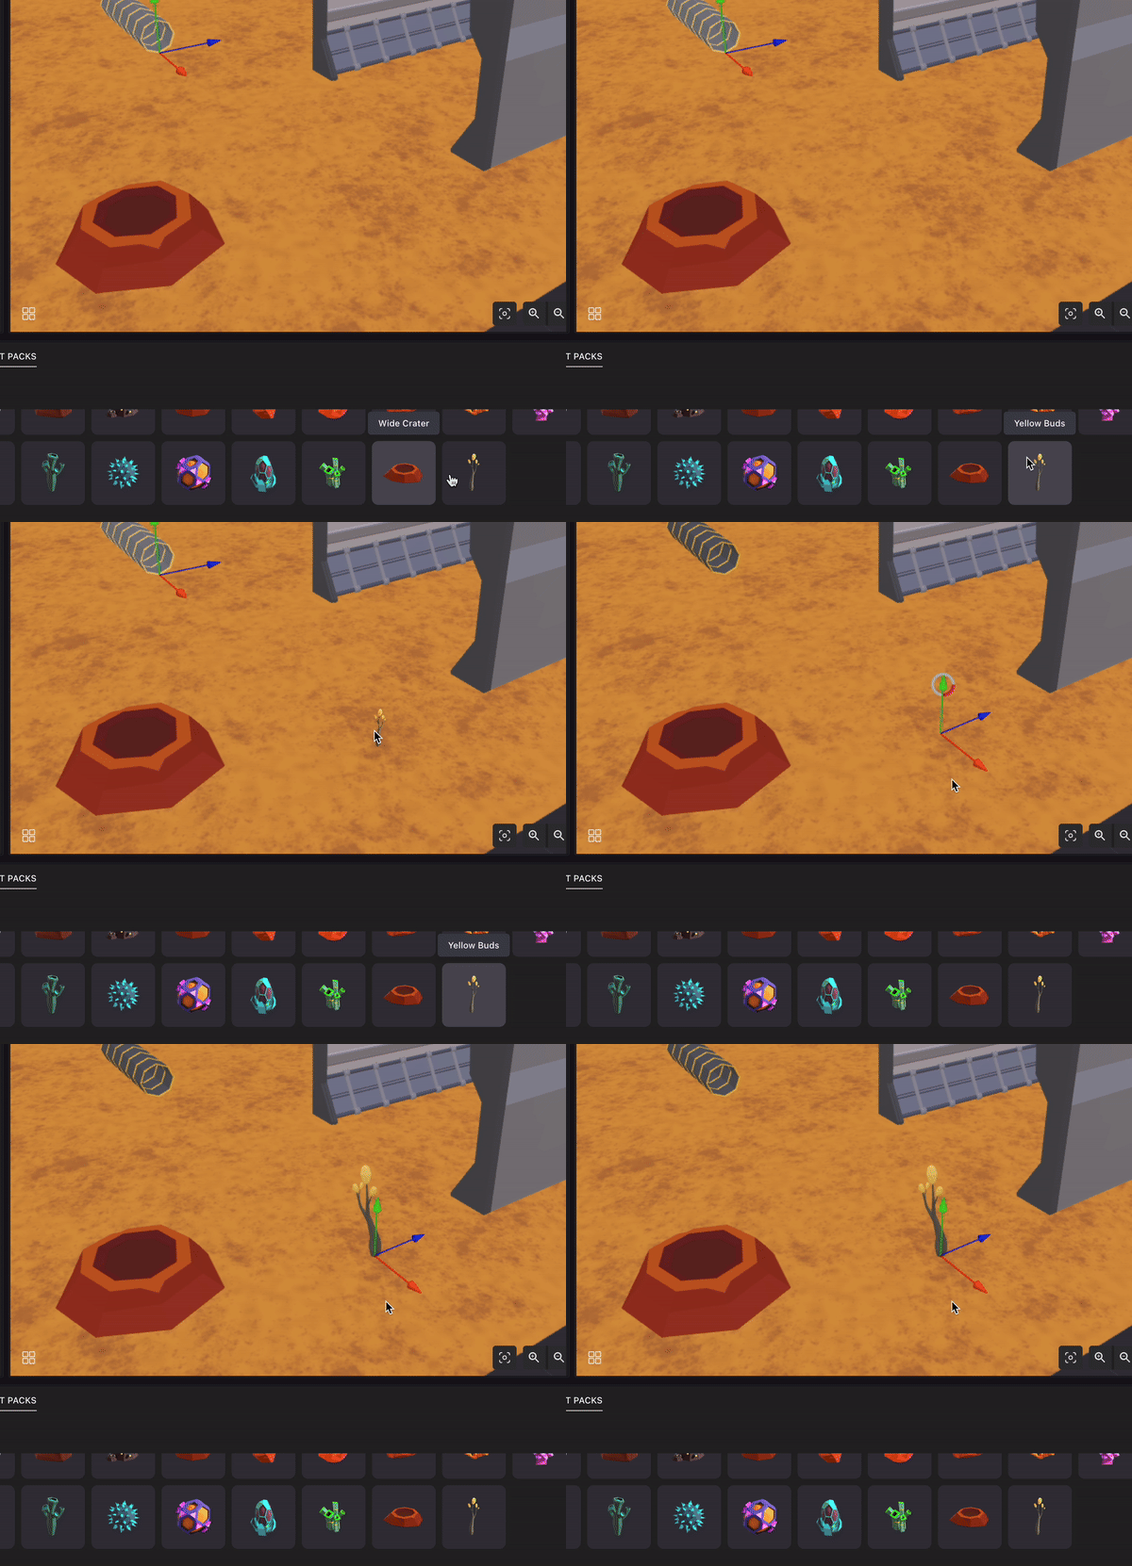
To place an item, click and drag the item to a specific location in the scene. All your changes are saved automatically.
Ground #
Some of the items on the asset packs are of type Ground, these have a paint bucket icon on them. If you drag one of these into your scene, it covers all of your scene’s ground with copies of this item.
You can also add a single copy of the item by holding Shift while you drag the ground onto the scene.
The collection of ground items appear in the entity tree inside a folder. Each one of them is locked, to prevent accidentally selecting. Untoggle the items to move or edit them.
Preview in explorer #
To test your scene and experience it like a player, click the Preview scene button on the top-right corner. This will open a scene preview on a new page, where you can move around the scene and interact with interactive items.
Publish scene #
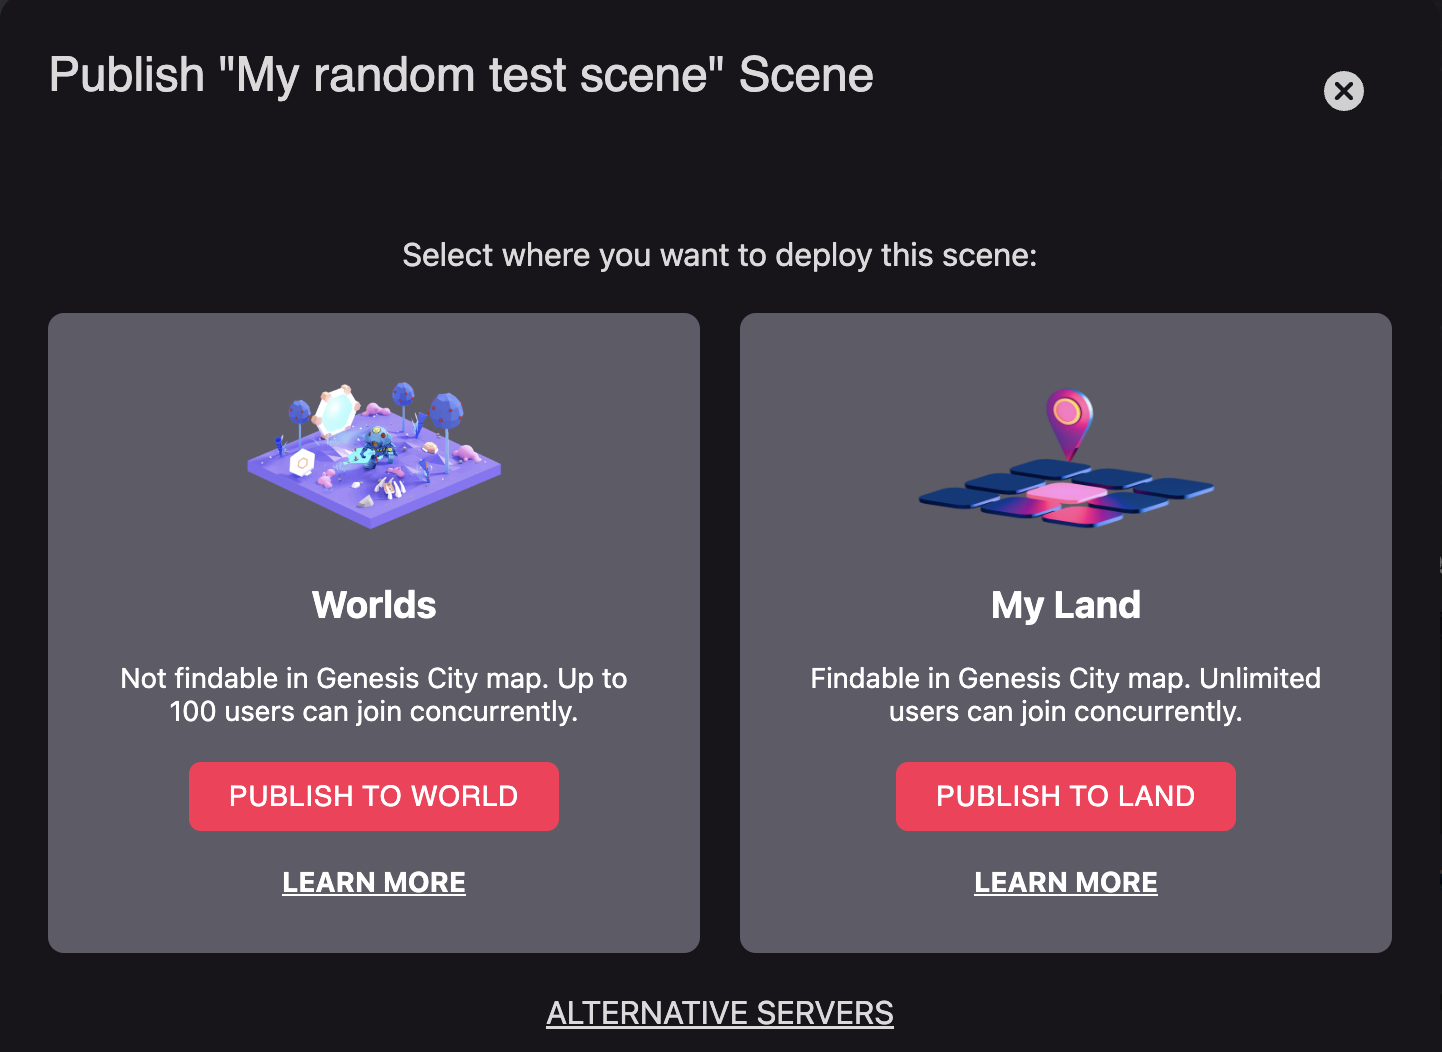
Once you’re happy with the scene, press Publish scene.
-
Select My world to make your scene available in any of your worlds .
-
Select My Land if you own land, or have been given deploy permissions by an owner. Then select the parcels where you want it deployed on the map. Parcels where you are allowed to deploy are shown in pink.
Download scene #
While editing a scene, press the download scene icon to download the contents of the scene as a .zip file. In the scene selector screen, you can also press the three dots icon and select Download scene.
You can then share this scene with another Builder user, or edit the scene with more freedom by using the Decentraland SDK.
Upload scene #
In the scene selector screen, press Upload scene, then drag one or several .zip files from exported Builder scenes and press Upload.
If a scene is too large to upload, try this:
- Decompress the scene .zip file.
- Look for the builder.json inside the uncompressed folder. Compress that single file into a new .zip file.
- Upload this new .zip file.
📔 Note: You can only upload scenes that have been built with the Builder. You can’t upload a scene that was built with the SDK or modified with it.
Scene limitations #
Decentraland scenes need to follow certain limitations, to be able to run them one next to another. There is a maximum number of materials, textures, triangles, etc, that is proportional to the number of parcels in the scene. See scene limitations for more details.
If the content in your scene exceeds any of these limits, the web editor will notify this on the bottom-left corner.
You can expand this menu to view details.
💡 Tip: If you’re building a Decentraland World, you can always add more parcels to increase your limits.
The content in a Decentraland scene must also avoid spilling onto neighbor parcels. If any of the models in your scene extend beyond the limits, the web editor will mark these in red.
Note that these checks don’t look at the visible geometry of the meshes, but rather they look at the bounding boxes of these meshes, as this is more performant. Learn more about Bounding Boxes .
Scene settings #
Click the *Pencil icon** on the top-right of the screen. This opens a series of scene-level properties to edit.
This opens up the scene menu, where you can configure multiple properties including title and thumbnail, scene category and age rating, player spawn locations, and feature toggles. See Scene Metadata .
The entity tree #
On the left margin, you’ll see a tree structure with all of the entities in the scene. This includes all of the items you add, as well as a few default ones.
Instead of selecting an item by clicking on it from the 3D view of the scne, you can select it from the tree view. Click the right-mouse button on an entity to reveal more options: you can rename, delete, or duplicate, also create a child entity, or add a component to the entity.
Entities follow a hierarchy that can have as many levels as you want. Establish a parent-child relationship between two entities by dragging one item onto another on the tree. A child entity inherits the position of the parent, so when the parent moves, it carries any children with it. This can be practical while building a scene, for example you can set glasses and plates as children of a table, and then move the table without needing to readjust anything else. It can also be important when interacting with the scene, for items to move together.
You can also minimize or expand the children of an entity to keep the view simple, this action has no effect on the scene.
Special entities #
The scene includes a couple of special entities that you can see in the entity tree.
- Scene: This refers to the root entity, everything you add in the scene is a child of this entity. You can open it to view scene settings .
- Player: The player’s avatar. You can add special components to this entity that can change gameplay mechanics. You can also drag other entities to be children of the avatar. If an entity is a child of the avatar, its position will be fixed to the player. Use this for example to add a floating marker over the player’s head, that follows the player around.
- Camera: The player’s camera. You can drag other entities to be children of the camera. If an entity is a child of the camera, its position will be fixed on screen. Use this for example to display a gun in a shooter game, that is always in view even if the player points up or down.
Lock or hide items #
You might find it handy to sometimes lock an item, to prevent accidentally selecting and moving it. This is especially useful for background items, like the ground, or a building. To lock an item, look for it on the entity tree on the left, hover over it, and select the lock icon. You can toggle this behavior on and off via that same icon.
You might also want to hide an item that could obstruct your view while placing others. This is especially useful to hide the roof or a building, while working on the interiors. Hidden items are only hidden in the Web Editor window, not to players entering the scene. To hide an item, look for it on the item tree on the left, hover over it, and select the eye icon. You can toggle this behavior on and off via that same icon.
Migrate from SDK6 to SDK7 #
Scenes created with the Builder in SDK6 can be easily migrated to SDK7 using the builder. To do this:
- Select an SDK6 scene from the project list
- Press the Edit scene button
- Select “Use decentraland web editor (SDK7)” option
- Press the Migrate now button. If needed, you can also save a copy of the scene in SDK6.
❗Warning
If the migrated scene contains Smart items , these will be removed from the scene. Smart items are not seamlessly migrated.